|
|
| | 1 | 2 | 3 | 4 | 5 |
| 6 | 7 | 8 | 9 | 10 | 11 | 12 |
| 13 | 14 | 15 | 16 | 17 | 18 | 19 |
| 20 | 21 | 22 | 23 | 24 | 25 | 26 |
| 27 | 28 | |
|
| |
|
|
|
|
|
|
|
|
การสร้าง Webpart บน SharePoint Server 2007
1. เพิ่ม หรือแก้ไข web.config ของเว็บที่จะทำการติดตั้ง
* trus level Full เพื่อทดสอบ หากใช้งานจริงควร Deploy ลง GAC และกำหนด level ให้เหมาะสม เช่น
level =”WSS_Minimal”
2. สร้าง Project ASP.NET Server Control และเขียนโค๊ด
3. กำหนด Output Project File เมื่อทำการ Build ให้ไป Deploy ที่โฟลเดอร์ Bin ของเว็บ SharePoint WebSite ที่จะทำการรัน ทำการทดสอบ Build
4. จากนั้นให้ไปกำหนดชื่อ namespace และ assembly ที่ไฟล์ web.config ของเว็บ
Ex .
5. เมื่อทำการแก้ไข web.config และ build Project เรียบร้อยแล้ว ให้ไปที่ เว็บที่เราทำการติดตั้ง webpart จากนั้นไปที่ เมนู Setting > Site setting > Modifies all site settings > Web Parts
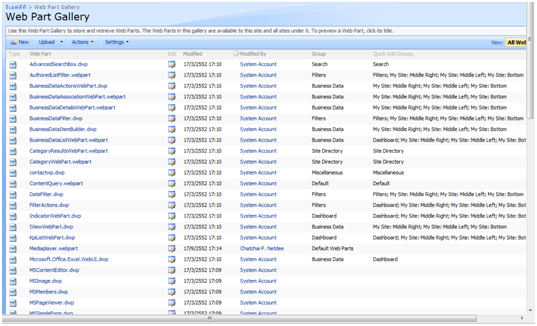
จากนั้นคลิ๊กที่ปุ่ม New ใน Web part Type Name ให้เลือก ชื่อ Web part ที่เราทำการ Deploy ไป จากนั้นคลิ๊กที่เมนู Populate Gallery จากนั้นจะปรากฏรายการ Web Part ที่เรา Populate ไปเมื่อครูให้เราไปทำการแก้ไข Document Property ตามที่เราต้องการ
Production Deployment
Web Part dll ไฟล์ควรจะถูกทำให้เป็น strongly named โดยใช้ชื่อที่ไม่ซ้ำกันแม้จะมี dll หลายเวอร์ชั่น โดยสามารถทำงานร่วมกันได้โดยไม่ต้องแก้ไขไฟล์ DLL
Web Part dll ควรจะถูกเก็บไว้ที่ GAC หรือถูกกำหนด Security Policy
Web Part ควรถูกทำให้อยู่ในรูปแบบ Package หรือเป็นส่วนหนึ่งของ solution เพื่อที่อนาคตสามารถที่จะพัฒนาไปสู่การพัฒนาแบบ Feature ได้
Web Part
Code Security - Permission
ASP.NET มี Set ของ Permission อาทิ เช่น
- IsolatedStorageFilePermission
- messageQueuePermission
- OdbcPermission
SharePoint ได้เพิ่มเติมสิทธิเหล่านี้เข้ามา
SharePoint Permission: ควบคุมความถูกต้องในการเข้าถูกทรัพยากรโดย Windows SharePoint Services อาทิเช่น object model
WebPart Permission: ควบคุมความถูกต้องในการเข้าถึงทรัพยากรของ WebPart อาทิเช่น connections
Code Security – Trust Levels
ASP.NET ได้กำหนด Trust levels ได้ดังนี้
Full, High, Medium, Low, Minimal
SharePoint เพิ่มส่วนกำหนดสิทธิ์ของ Web Part ดังนี้
WSS_Minimal: เป็นค่าพื้นฐานของทุก Wss Virtual directory โดย wss_minimal ไม่ได้ให้สิทธิ์ลงไปในส่วน code เมื่อทำการติดตั้ง WebPart
ค่าที่ถูก กำหนดไว้ใน virtual directory/web.config ไฟล์ของ sharepoint site
การกำหนดค่าระดับ Trust Levels ถูกเก็บไว้ที่ wss_minimaltrus.config และ wss_mediumtrus.config
ซึ่งอยู่ที่ local drive :Program FilesCommon FilesMicrosoft Sharedweb server extension12config
วิธีการที่กำหนดสิทธิ์ให้กับ Assemblies มีดังนี้
1. เปลี่ยน trust level ให้เป็น Full
2. ติดตั้ง assembly ลงไปใน GAC
3. แนะนำ : สร้าง Custom policy ไฟล์ สำหรับ assembly
example โดยสร้างไฟล์ wss_custom.config ไฟล์เก็บไว้ local drive :Program FilesCommon FilesMicrosoft Sharedweb server extension12config
Custom policy file จะกำหนดสิทธิ์ที่จำเป็นให้กับ assembly ที่ถูกระบุ
Enabling Call Stack เพื่อตรวจสอบข้อผิดพลาดของโปรแกรม (Debugging)
WSS ได้ overrides “CallStack” attribute ซึ่งเมื่อใดก็ตามที่เกิด ความผิดพลาดทีเกี่ยวข้องกับระบบเกิดขึ้นจะทำให้ไม่แสดงรายละเอียดของข้อผิดพลาดขึ้นมา
การทำการ Enable CallStack attribute นั้น ให้ไปที่
ให้เปลี่ยนค่า CallStack=”True”
Event Handlers (การตรวจจับเหตุการณ์)
นักพัฒนาสามารถที่จะใช้งาน even handlers เพื่อที่จะทำการ execute custom code ก่อน หรือหลัง เหตุการณ์ที่เกิดขึ้นภายใน site collections, sites, lists หรือ list items
ก่อน = synchronous
หลัง = asynchronous
การตรวจจับเหตุการณ์ที่เกิดขึ้น (Impersonation in event handlers)
- ตัวจัดการเหตุการณ์ที่รันในบริบทของผู้ใช้ปัจจุบัน
- ใช้ System.Security.Principal.WindowsIdentity เพื่อตรวจสอบ
- การกระทำบางอย่างจะต้องปลอมตัว
Event handlers ต้องสืบทอดมาจากคลาสที่เหมาะสมและ เลือกติดตั้งใน Methods ที่จะทำการดักจับเหตุการณ์อย่างถูกต้องโดยมีรายละเอียดดังนี้
SPWebEventReceiver : ใช้สำหรับการดักจับเหตุการณ์ใน site และ site collection
SPListEventReceiver : ใช้สำหรับรูปแบบข้อมูลที่มีโครงสร้างแบบ list
SPItemEventReceiver : ใช้สำหรับ การดักจับเหตุการณ์ใน list item
SPWebEventReceiver
SiteDeleted :จะปรากฎหลังจาก site collection ถูกลบ
SiteDeleting: จะปรากฎเมื่อ site collection กำลังทำการลบ
WebDeleted : เหตุการณ์นี้จะเกิดขึ้นหลังจาก ทำการลบเว็บไซด์ ซึ่งเว็บไซด์นั้นได้ถูกลบออกจากระบบไปเรียบร้อยแล้ว
WebDeleting : เหตุการณ์นี้จะเกิดก่อนที่จะเริ่มต้นกระบวนการ ลบเว็บไซด์ที่มีอยู่ในระบบ
WebMoved :เหตุการณ์นี้จะเกิดขึ้นหลังจาก ทำการย้ายเว็บไซด์ซึ่งเว็บไซด์นั้นได้ถูกย้ายเรียบร้อยแล้ว
WebMoving : เหตุการณ์นี้จะเกิดขึ้นก่อนที่จะทำการเปลี่ยนชื่อเว็บ หรือ ย้ายไปต่าง Parent object
SPListEventReceiver
FieldAdded : ปรากฎหลังจาก field link ได้ถูกเพิ่ม
FieldAdding : ปรากฏเมื่อ fieldlink เริ่มทำการเพิ่มประเภทข้อมูล
FieldDeleted : ปรากฏหลังจาก Field ได้ถูกลบจาก List
FieldDeleting : ปรากฏเมื่อ Field กำลังถูกลบ
FieldUpdated : ปรากฏหลังจาก field link ได้ทำการ updated เรียบร้อยแล้ว
FieldUpdating : ปรากฏเมื่อ fieldlink กำลังทำการ updated
SPItemEventReceiver : Only asynchronous methods listed
ItemAdded
ItemAttachmentAdded
ItemAttachmentDeleted
ItemCheckIn
ItemCheckedOut
ItemDeleted
ItemFileConverted
ItemFileMoved
ItemUncheckedOut
ItemUpdated
Demo : Simple Event Handler from SDK
1. สร้าง event handler สำหรับ list item
2. Override ItemUpdating() เพื่อที่จะแสดงให้เห็นถึงวิธีการแสดง ข้อความไปยังผู้ใช้งานหลังข้อมูลได้ถูกอัพเดต
3. Override ItemAdded() to demo asynchronous events
4. Create Class Library Project
5. Add Reference to SharePoint
Using Microsoft.SharePoint;
Using System.Security.Principal;
public class ItemHandler : SPItemEventReceiver
{
public override void ItemAdded(SPItemEventProperties properties)
{
SPListItem item = properties.ListItem;
item["Title"] = "I am updating this title from an event handler";
item.Update();
}
public override void ItemUpdating(SPItemEventProperties properties)
{
properties.Cancel = true;
properties.ErrorMessage = "We no longer allow editing of this item";
properties.ErrorMessage += "event handler runs as "
+ WindowsIdentity.GetCurrent().Name;
}
}
6. Sign the assembly Key For Project
Deployment
เมื่อ event handler พร้อมแล้ว ผู้พัฒนาต้องติดตั้ง assembly นั้นลงไปใน GAC
จากนั้นผู้พัฒนาต้อง register event โดยใช้หนึ่งใน 3 วิธีนี้
ใช้ feature สำหรับ list type
ใช้ feature สำหรับ content type
ใช้ object model เพื่อ register ไปยัง SPWeb หรือ SPList EventReceivers
Demo : Deployment
1. Deploy event handler ผ่าน object model
2. Development tips
A : ทุกครั้งที่ทำการเปลี่ยนแปลง ให้ทำการ ลบ และเพิ่ม dll ลงไปใน GAC ใหม่และ Restart IIS
B : The eventsink code should be calling other classes that can be tested separately.
| Create Date : 24 กุมภาพันธ์ 2554 |
| Last Update : 9 พฤศจิกายน 2554 21:42:46 น. |
|
0 comments
|
| Counter : 1127 Pageviews. |
 |
|
|
|
|
|
|


 ฝากข้อความหลังไมค์
 ผู้ติดตามบล็อก : 1 คน [