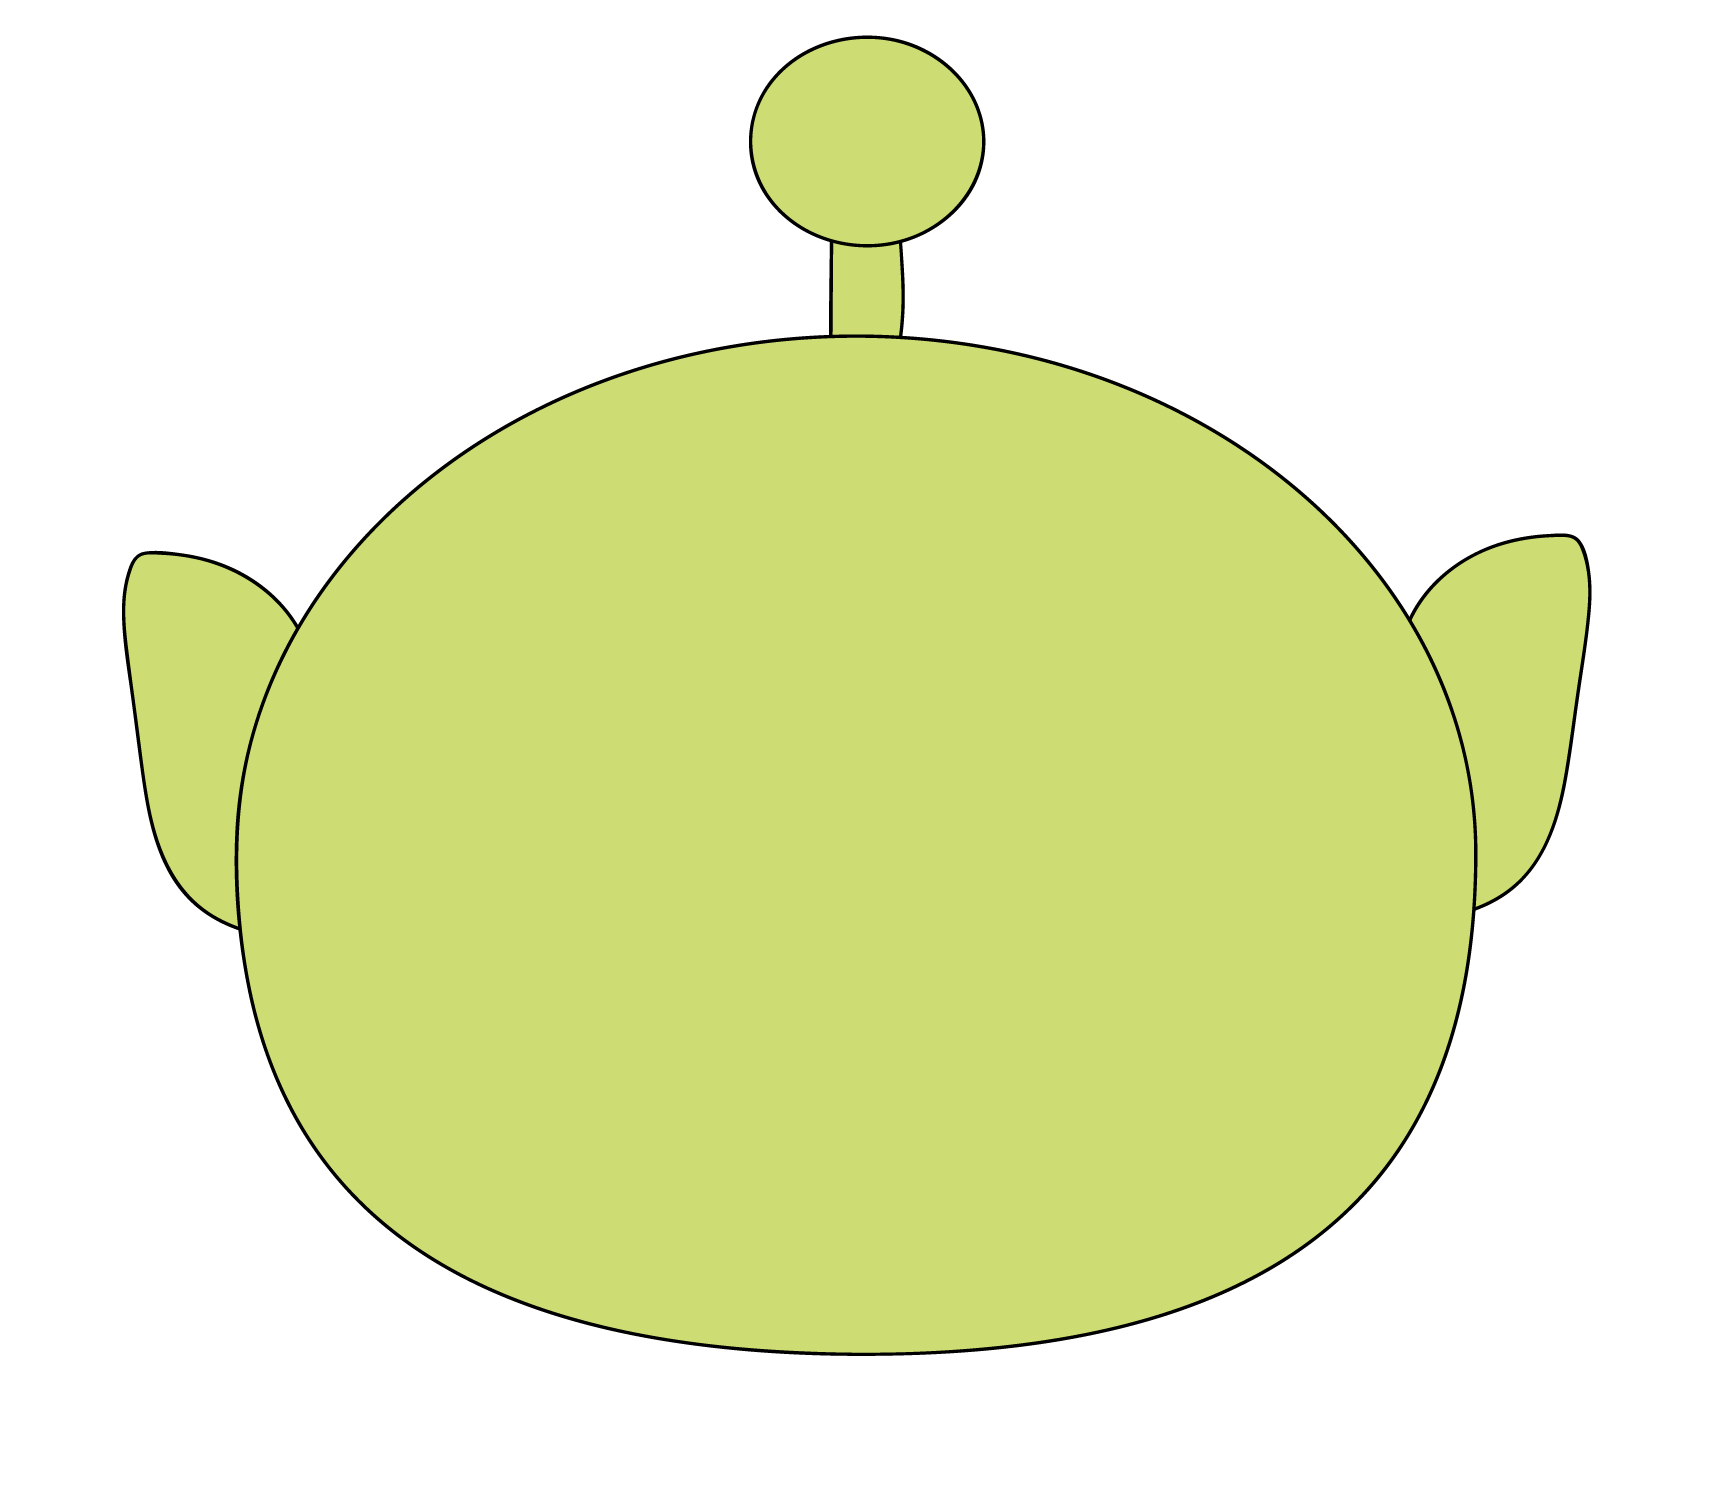
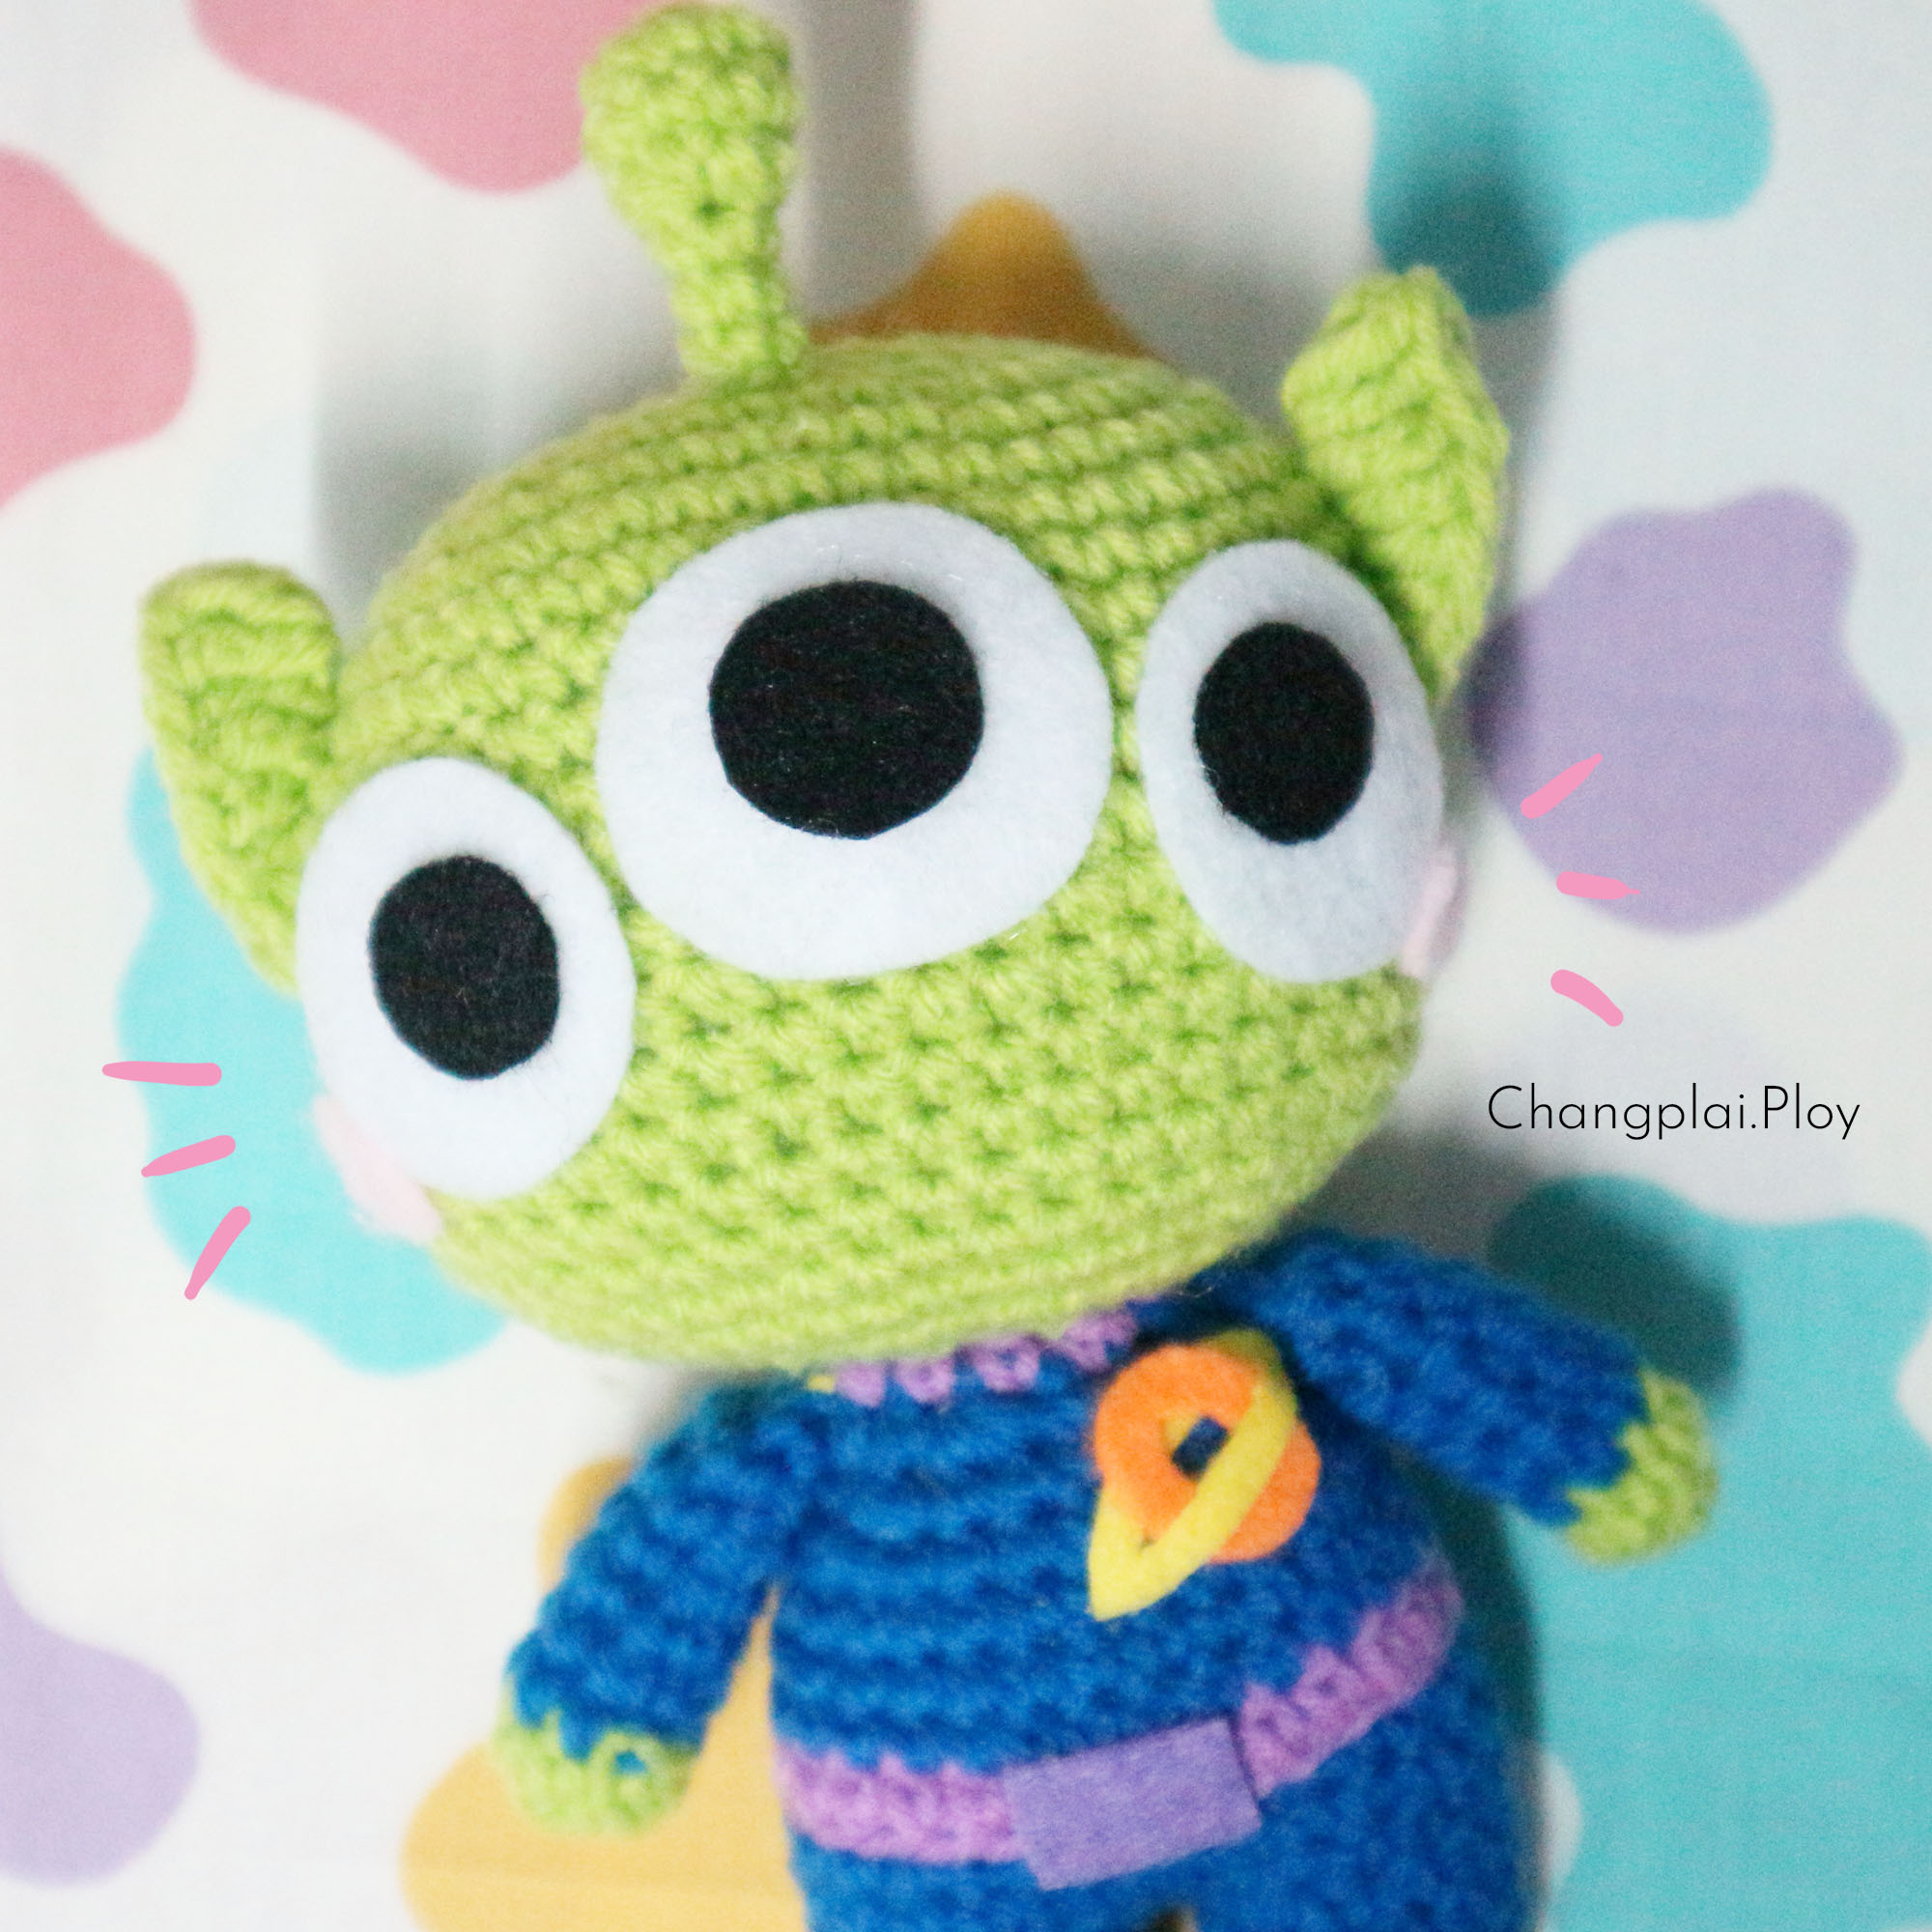
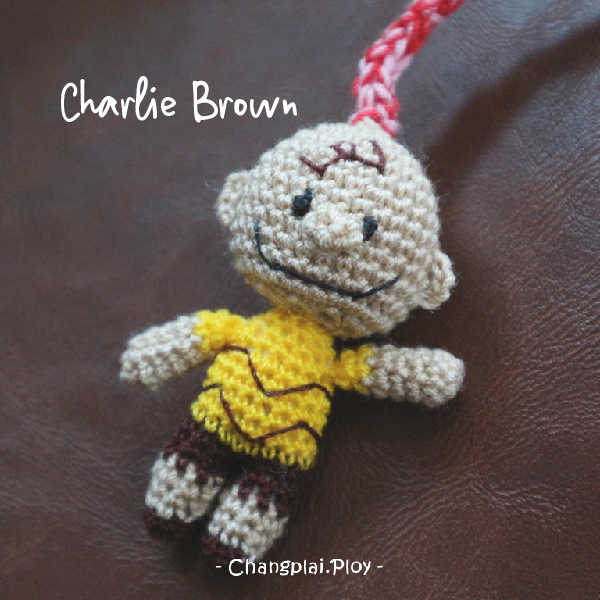
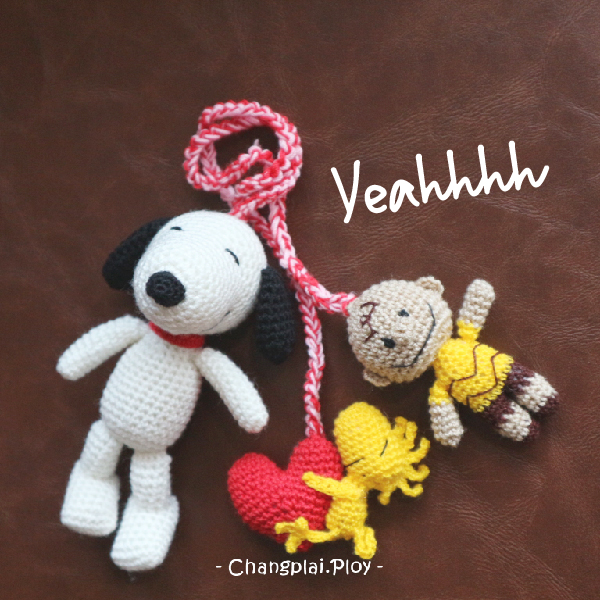
Little Green Man (Alien) Amigurumi Pattern [Crochet-Eng ver.]
A Stranger. From the outside. Ohhhhhhhhhhhhhhh
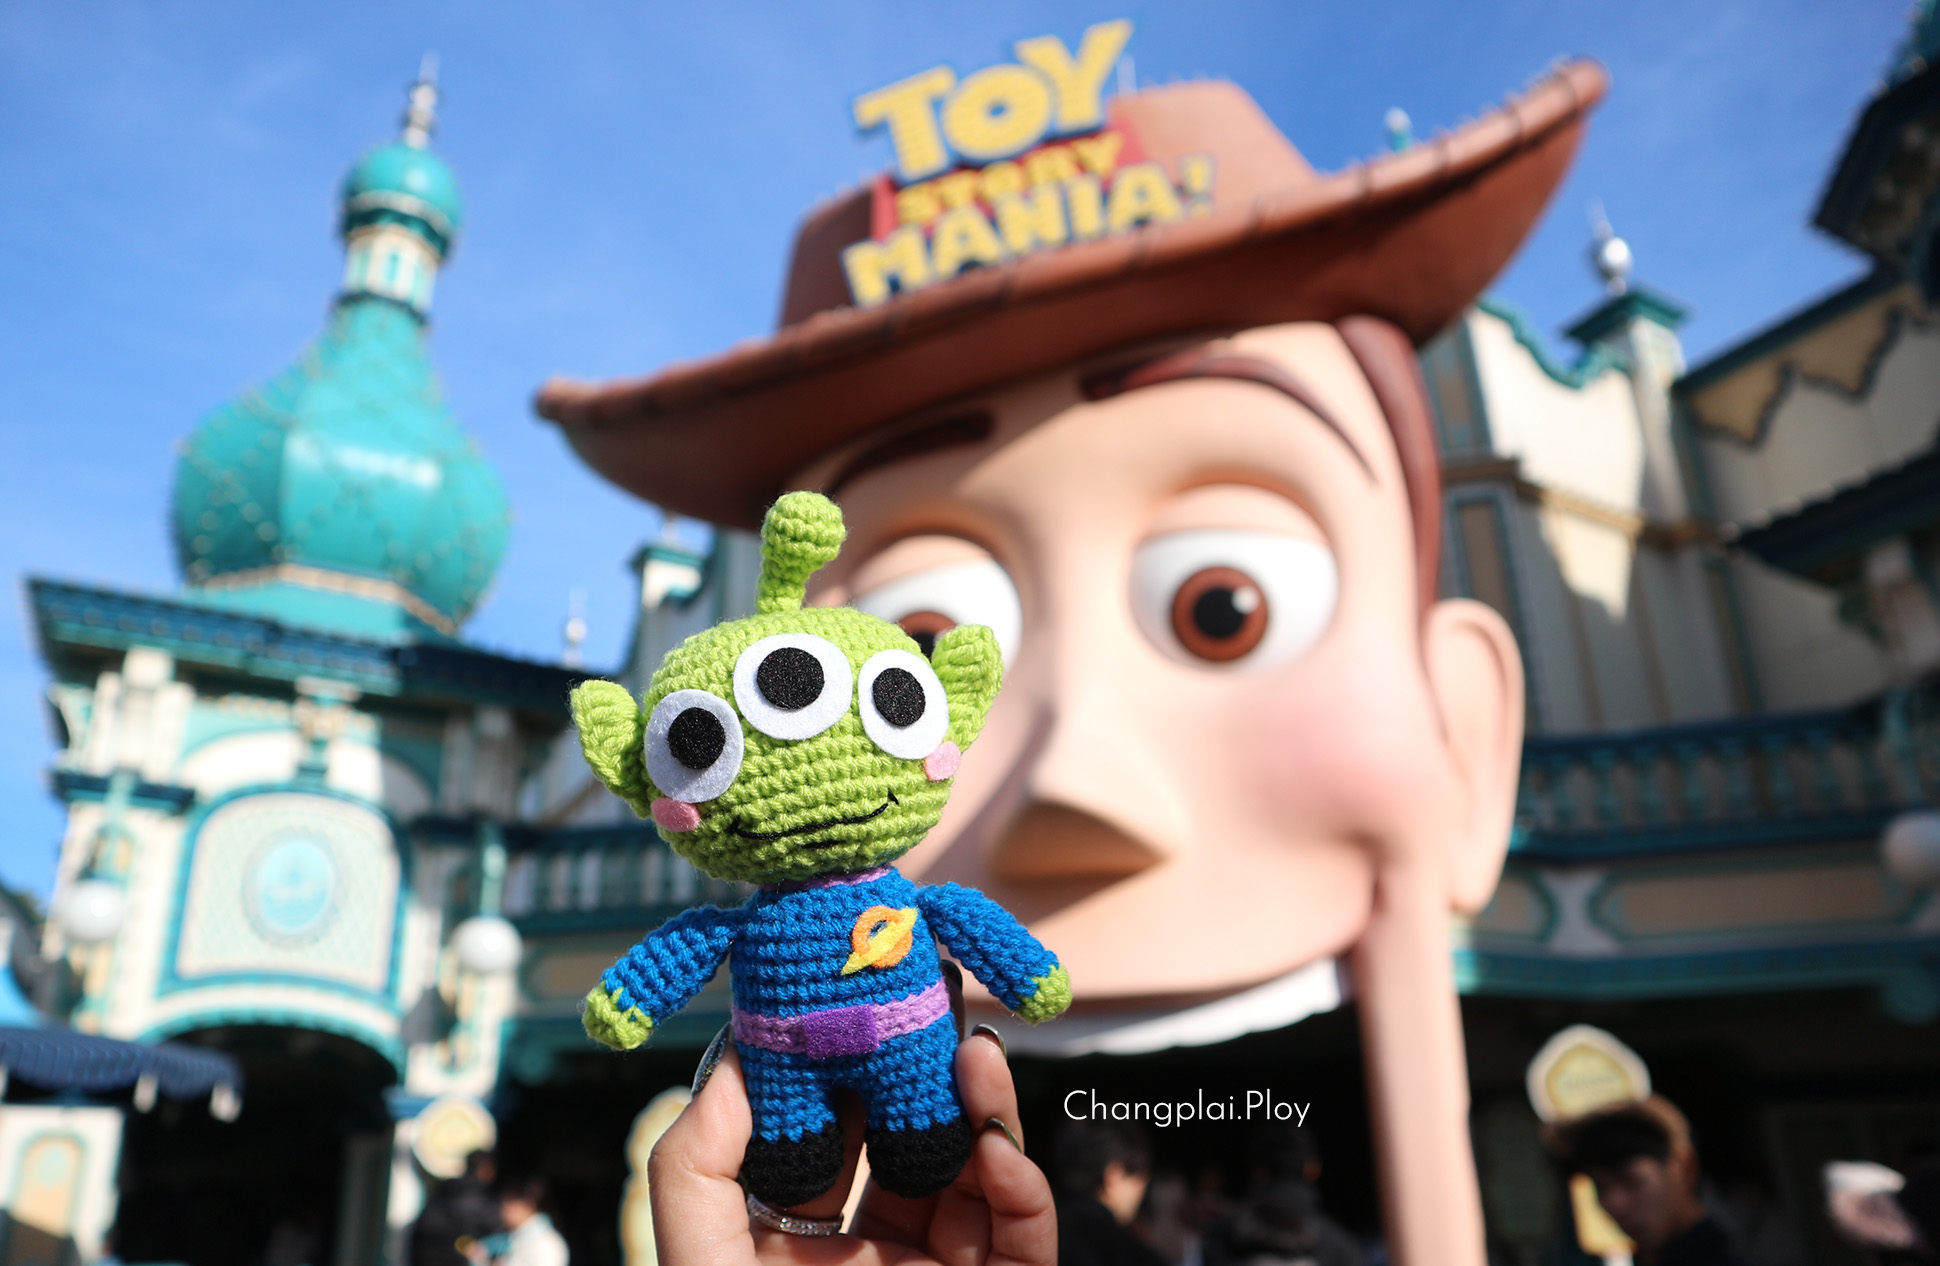
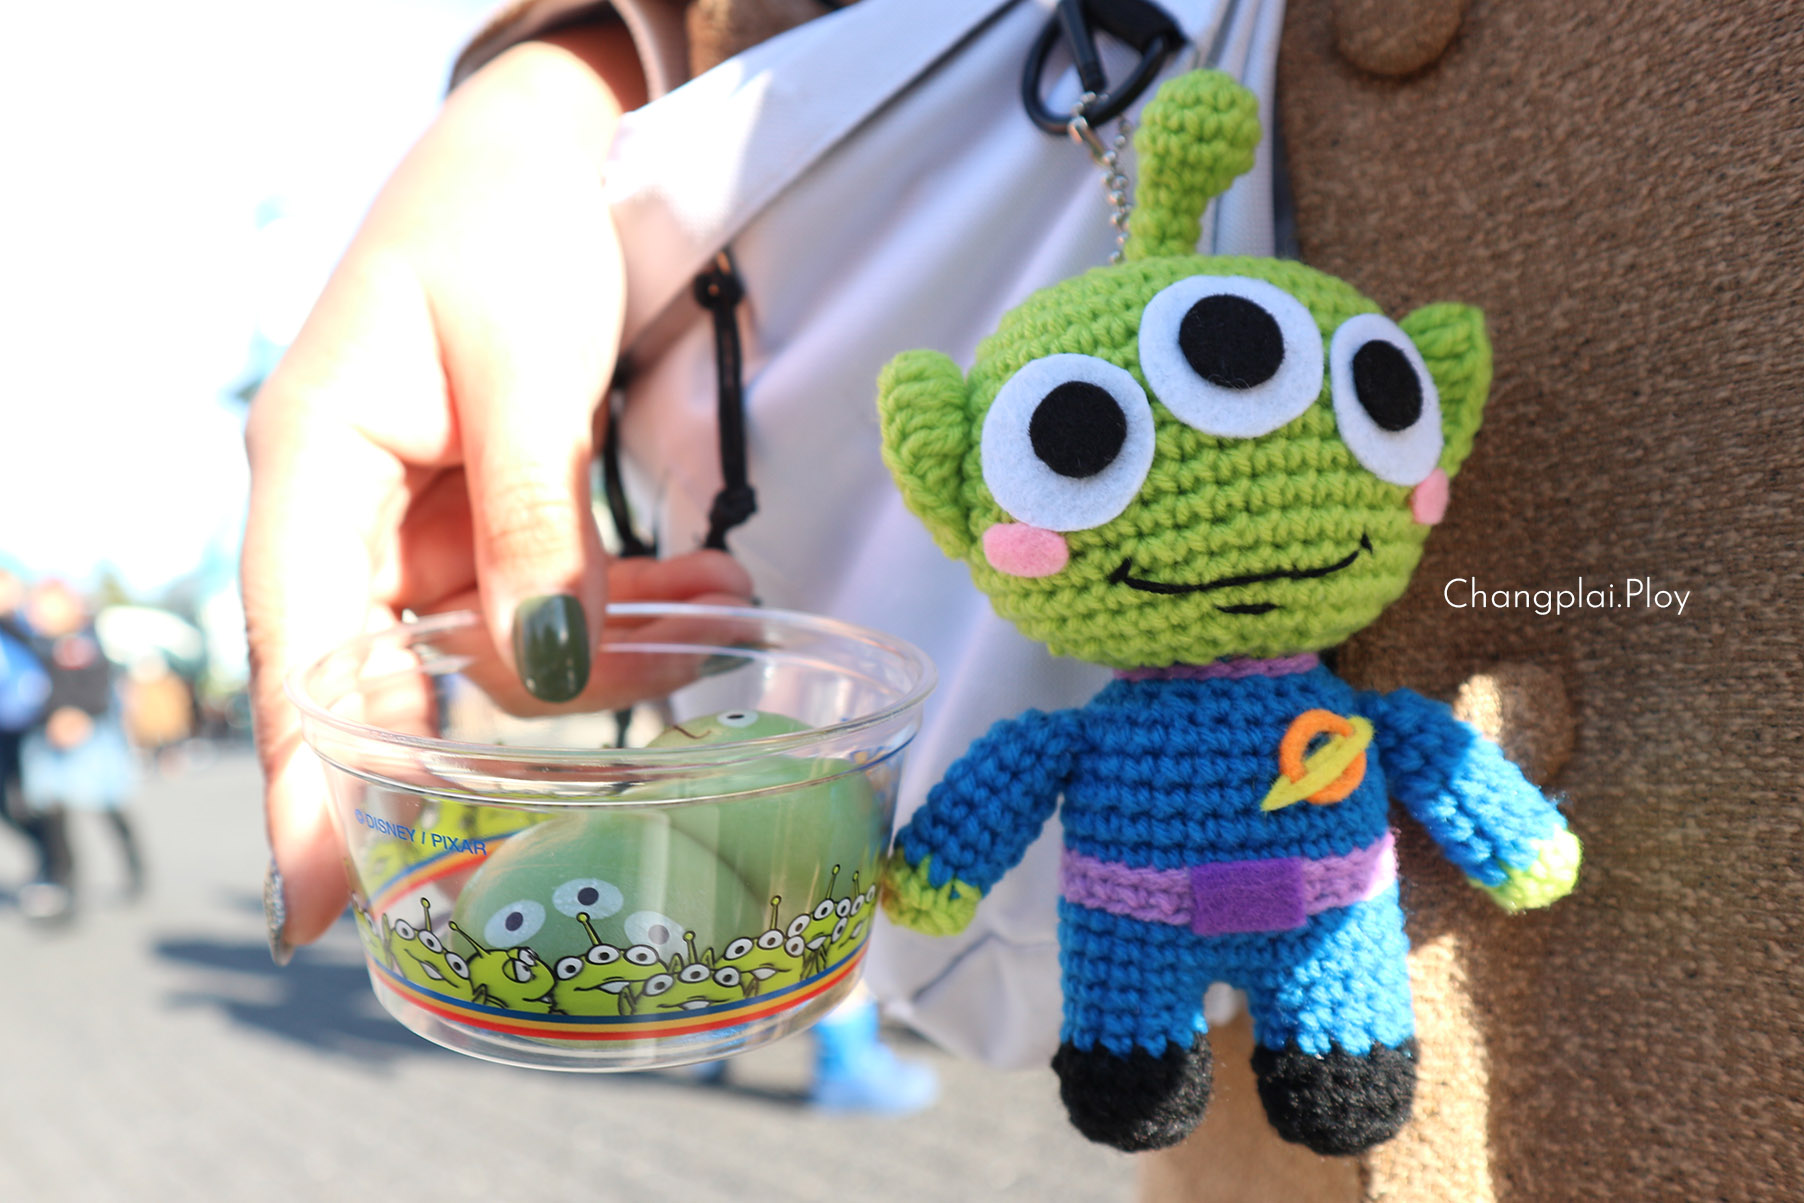
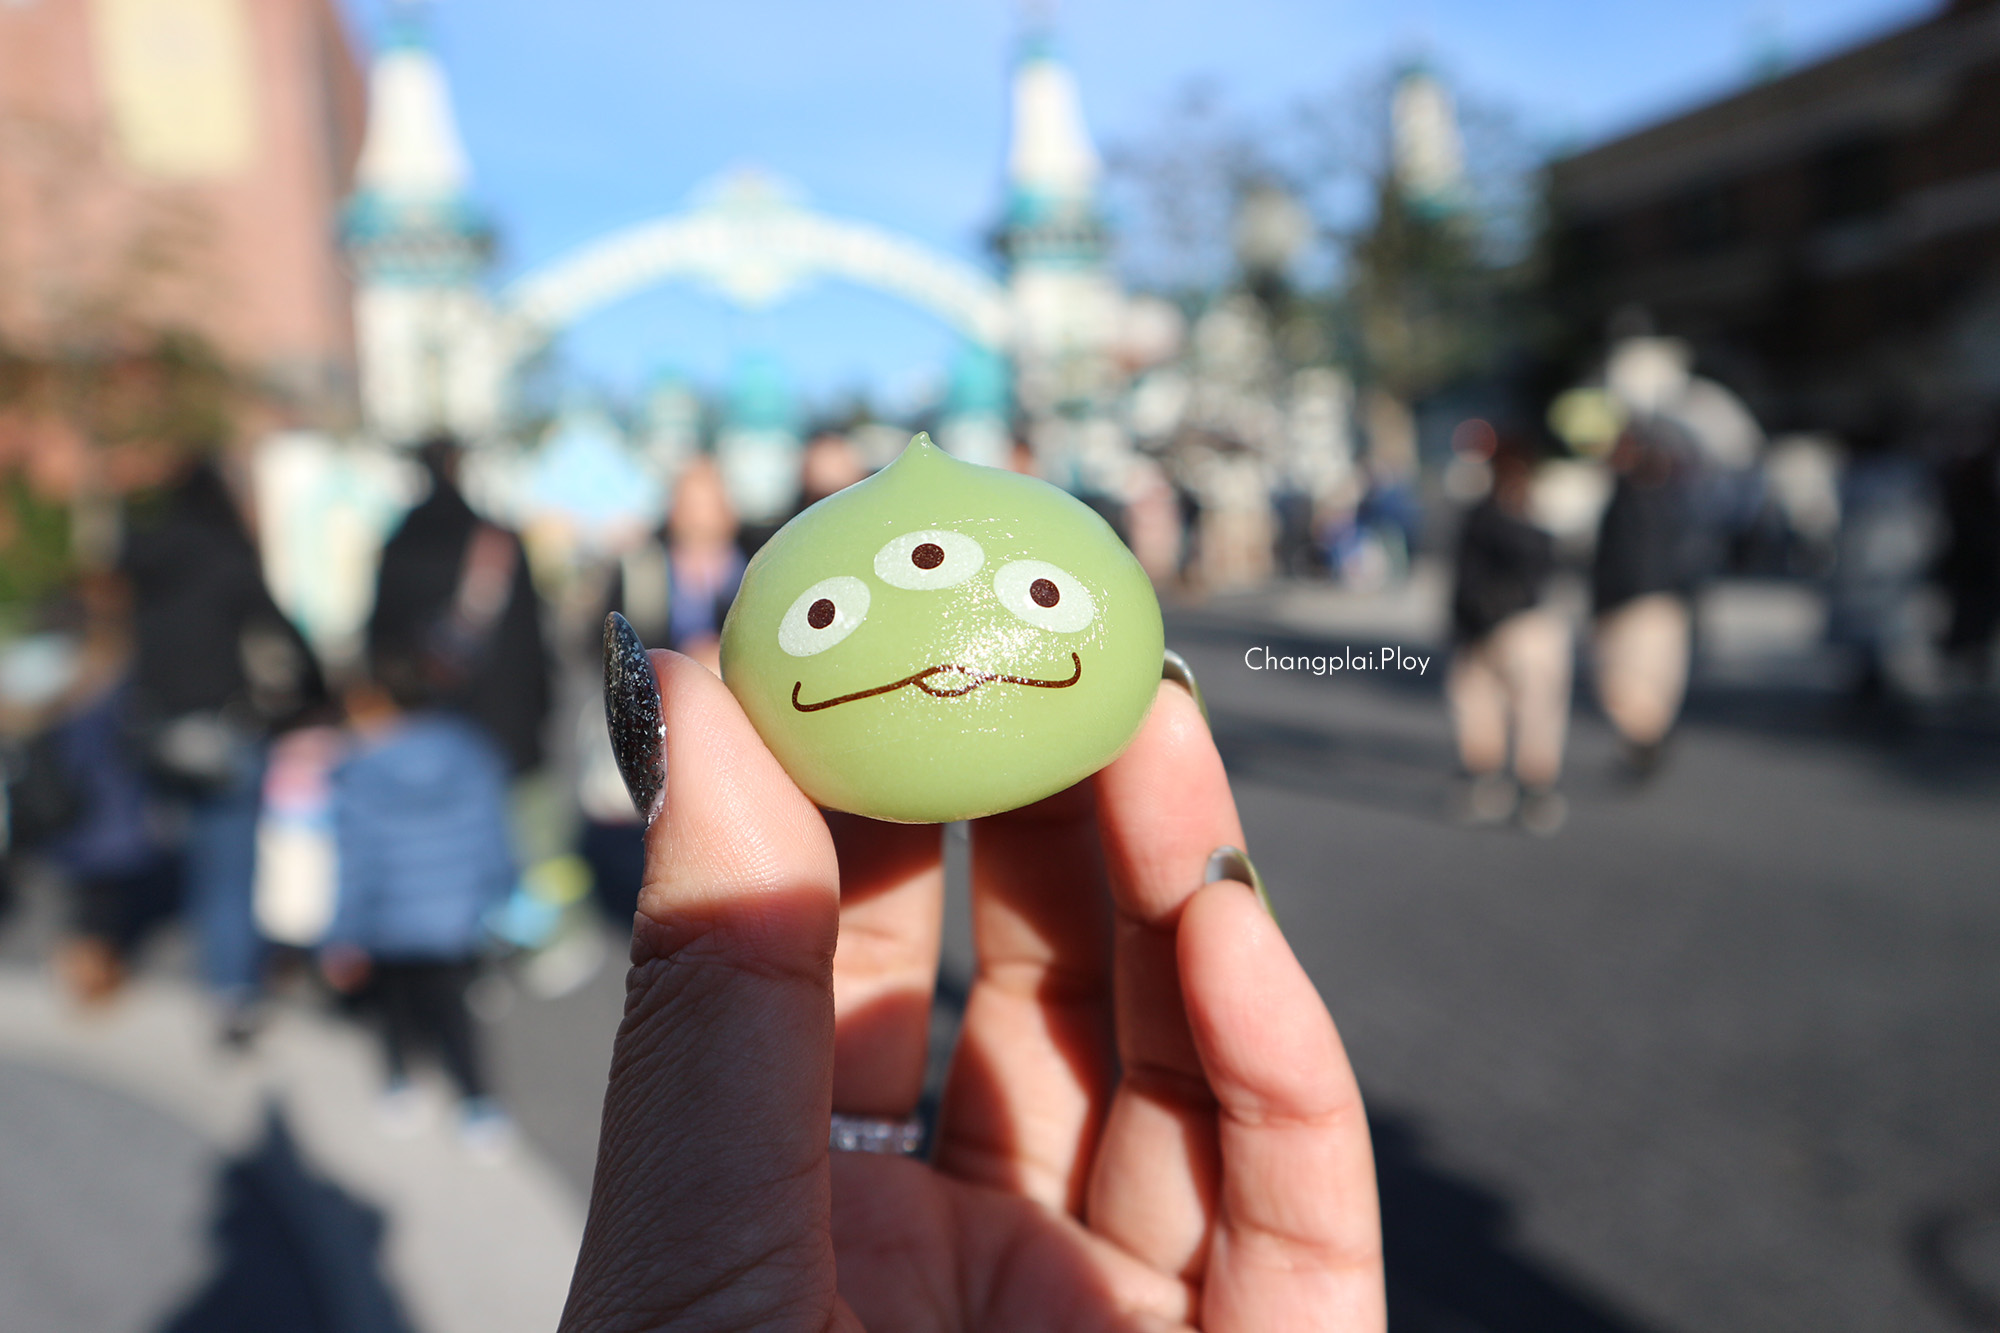
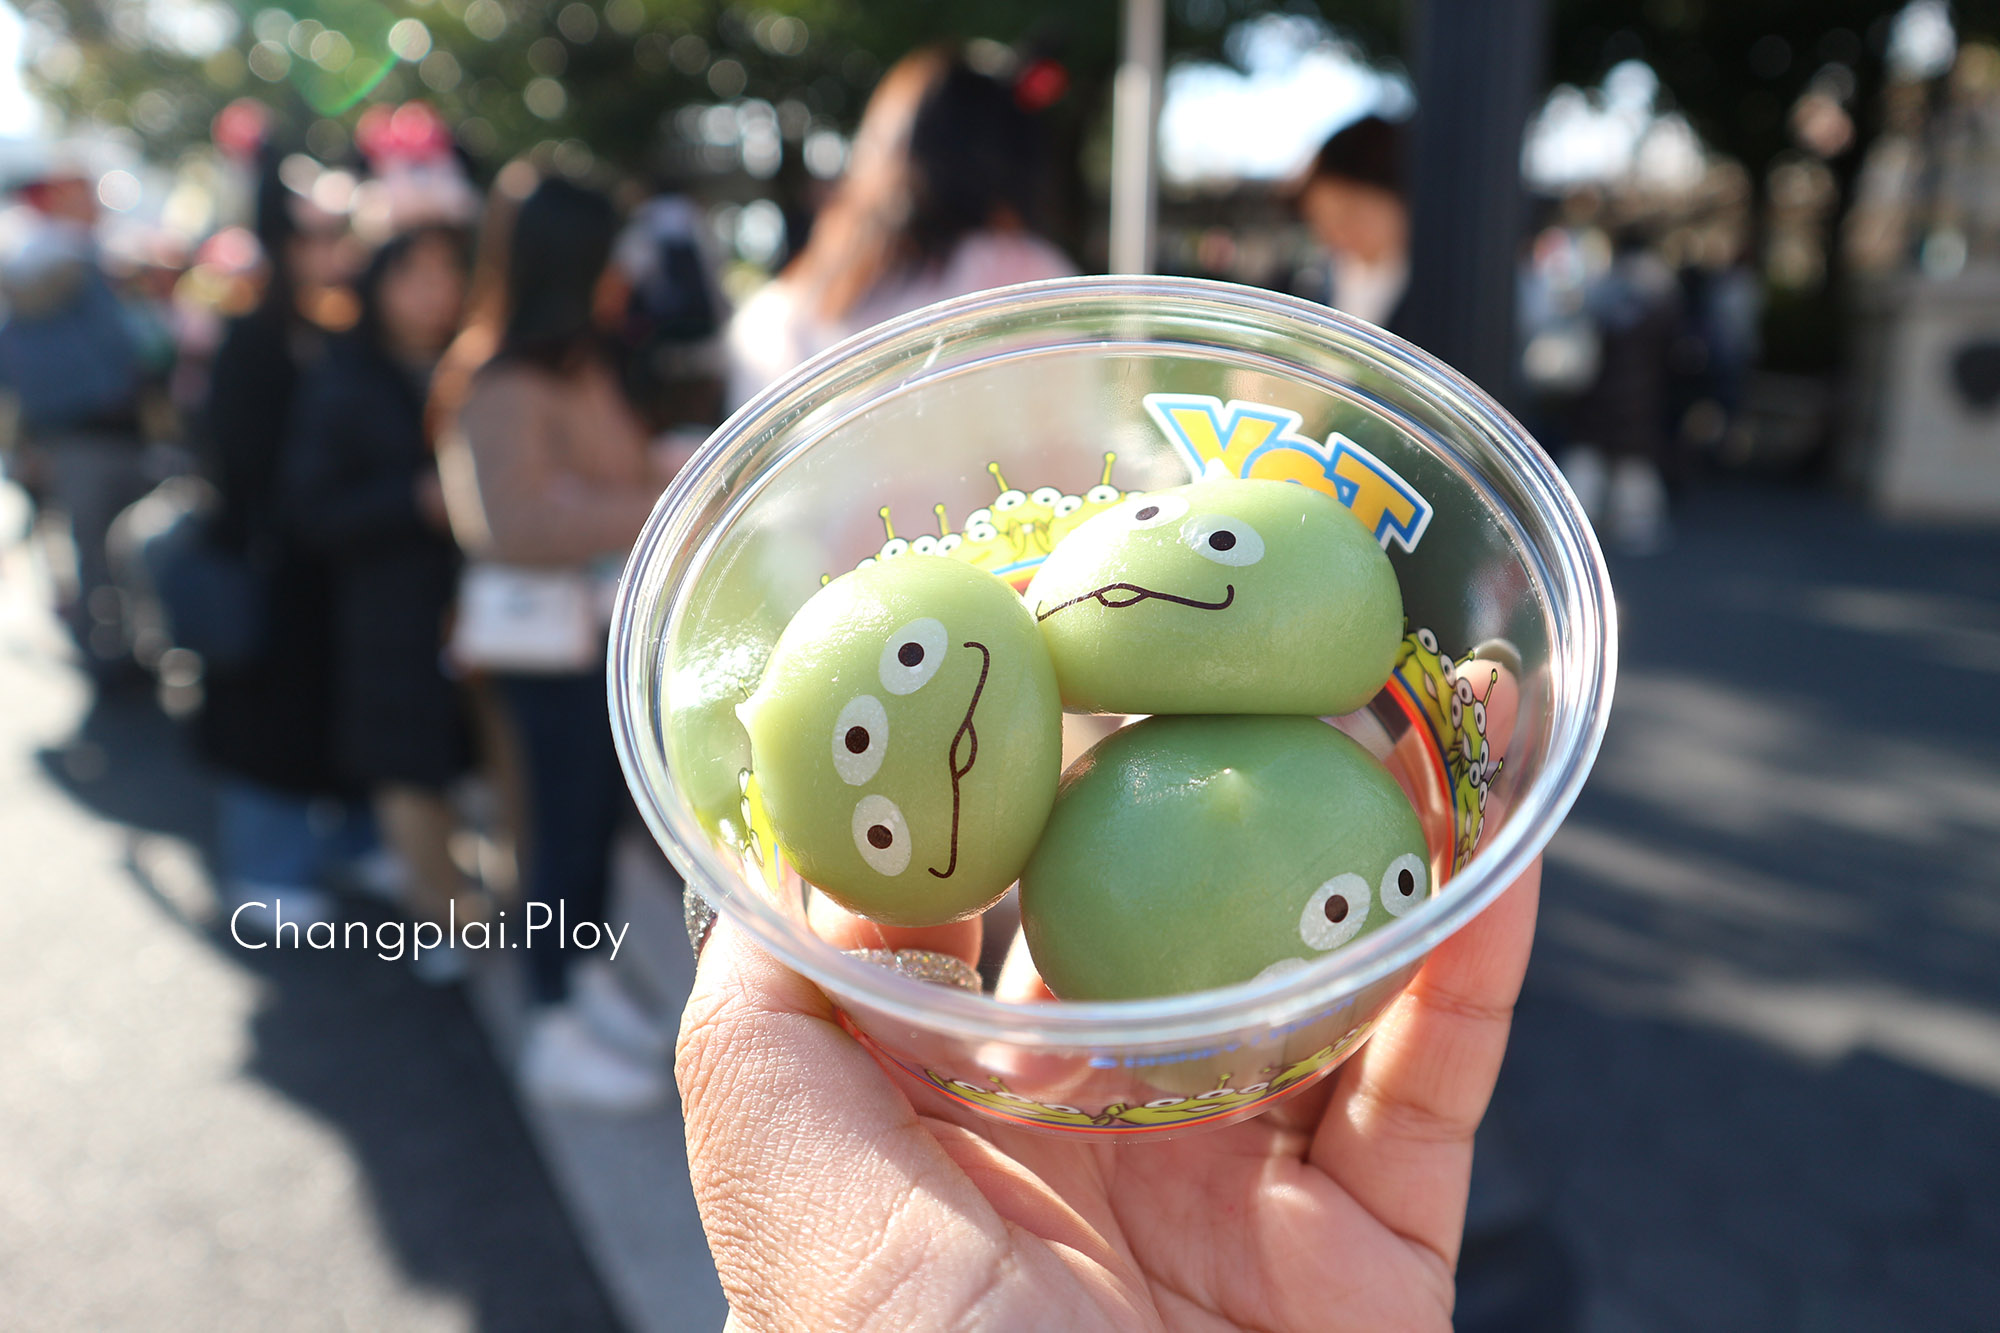
Hi everyone. Welcome to my blog once again. I know I forget to uplode something in 2020. but now I'm back!! with Little Green Man or Alien whatever in January of 2020 I'm going back to japan again in Tokyo Disney Sea at TOY STORY MANIA! and I grab one of the charactor I made is "Alien" to take some photo in front of the attraction too! you guys I'M IN LOVE......
so in this time (this year) I desired to share my pattern to youuuuuuuuu Are you ready? Ok this pattern I made in Japan Style
To Crochet Little Green Man you’ll need:
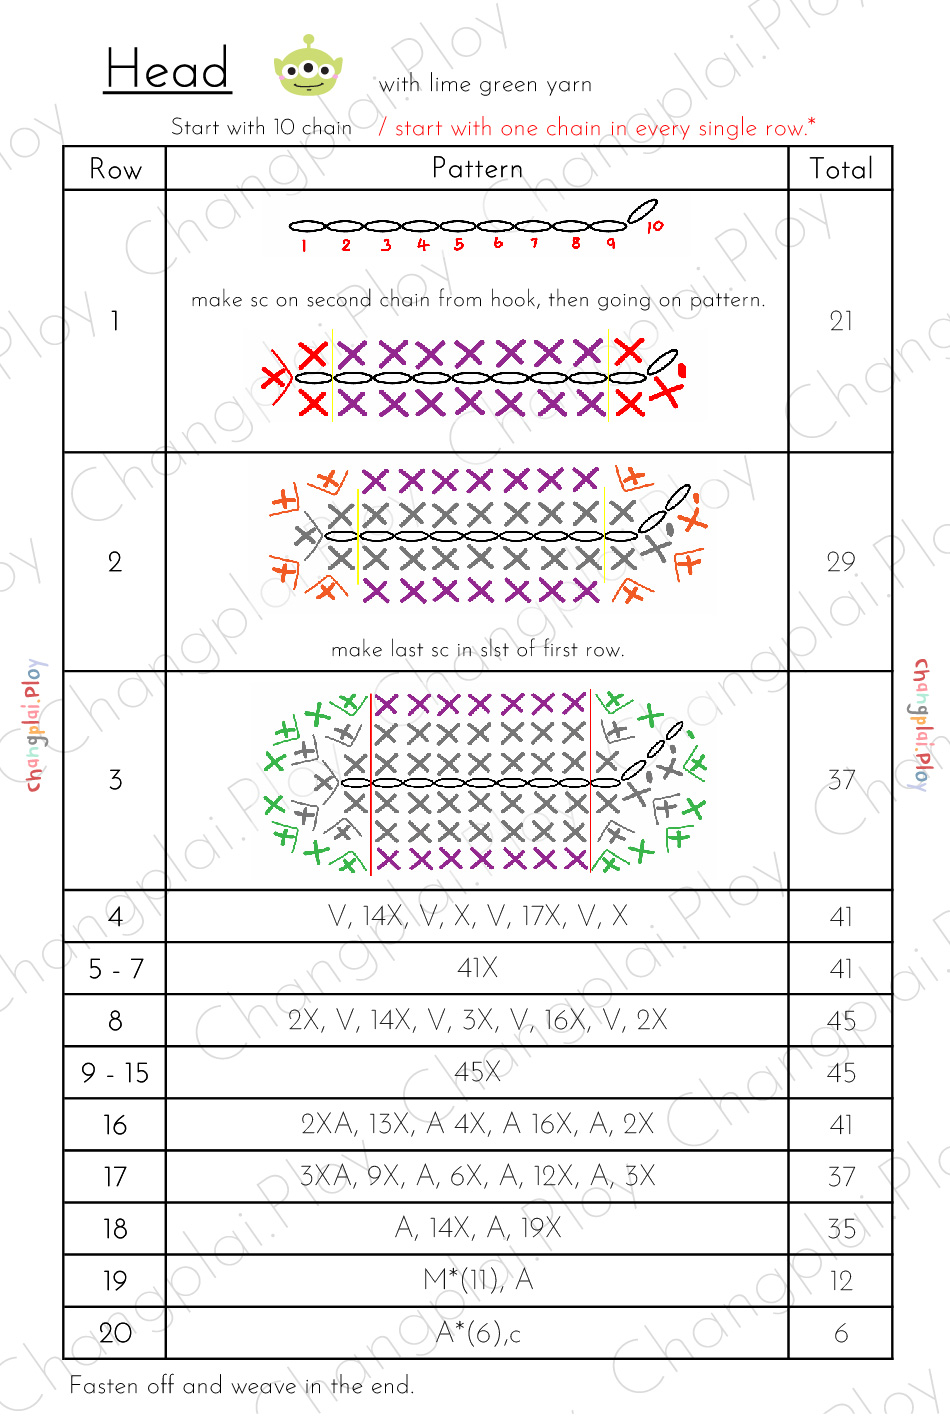
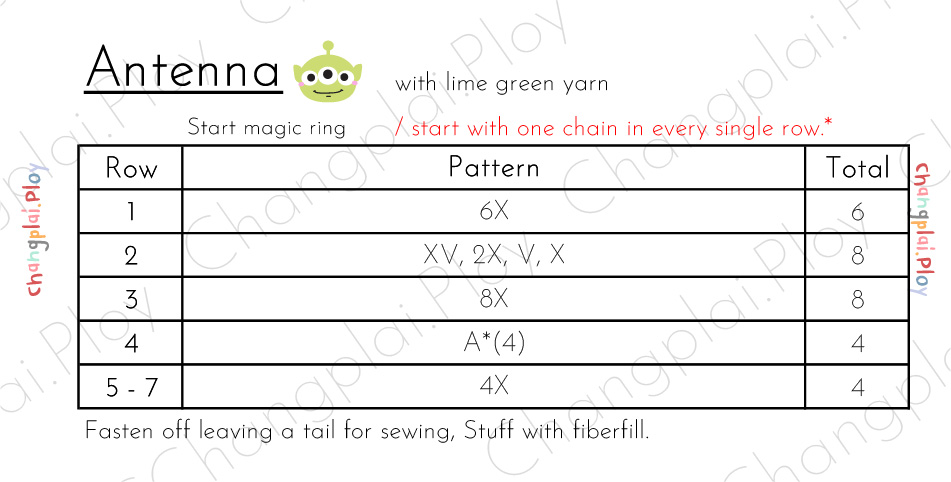
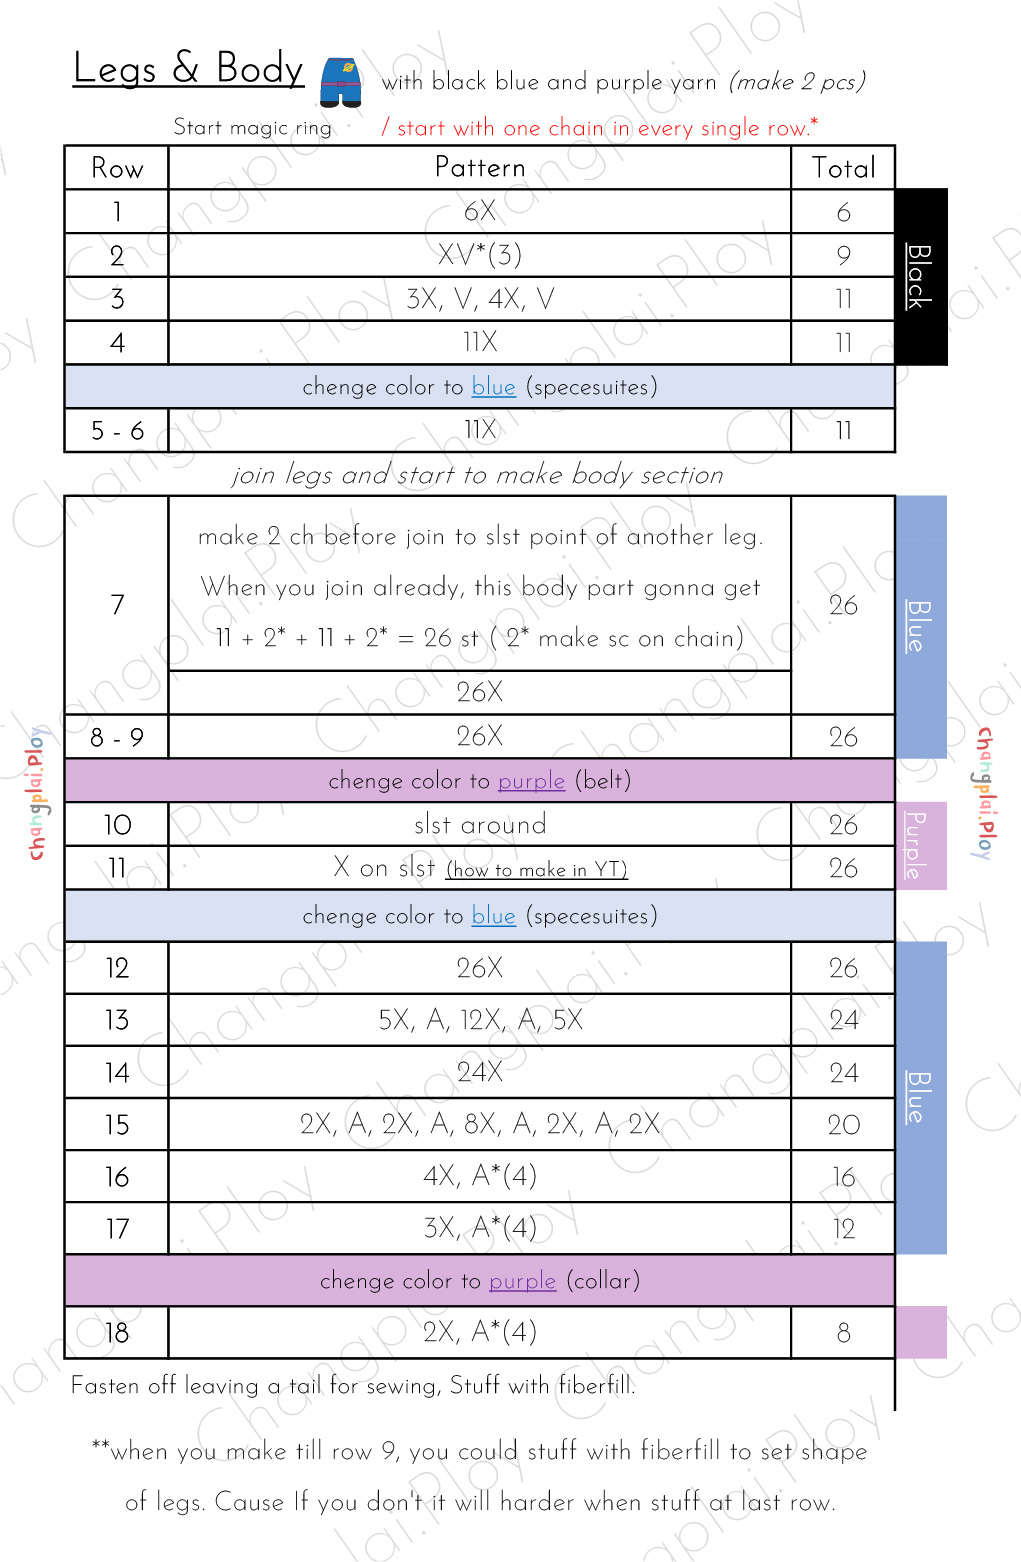
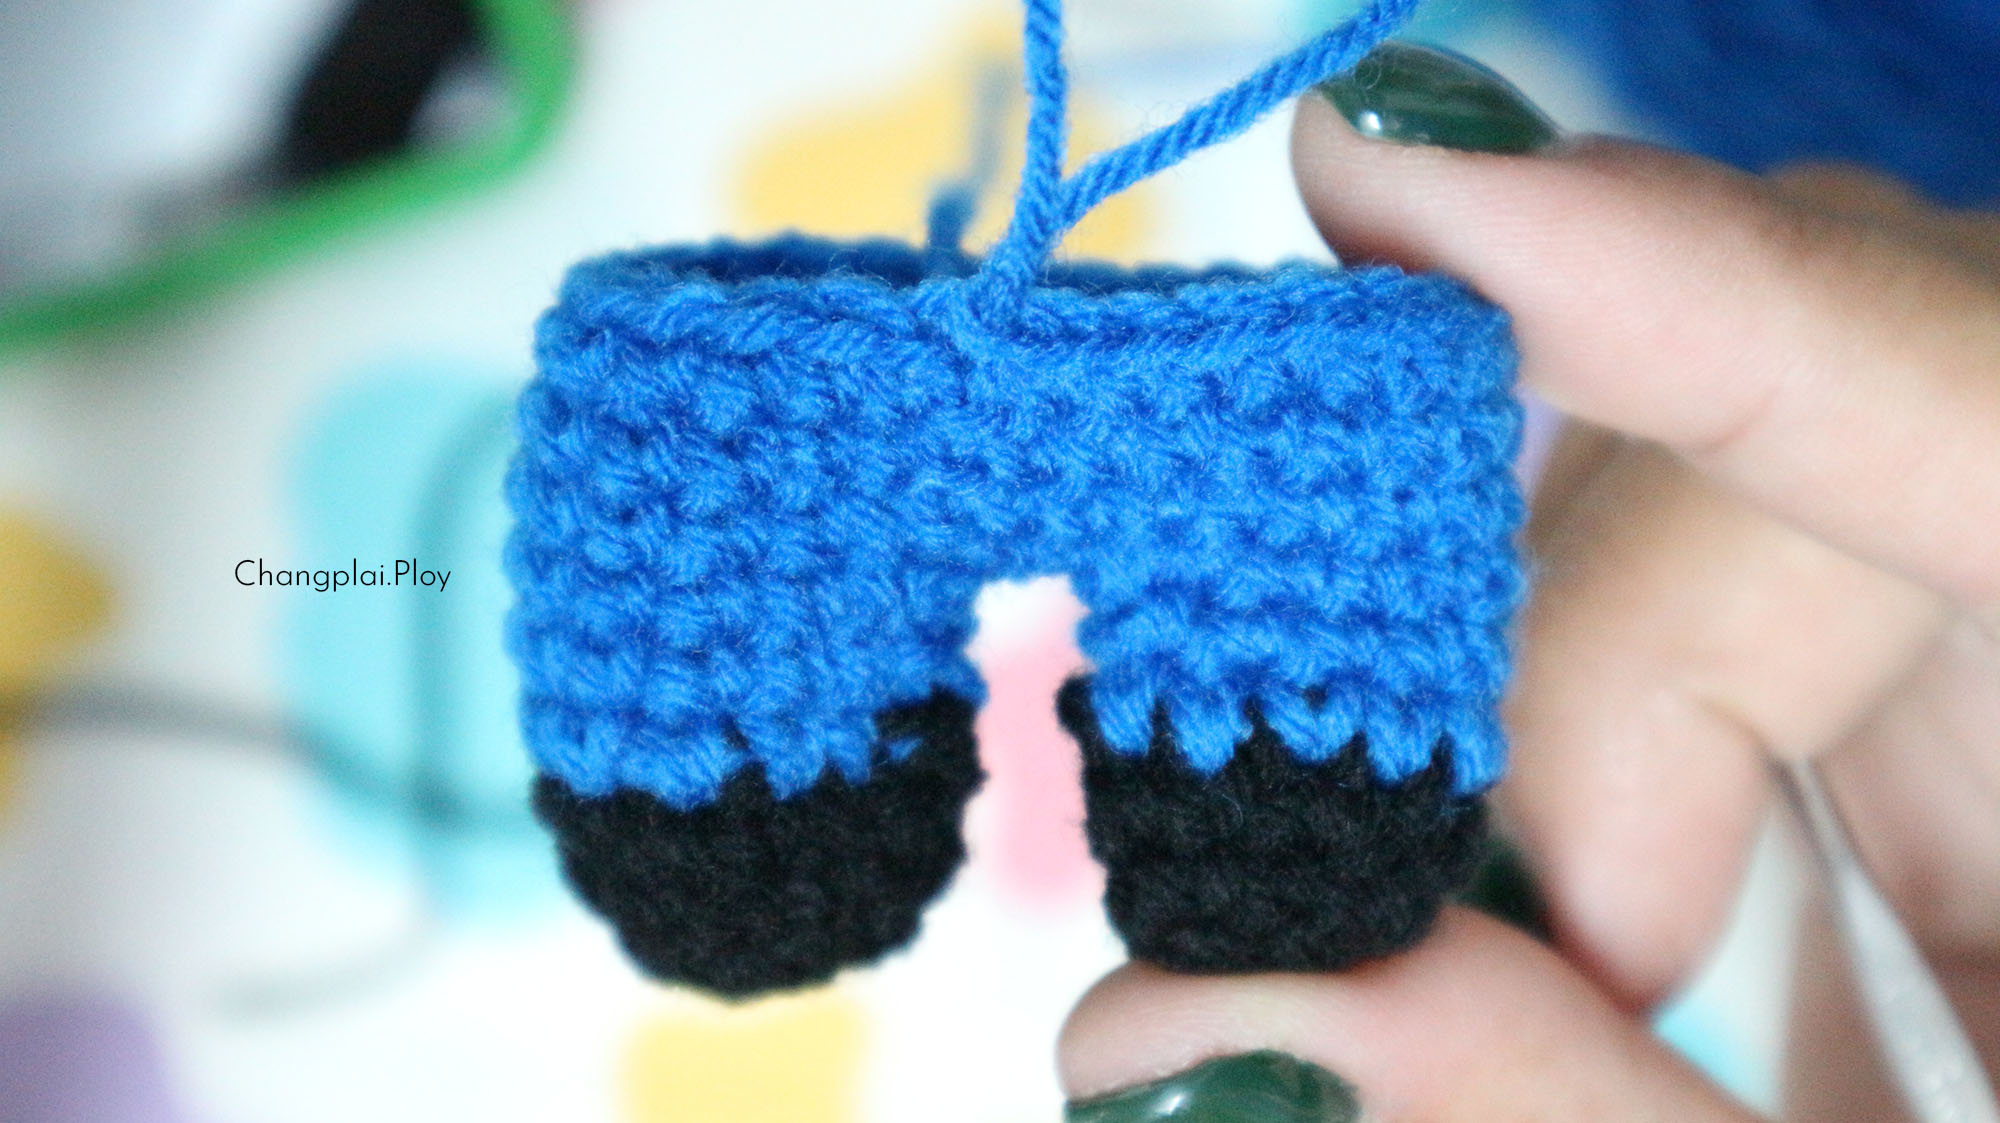
Yarn: Lime Green, Blue, Purple and Black Colors
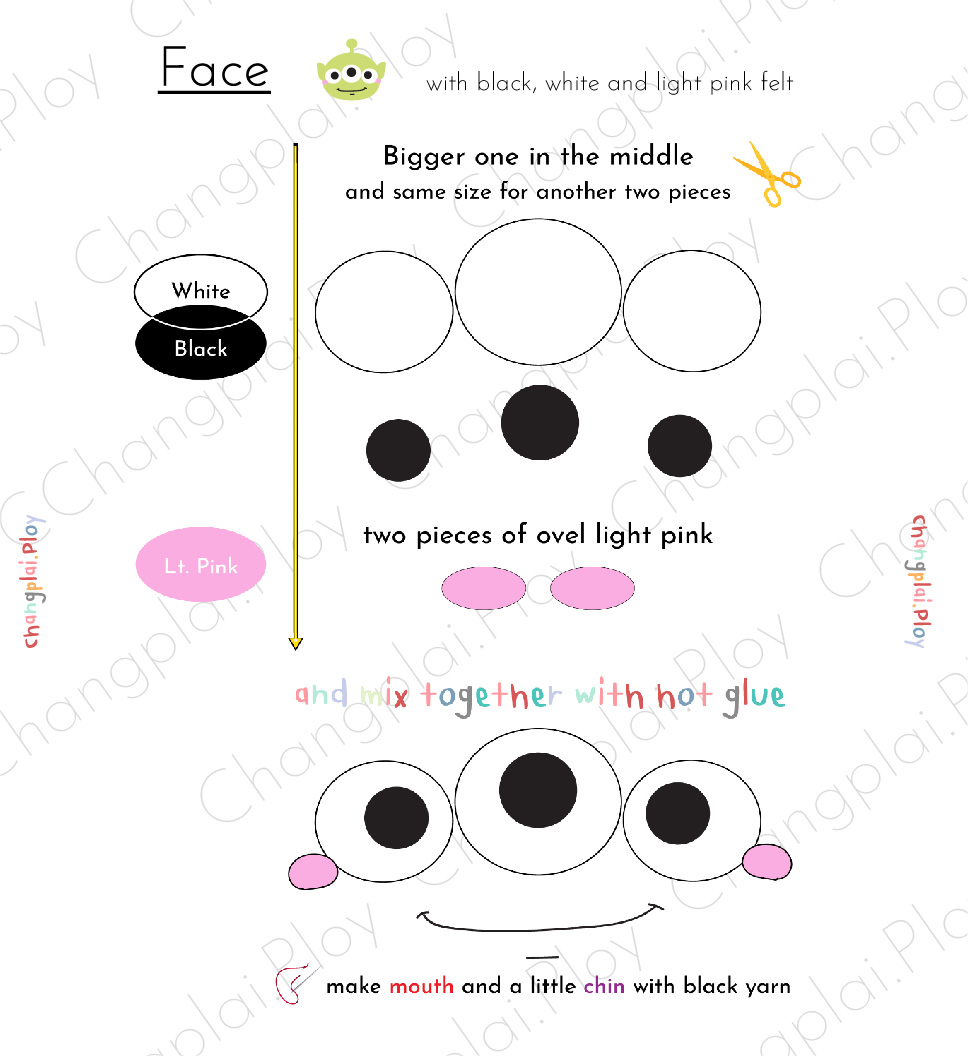
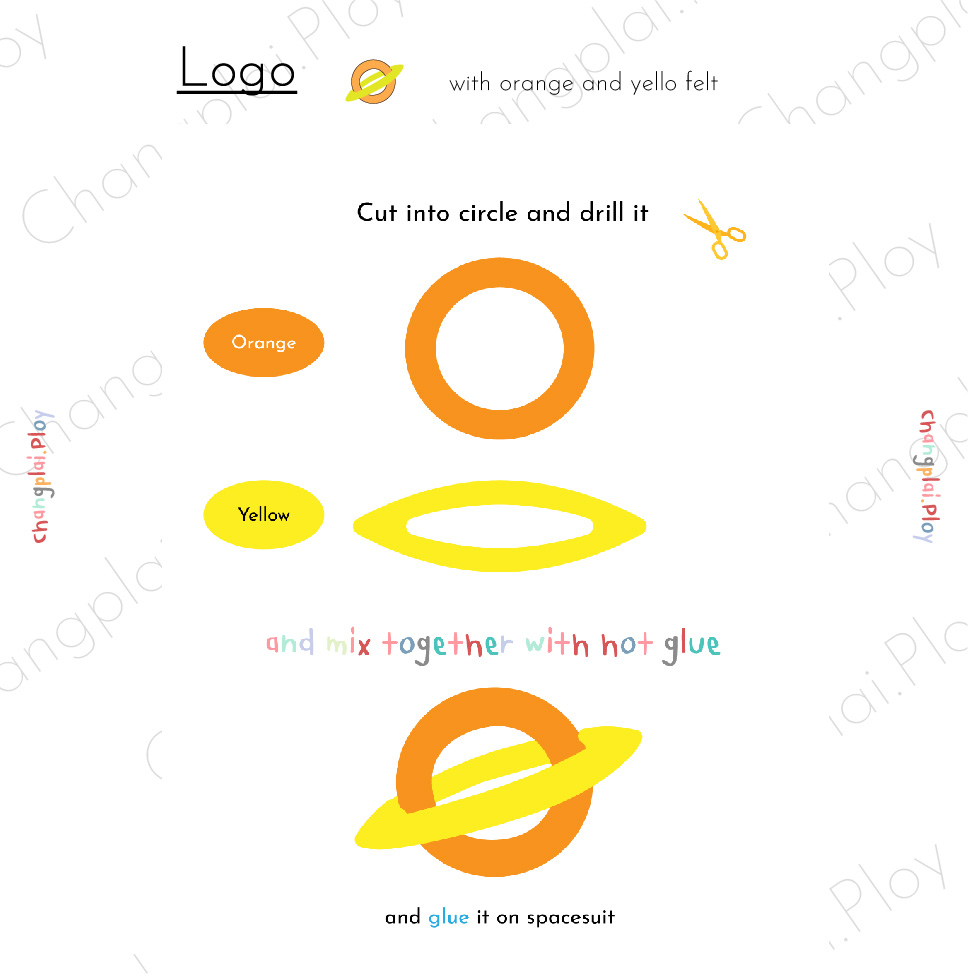
Felt: Black, White, Purple, Light Pink, Orange and Yellow Colors.
1.6 mm. crochet hook.
Fiberfill for stuffing
Scissors, sewing needle and Glue (Hot glue gun)
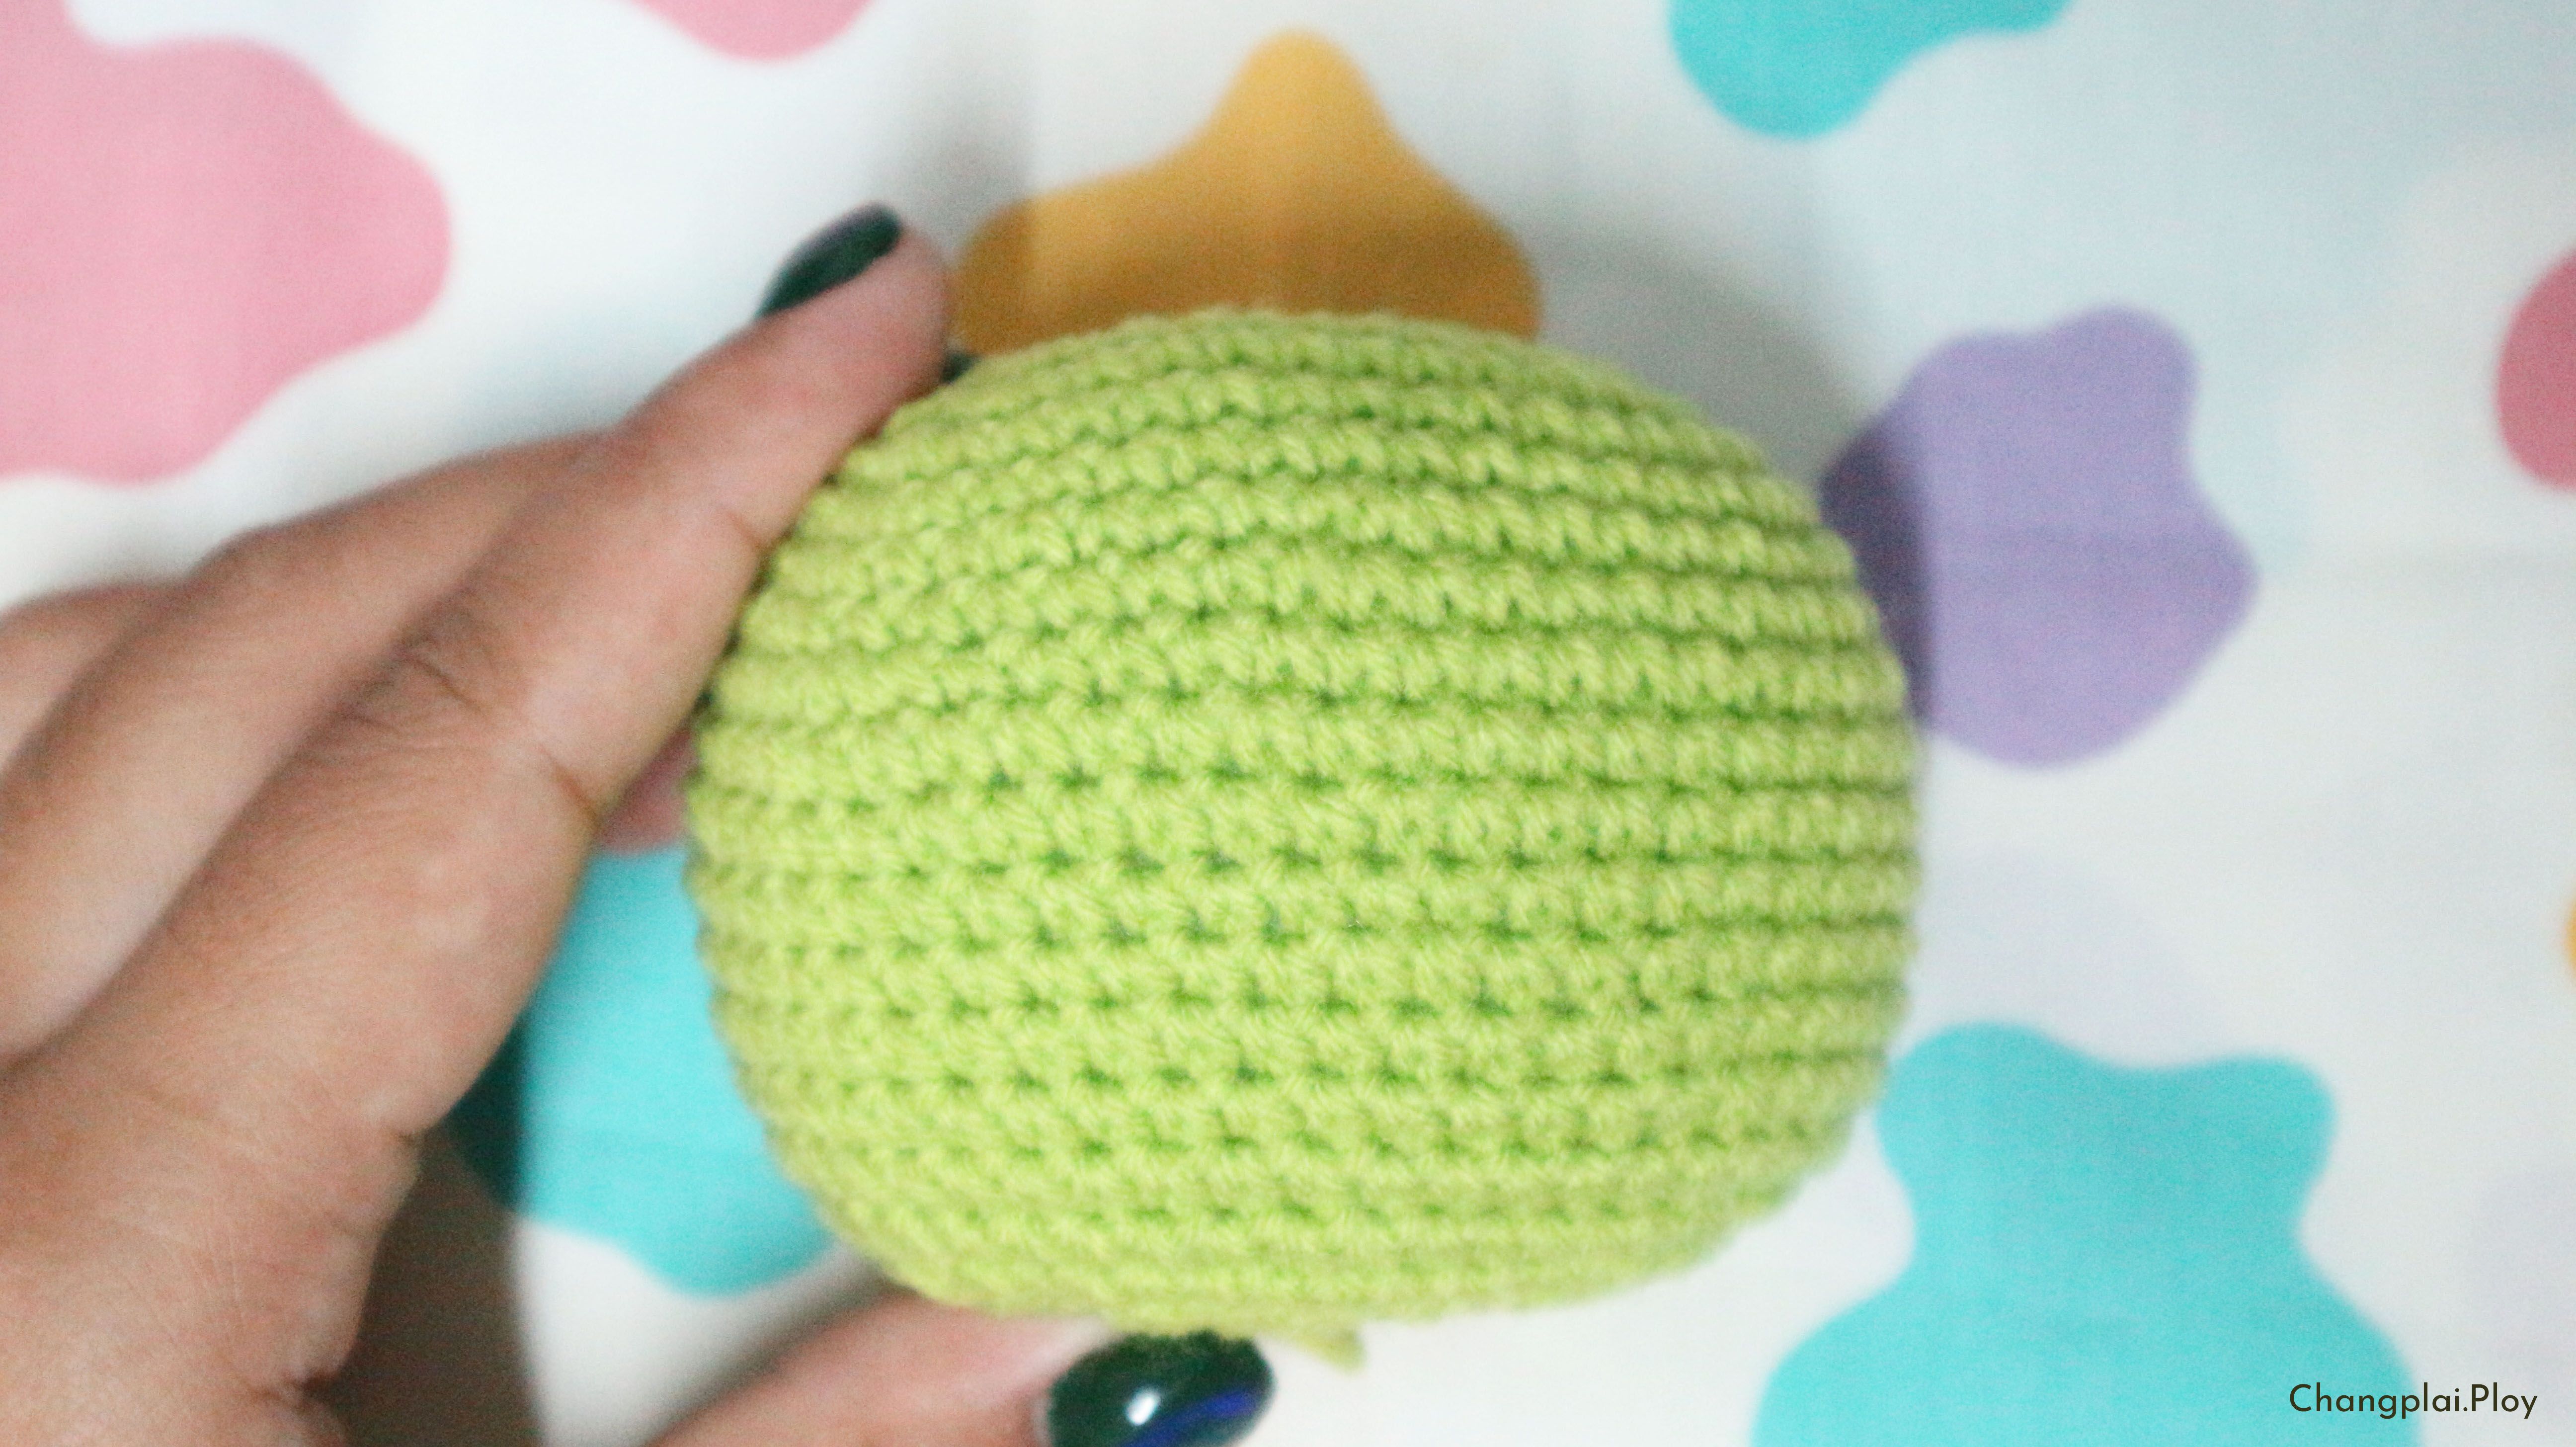
In case you use the specified yarn and hook, your 'Little Green Man' will be about 5" - 6”. The pattern can also work well the yarn of other weight, but size of finished crochet will be different.
Skill Level : intermediate
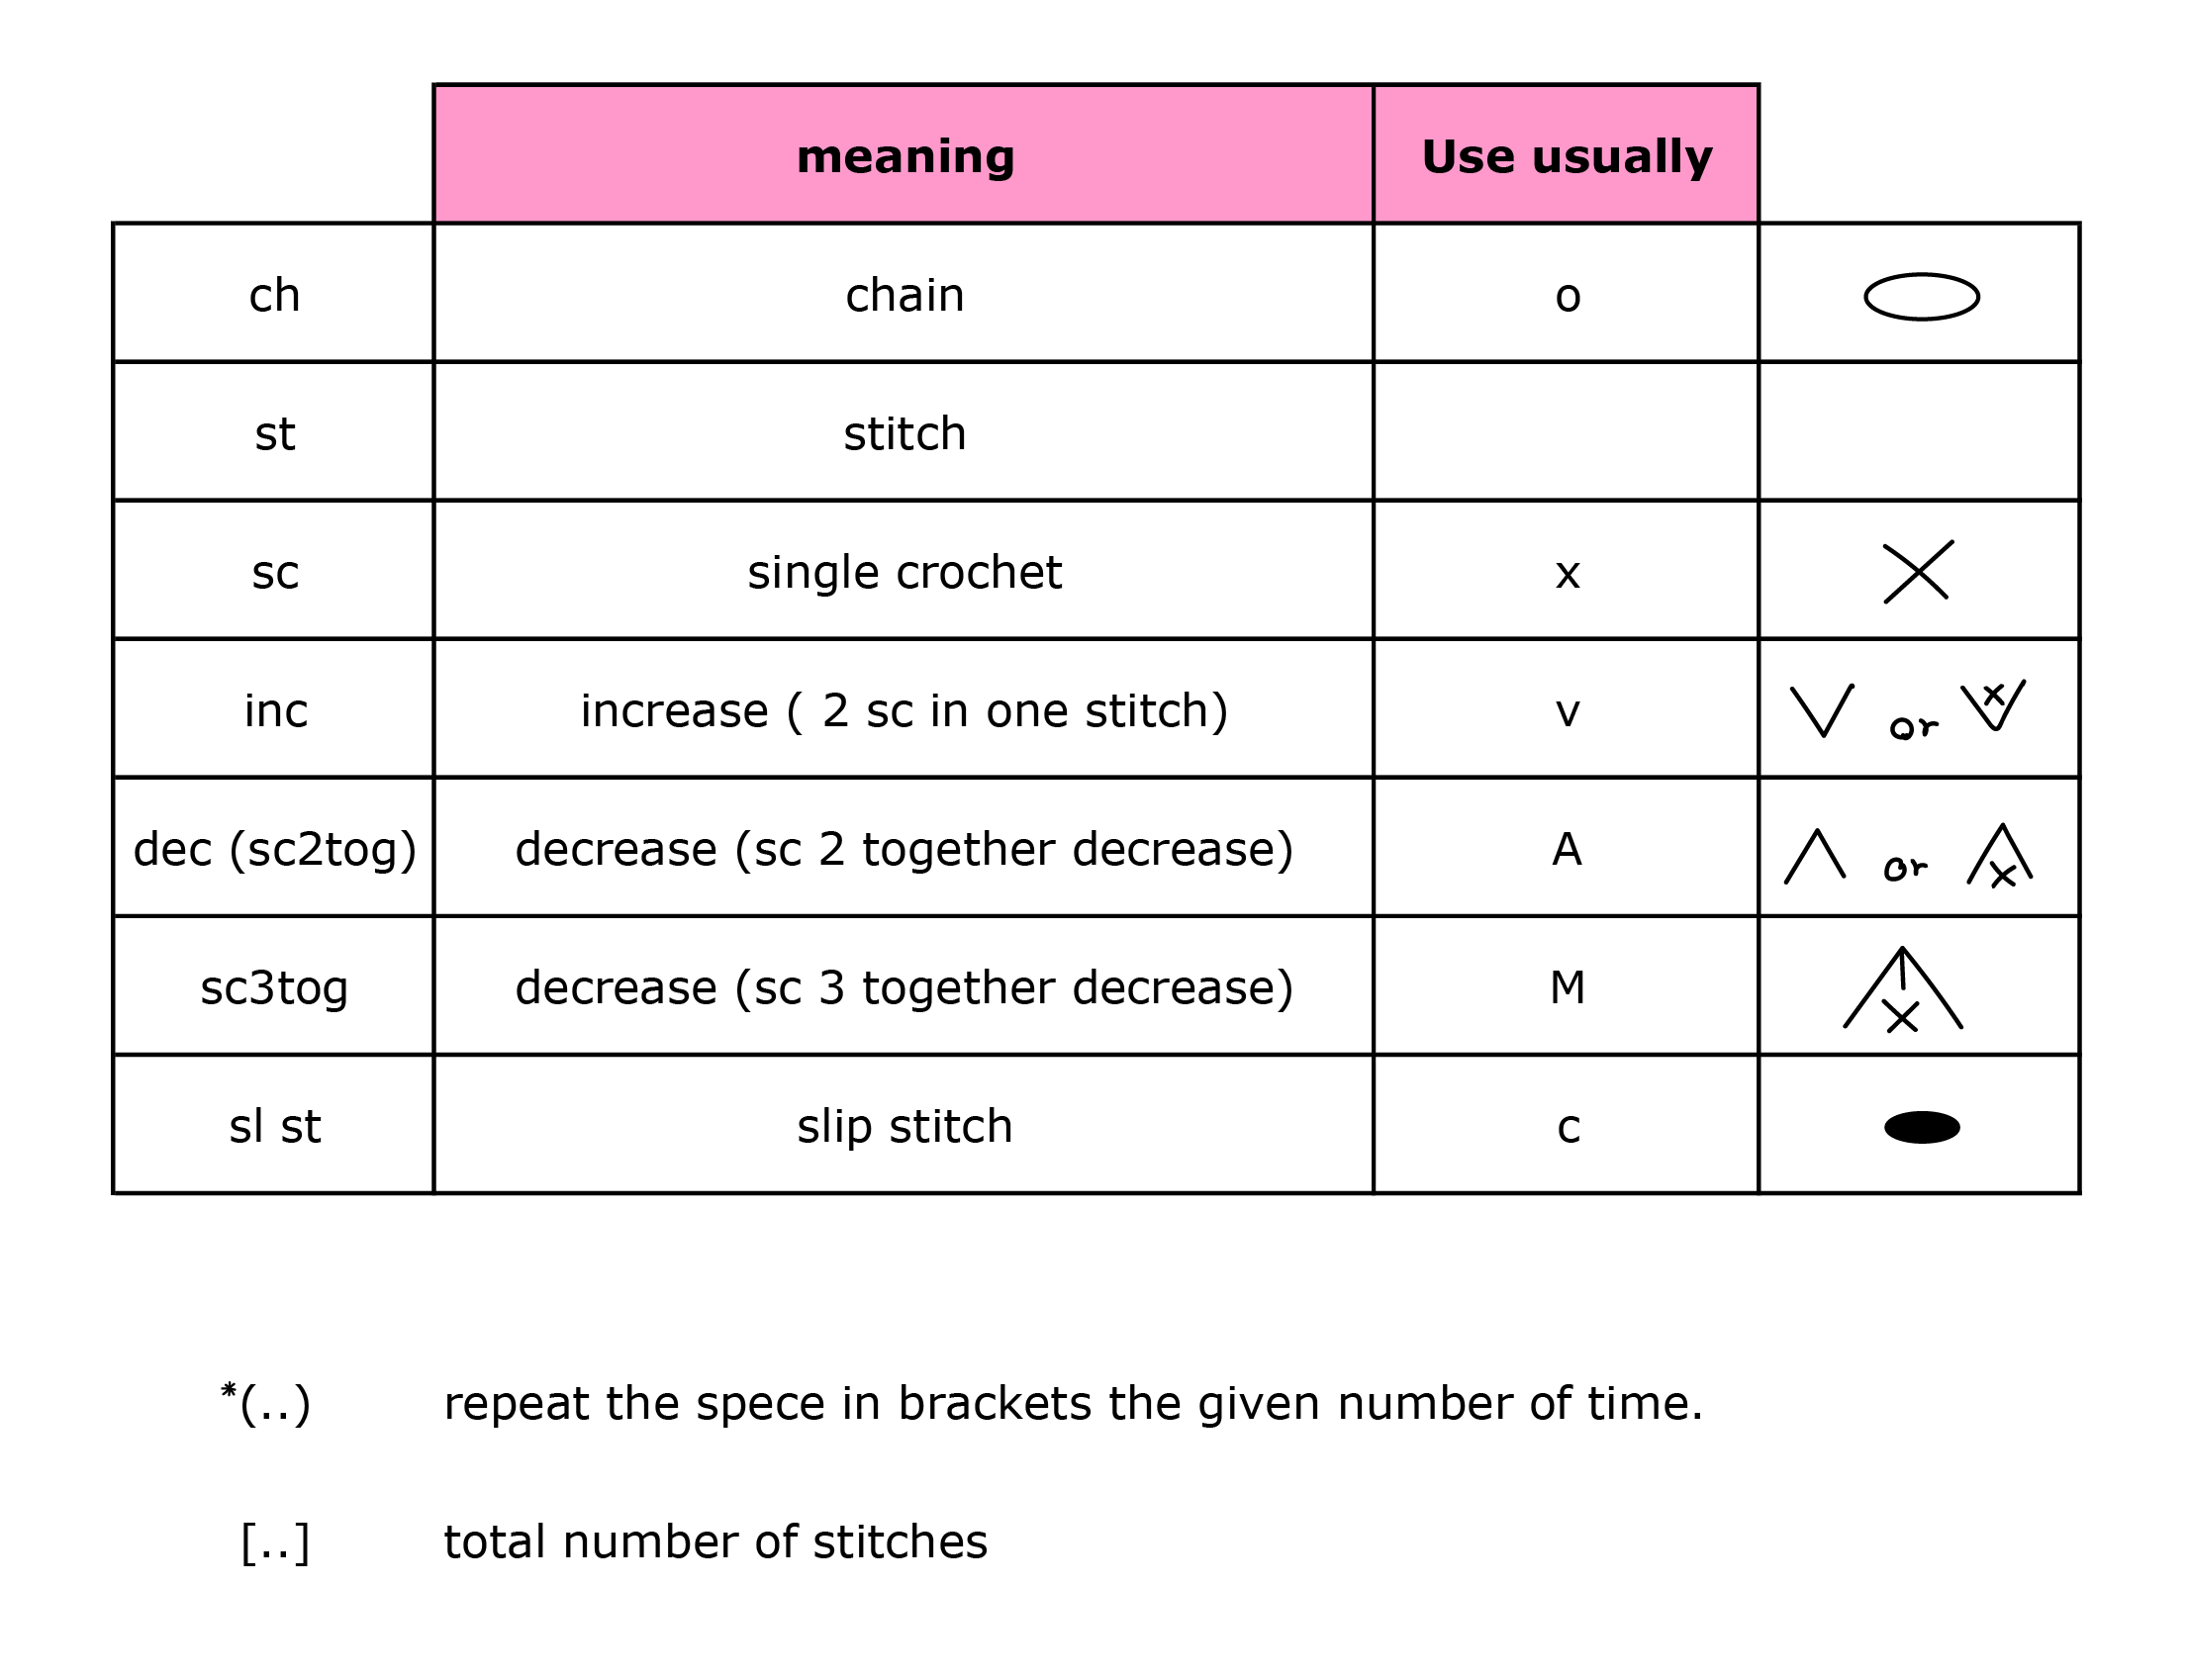
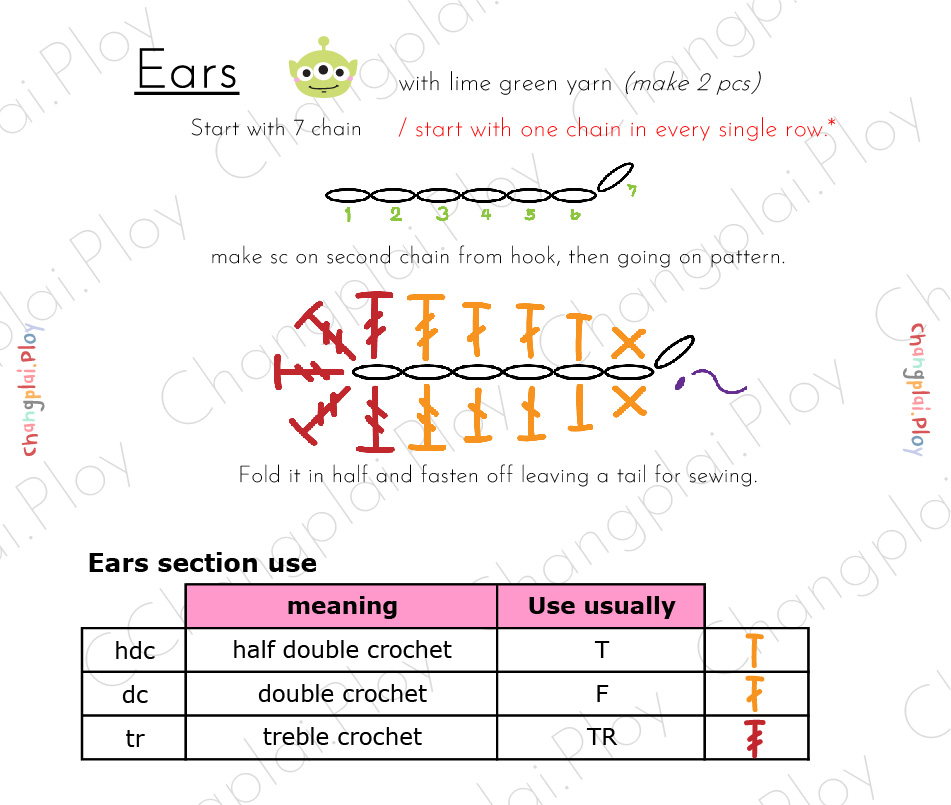
Abbreviations :
so I need you to see at I use usually and what I draw.
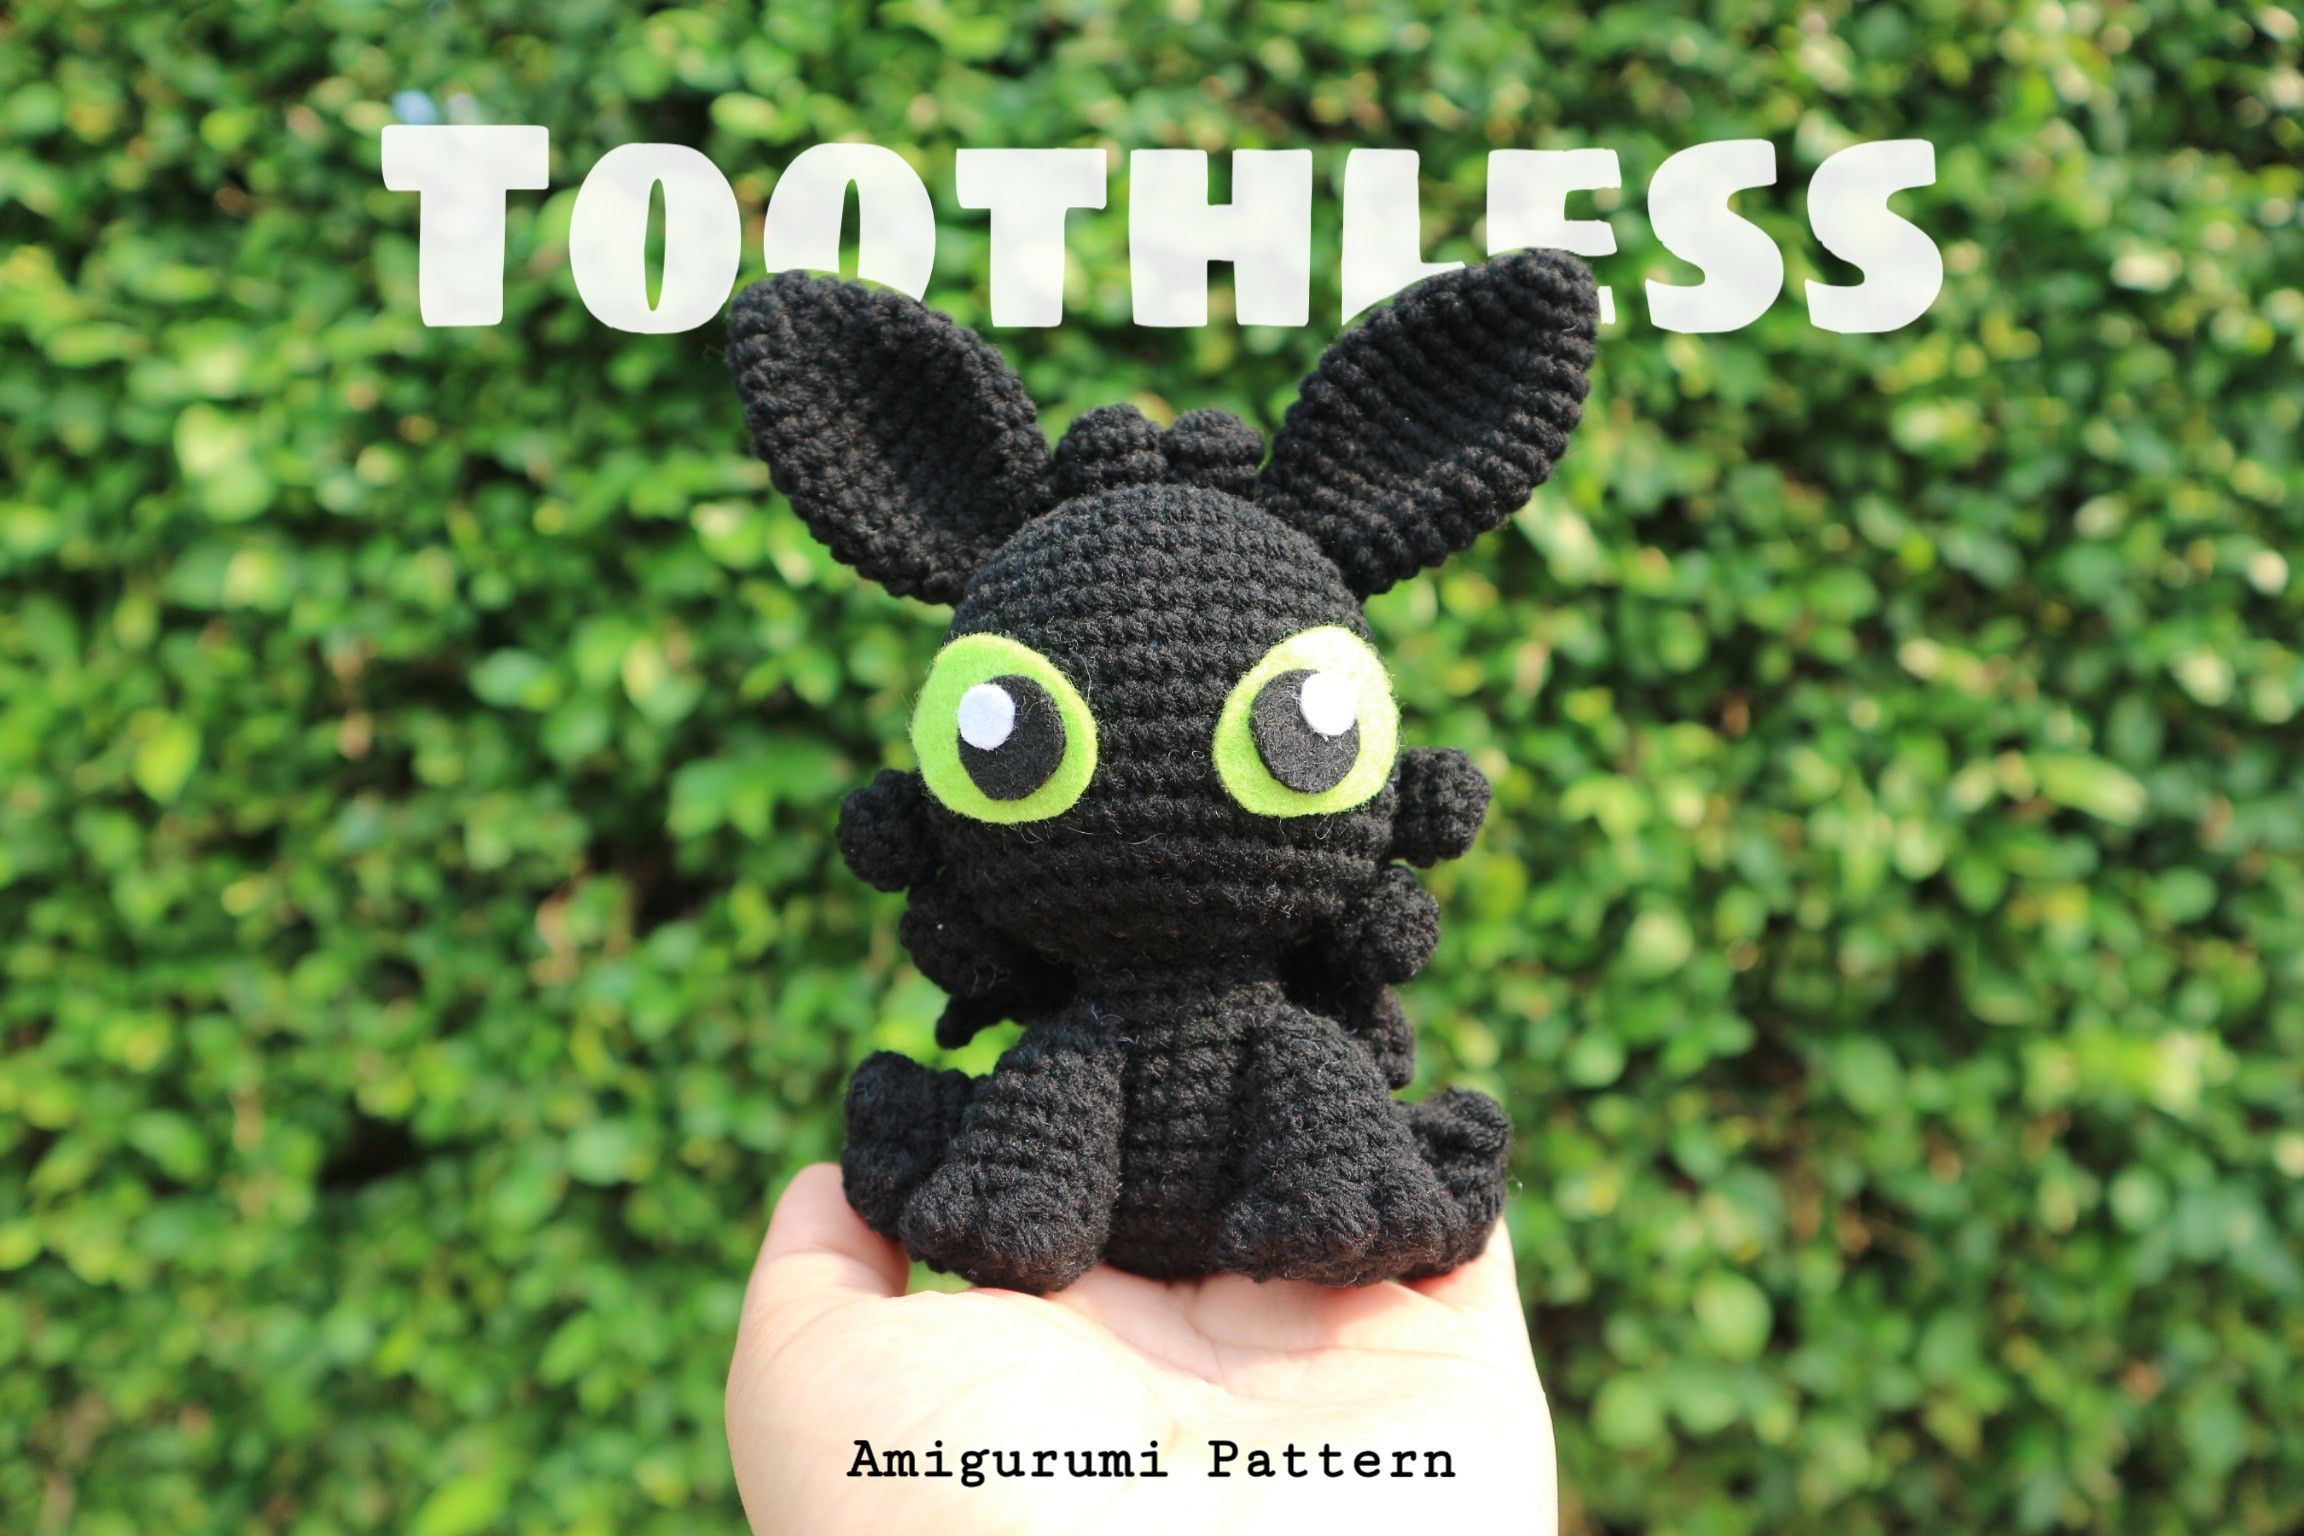
He became the friend who gave me my purpose." - Hiccup describing his relationship with Toothless.
Hi everyone. Welcome to my blog once again.
It's been 9 or 10 years after the first movie of How to Train Your Dragon released in 2010, and now the last movies of 'How to Train your Dragon 3 : The Hidden World' released. It's was really good animation!
It's make me laugh, touching and cry. I used to take so much time to make same scale of Night Fury (Toothless) in keychain size but it's always messed up, till I found this toothless amigurumi style on Sarselgurumi this's too cute ever! Therefore my customer NOT OK for that size like ' It's too big for keychain' then I Modifiy.
haha after I modify this pattern I found that 'could I share this? cus I get it free! ' then I gonna share to you guys.
To Crochet Toothless you’ll need:
Yarn: Black Color ( to make Toothless and If you want his girlfriend use White.)
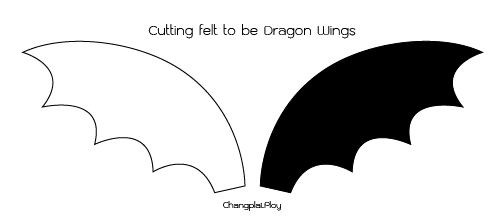
Felt: Lime green, Black, White and Red Colors. (for Light Fury use light blue to make eyes)
1.6 mm. crochet hook.
Fiberfill for stuffing
Scissors, sewing needle and Glue (Hot glue gun)
In case you use the specified yarn and hook, your 'Toothless' will be about 5" - 6”. The pattern can also work well the yarn of other weight, but size of finished crochet will be different.
Skill Level : intermediate Abbreviations : ch = chain st = stitch sc = single crochet [ x ] inc = increase (2 sc in one st) [ v ] dec = decrease (2 sc together) [ a ] sl st = slip stitch BLO = back loop only (..) = repeat the spece in brackets the given number of time. [..] = total number of stitches Head with black yarn. Start with one chain every single row and finish row with sl st, R1: 6 sc into the magic ring [6] R2: (inc) repeat 6 times [12] R3: (sc in next st, inc) repeat 6 times [18] R4: (sc in next 2 st, inc) repeat 6 times [24] R5: sc in all 24 st [24] R6: (sc in next 3 st, inc) repeat 6 times [30] R7 - 12: sc in all 30 st [30] R13: (sc in next 9st, inc), (sc in next 7st,inc), (sc in next 12 st) [32] R14 - 15: sc in all 32 st [32] R16: (sc in next 2 st, dec) repeat 8 times [24] Stuff with fiberfill, R17: (sc in next st, dec) repeat 8 times [16] R18: (dec) repeat 8 times [8] Fasten off and weave in the end.
Body with black yarn. Start with one chain every single row and finish row with sl st, R1: 6 sc into the magic ring [6] R2: (inc) repeat 6 times [12] R3: (sc in next st, inc) repeat 6 times [18] R4: (inc), (sc in next 5 st, inc), (sc in next 5 st, inc), (sc in next 5 st) [21] R5 - 7: sc in all 21 st [21] R8: (sc in next 4 st, dec) repeat 3 times, (sc in next 3 st) [18] R9: (sc in next st, dec), (sc in next 4 st, dec) repeat 3 times [14] R10: sc in all 14 st [14] R11: (sc in next 3 st, dec), (sc in next 5 st, dec), (sc in next 2 st) [12] Fasten off leaving a tail for sewing, Stuff with fiberfill.
Ears (make 2) with black yarn. Start with one chain every single row and finish row with sl st, R1: 5 sc into the magic ring [5] R2: (sc in next st, inc), (sc in next st, inc), (sc in next st) [7] R3: (inc, sc in next 2 st), (inc, sc in next 2 st), (inc) [10] R4: sc in all 10 st [10] R5: (sc in next 3 st, inc), (sc in next 2 st, inc), (sc in next 3 st) [12] R6: (sc in next 2 st, inc) repeat 4 times [16] R7: (sc in next 3 st, inc) repeat 4 times [20] R8 - 10: sc in all 20 st [20] R11: (sc in next 3 st, dec) repeat 4 times [16] R12: sc in all 16 st [16] R13: (sc in next 3 st, dec) repeat 3 times, (sc in next st) [13] R14: (sc in next 2 st, dec) repeat 3 times, (sc in next st) [10] R15: sc in all 16 st [16] Fasten off leaving a tail for sewing, Do not stuff fiberfill.
Mini Horn (make 6)*an easy way you can cut the black felt to make it. with black yarn. / for Light Fury usr only 2 piece. Start with one chain every single row and finish row with sl st, R1: 5 sc into the magic ring [5] R2 - 3: sc in all 5 st [5] Fasten off leaving a tail for sewing, Do not stuff fiberfill.
Front Legs (make 2) with black yarn. Start with one chain every single row and finish row with sl st, R1: 6 sc into the magic ring [6] R2: (inc) repeat 6 times [12] R3: (sc in next 3 st), (Make toe*), (sc in next st), (Make toe*), (sc in next st), (Make toe*), (sc in next st), (Make toe*), (sc in next 2 st) [12] R4: sc in all 12 st [12] R5: (sc in next 3 st, dec), (sc in next 3 st, dec), (sc in next 2 st) [10] R6 - 7: sc in all 10 st [10] Fasten off leaving a tail for sewing, Stuff with fiberfill.
Back Legs (make 2) with black yarn. Start with one chain every single row and finish row with sl st, R1: 6 sc into the magic ring [6] R2: (inc) repeat 6 times [12] R3: (sc in next 3 st), (Make toe*), (sc in next st), (Make toe*), (sc in next st), (Make toe*), (sc in next st), (Make toe*), (sc in next 2 st) [12] R4: sc in all 12 st [12] R5: (sc in next 3 st, dec), (sc in next 3 st, dec), (sc in next 2 st) [10] R6 - 7: sc in all 10 st [10] R8: (sc in next 2 st, dec), (sc in next 3 st, dec), (sc in next st) [8] Fasten off leaving a tail for sewing, Stuff with fiberfill.
*Toe(make popcorn stitch) But for my pattern make only 4 double crochet in the same stitch
Tail with black yarn. Start with one chain every single row and finish row with sl st, R1: 4 sc into the magic ring [4] R2: (sc in next 2 st, inc), (sc in next st) [5] R3: sc in all 5 st [5] R4: (sc in next 3 st, inc), (sc in next st) [6] R5: (sc in next st, inc), (sc in next 2 st, inc), (sc in next st) [8] R6: sc in all 8 st [8] R7: (sc in next 4 st, inc), (sc in next 3 st) [9] R8: (sc in next st, inc), (sc in next 4 st, inc), (sc in next st) [11] Fasten off leaving a tail for sewing, Stuff with fiberfill. **Decorate the tail by using black and red felt.
Wings
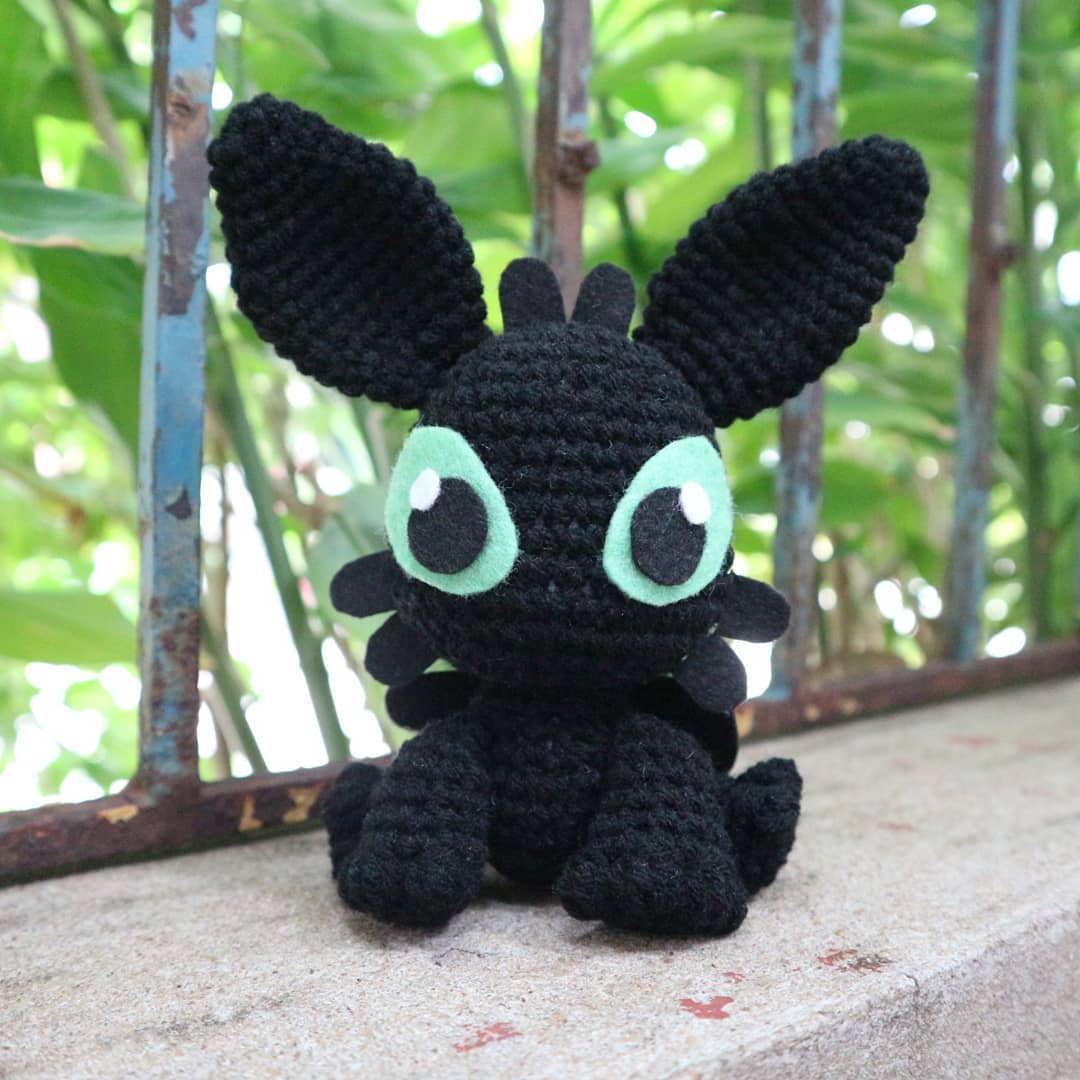
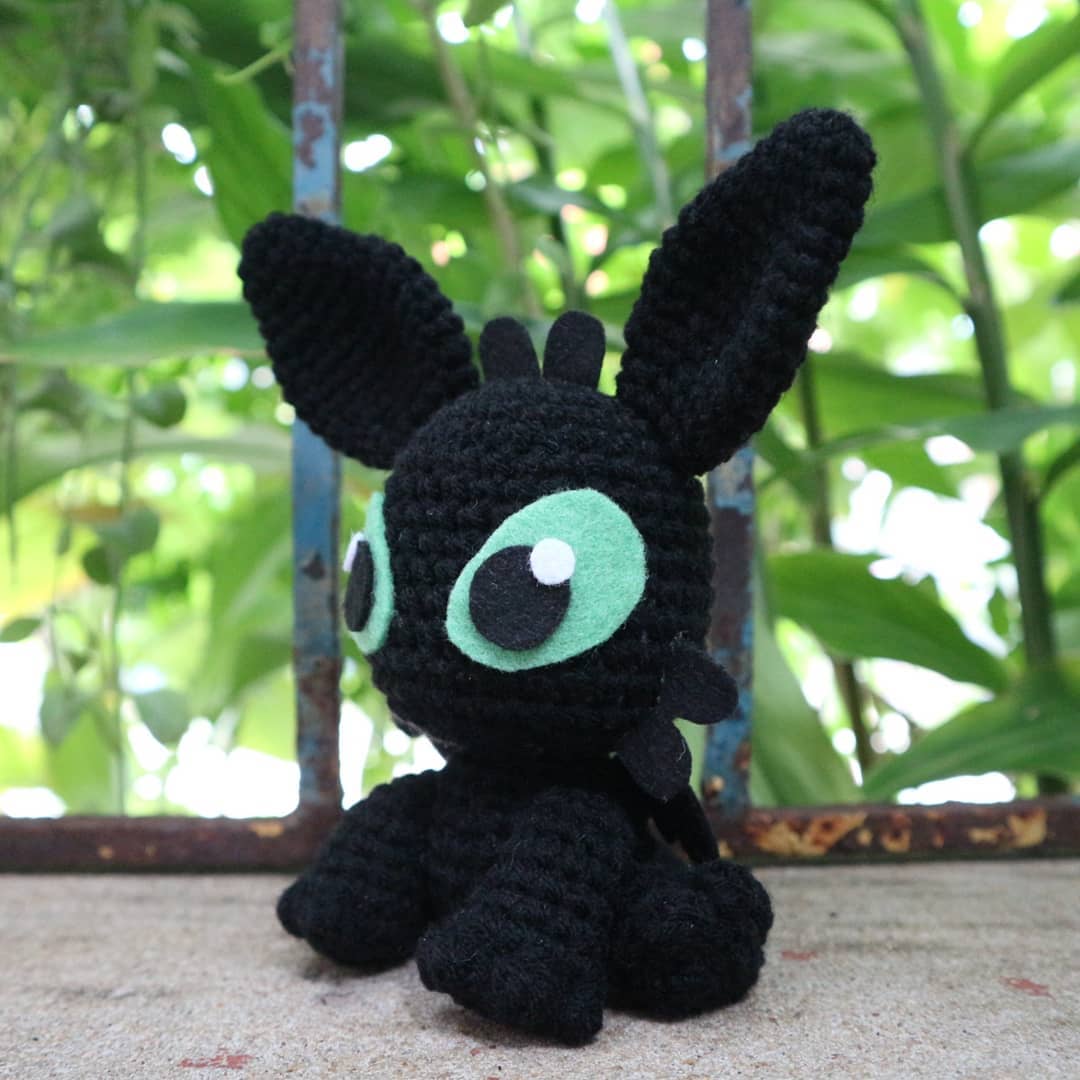
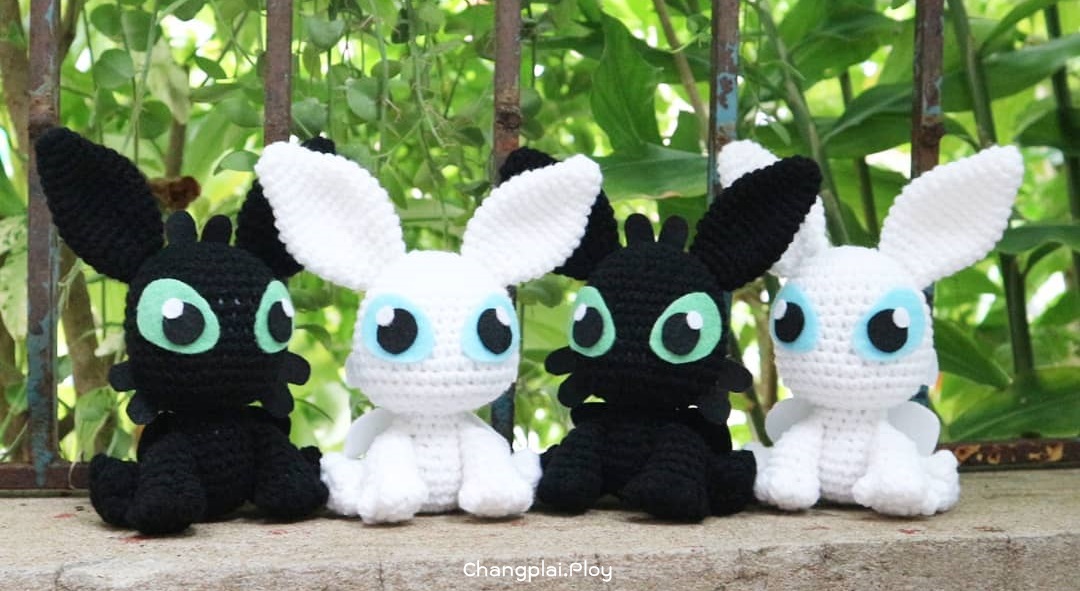
Assembly: 1. Sew body to head (see how i attached on the video). 2. Sew ears to the head. 3. Sew arms, legs, tail and spot to the body. 4. Use Green,Black and White felt to make eyes like in the picture or some face you want.
You can make this Dragon in White to be Light Fury, like these.
Let's see how I make on these video
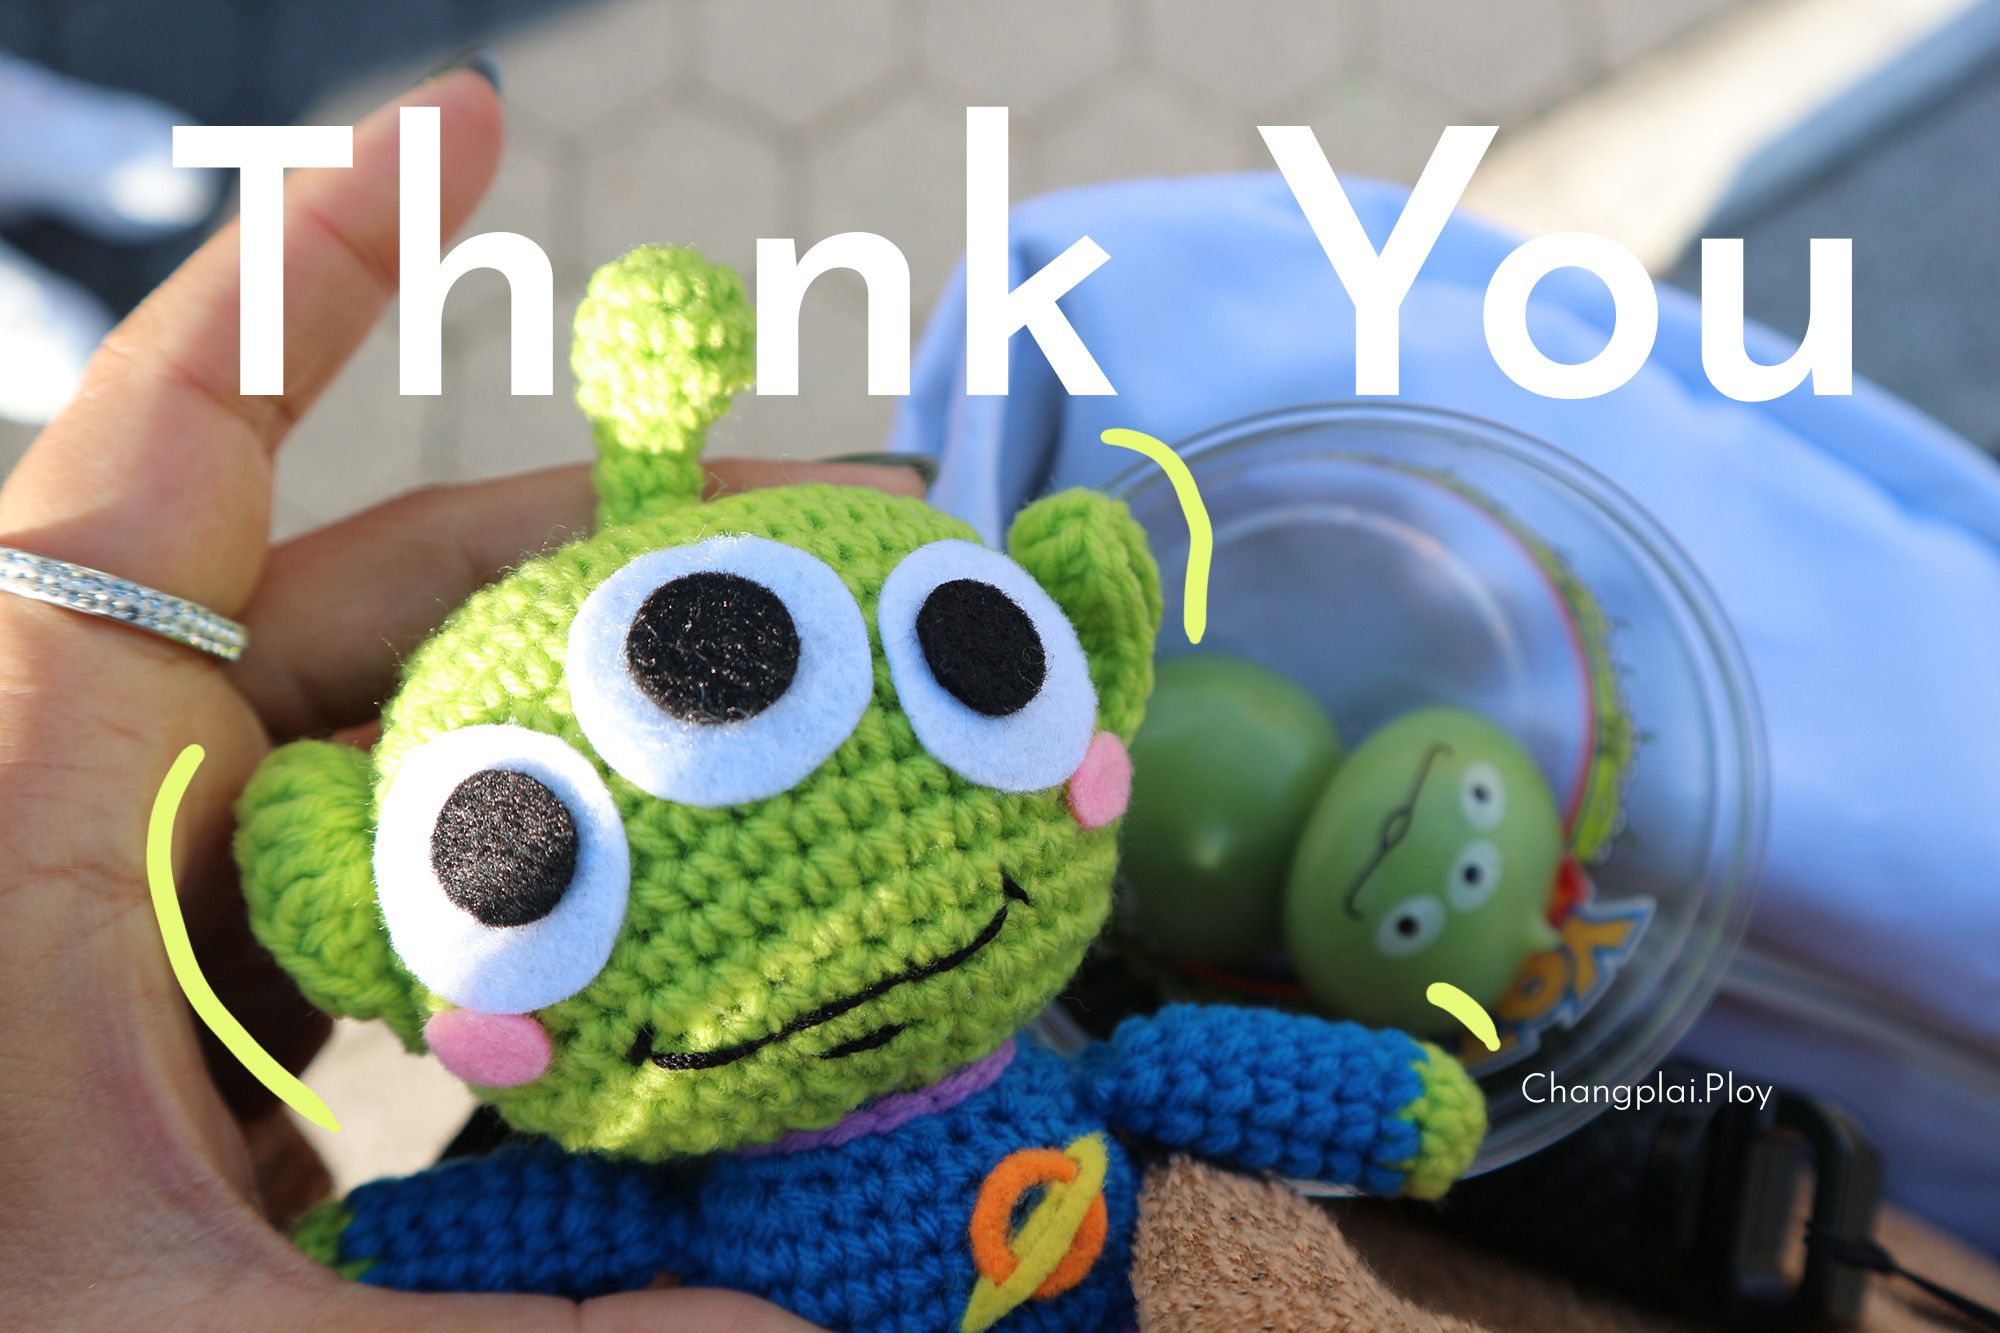
THANK YOU FOR JOINING Hope you gonna share your finished doll with me
R3 : (inc),�(sc in next 4 st, inc),�(sc in next st, inc),�(sc in next 4 st, inc), sc [18]
R4 :�(sc in next st, inc),�(sc in next 5 st, inc),�(sc in next 2 st, inc),�(sc in next 3 st, inc),(sc in next st, inc), sl st [23]
R5 : sc BLO in all 23 st [23]
R6 - 10 : sc in all 23 st [23]
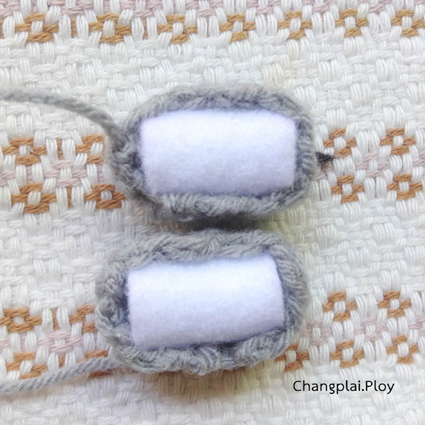
(from row 1 - 5 as pic below )
R11 : (sc in next 3 st, inc), (sc in next st, inc) repeat 2 times,�(sc in next 2 st, inc),�(sc in next st, inc),�(sc in next 3 st, inc),�(sc in next 5 st, inc) [30]
R12 :�(sc in next 3 st, inc) repeat 2 times,�(sc in next 2 st, inc) repeat 3 times,�(sc in next 4 st, inc), 8sc [36]
R13 :�(sc in next 5 st, inc),�(sc in next 8 st, inc),�(sc in next 7 st, inc), 13 sc [39]
R14 - R24 : sc in all 39 st [39]
R25 :�(sc in next 2 st, dec) repeat 9 times, 3 sc [30]
Stuff with fiberfill.
R26 :�(sc in next st, dec) repeat 10 times, [10]
R27 : (dec) repeat till close
Fasten off and weave in the end.
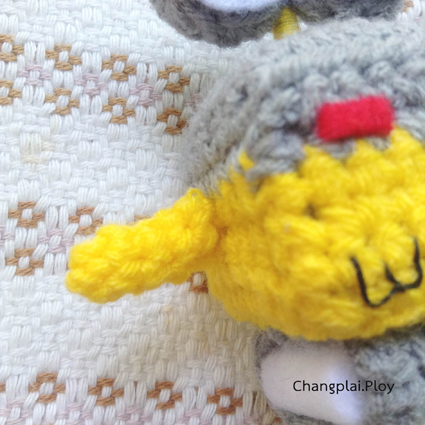
Ears�(make 2)�
with pink yarn.
Chain 8 starting from fourth�chain from hook.
(4 dc), (5 dc in one chain), (4 dc) [13]
Fasten off leaving a tail for sewing on head around row 21.
Body�
with pink yarn.
Start with one chain every single row and finish row with sl st, making magic ring.
R1: 6 sc into the magic ring�[6]
R2: (inc) repeat 6 times [12]
R3: (sc in next st, inc) repeat 6 times [18]
R4: (sc in next 5 st, inc) repeat 3 times�[21]
R5 - 8 : sc in all 21 st�[21]
R9: (sc in next 5 st, dec) repeat 3 times [18]
R10: (sc in next 4 st, dec) repeat 3 times [15]
R11: (sc in next 3 st, dec) repeat 3 times [12]
Fasten off leaving a tail for sewing, Stuff with fiberfill.
Dress�
with red yarn.
Start from last row of body but do from wrong side.
R1 : (sc in next st, inc) repeat 6 times�[18]
R2 : (sc in next 2 st, inc) repeat 6 times�[24]
R3 : (sc in next 5 st, inc) repeat 4 times�[28]
R4 - 9 : sc in all 28 st [28]
R10 : sl st in all 28 st [28]
Fasten off and weave in the end.
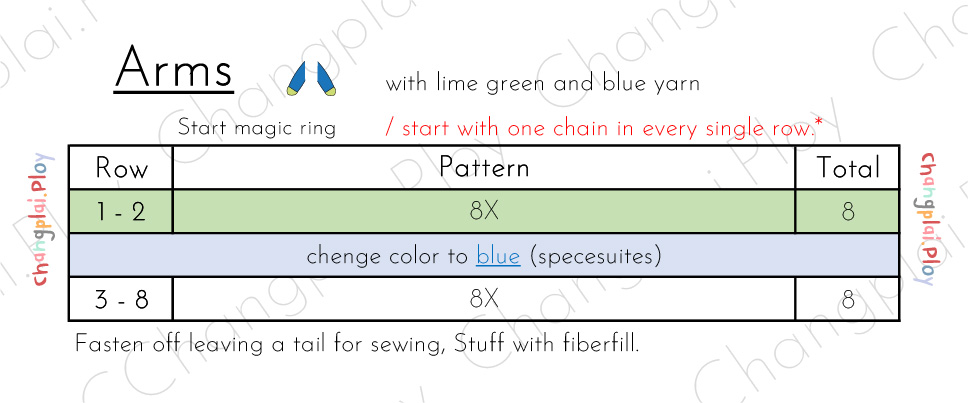
Arms�(make 2)�
with pink yarn.
R1 : 6 sc into the magic ring�[6]
R2 :�(sc in next 2 st, inc)�repeat 2 times[8]
R3 - 7 : sc in all 8 st�[8]
Fasten off leaving a tail for sewing, Stuff with fiberfill.
Finger�
with pink yarn.
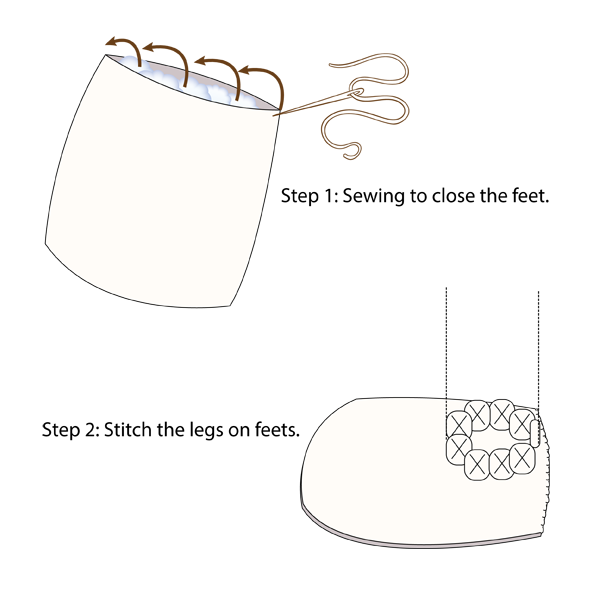
Foots�(make 2)�
with black yarn.
R1 : 6 sc into the magic ring�[6]
R2 :�(sc in next 2 st, inc)�repeat 2 times[8]
R3 - 6 : sc in all 8 st�[8]
R7 : (dec) repeat 4 times[8]
Fasten off and weave in the end.
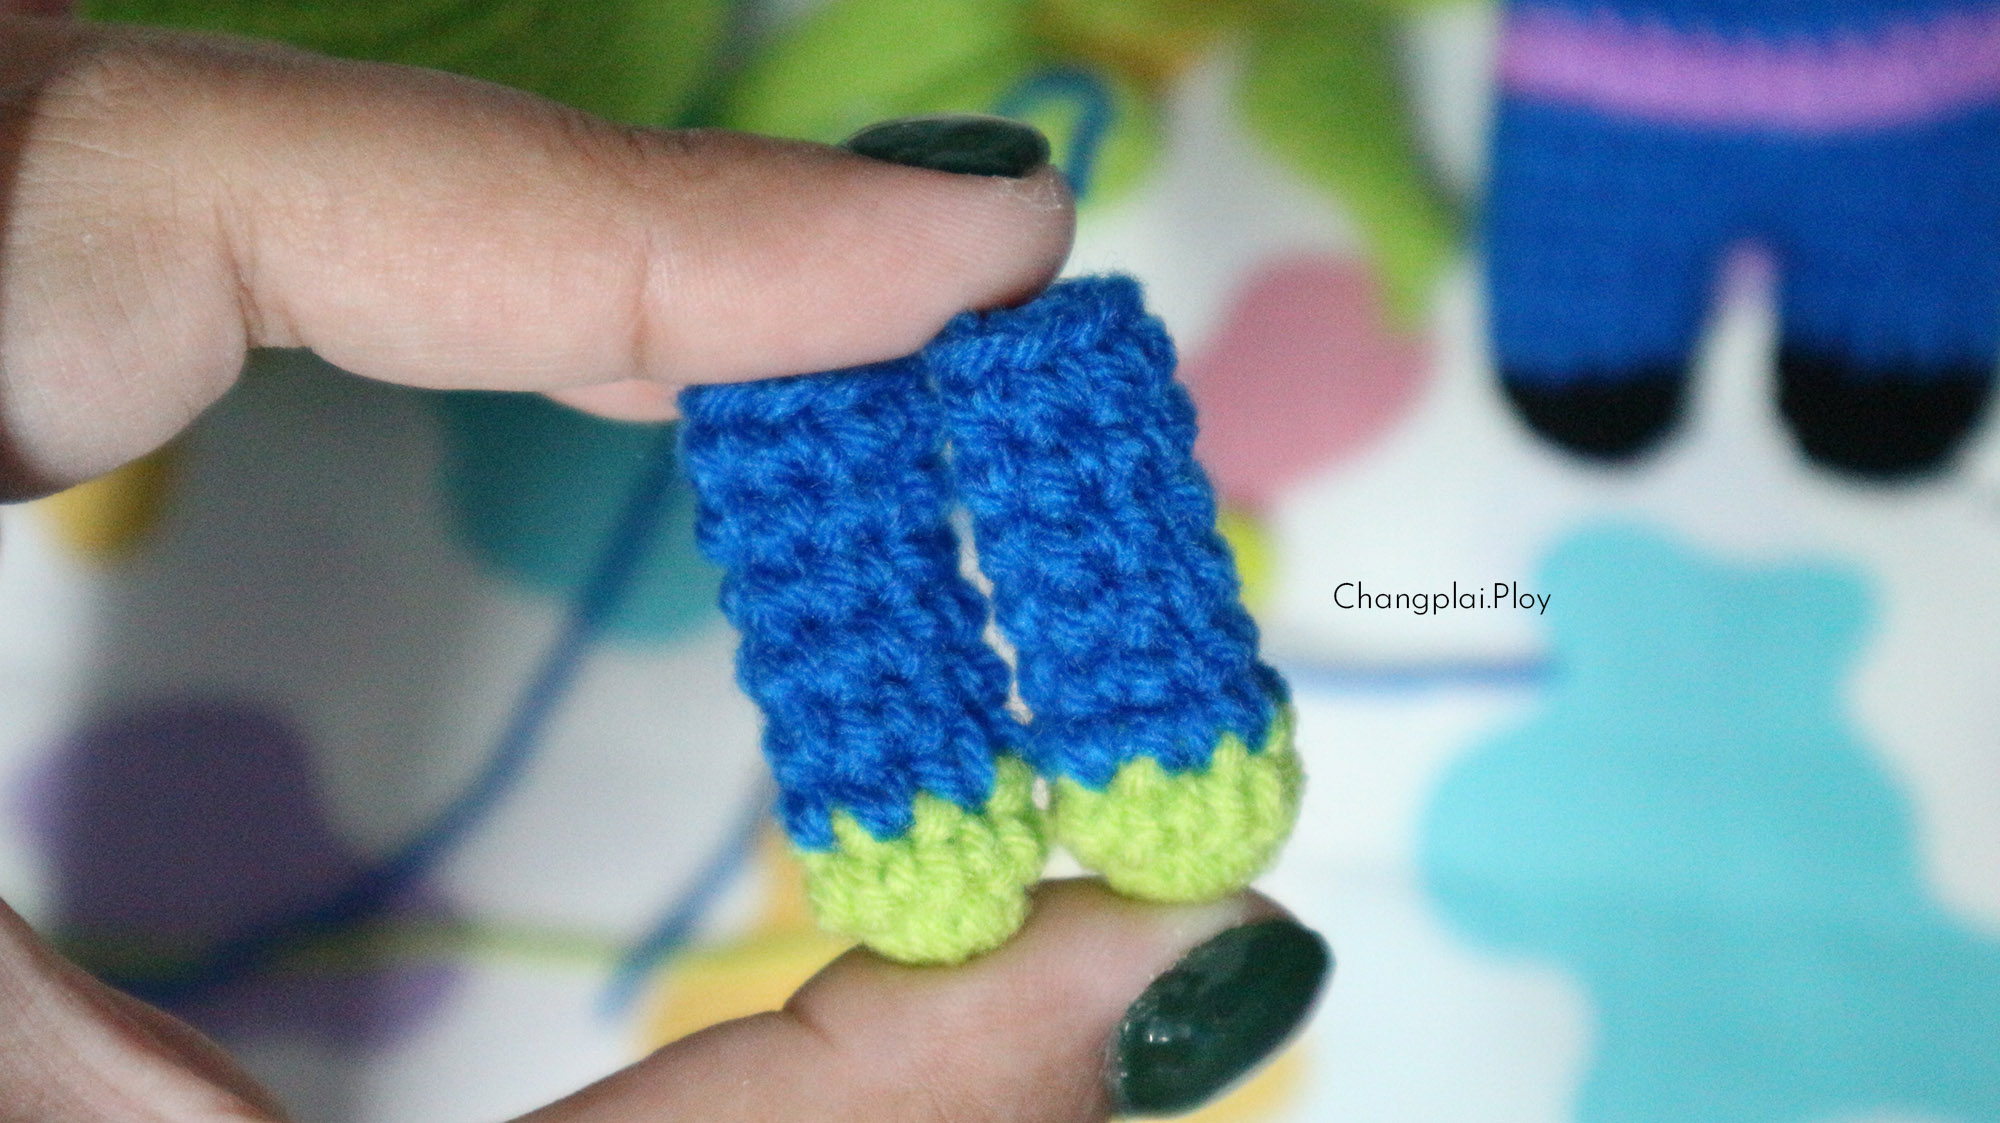
Legs�(make 2)�
with pink yarn.
Start with one chain every single row and finish row with sl st,
*Start from feet, making stitch on their legs position.
R1 - 5 : sc in all 8 st [8]
Finish with sl st, Stuff with Fiberfill and fasten off leaving a tail for sewing.
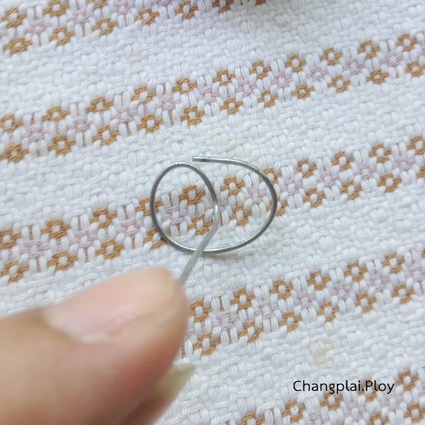
Tail�(make 2)�
with pink yarn.
Chain 14 starting from second�chain from hook.
sc in all 13 ch [13]
Fasten off leaving a tail for sewing.�
so tail will be in curl automatic.�
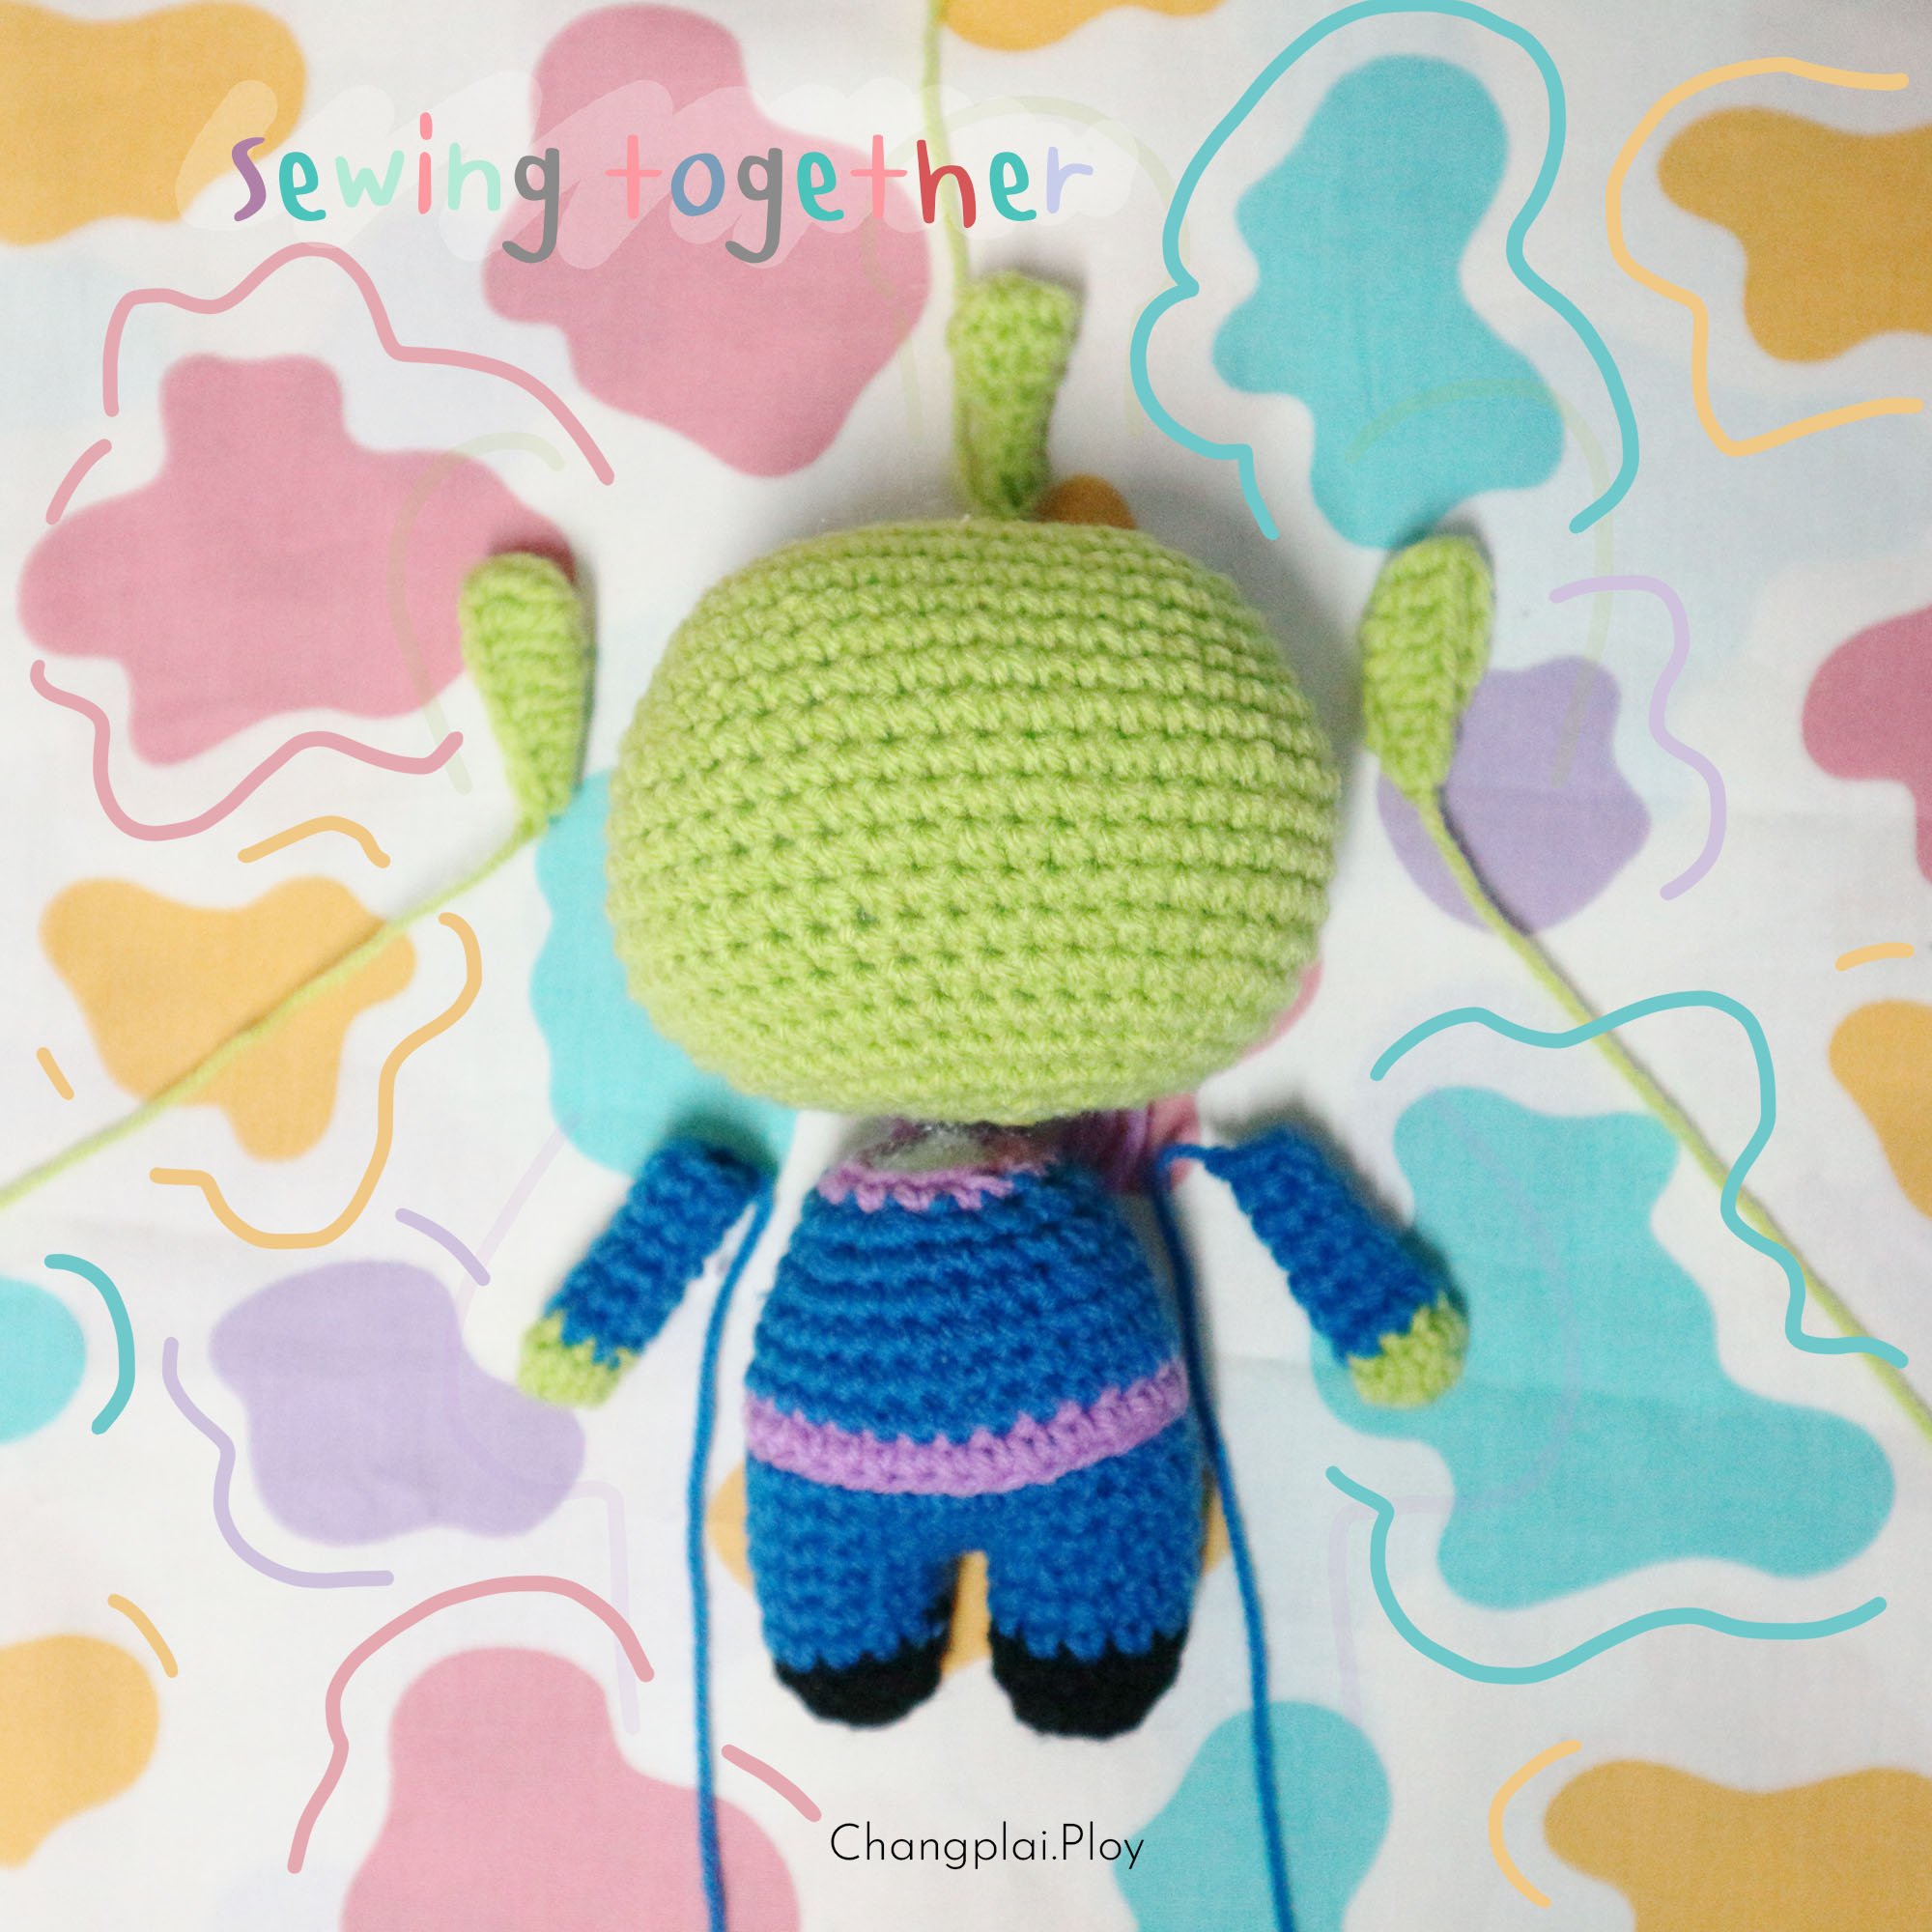
Assembly:�
1. Sew body to head (with pink color ).�
2. Sew ears to the head (for me around row 21)
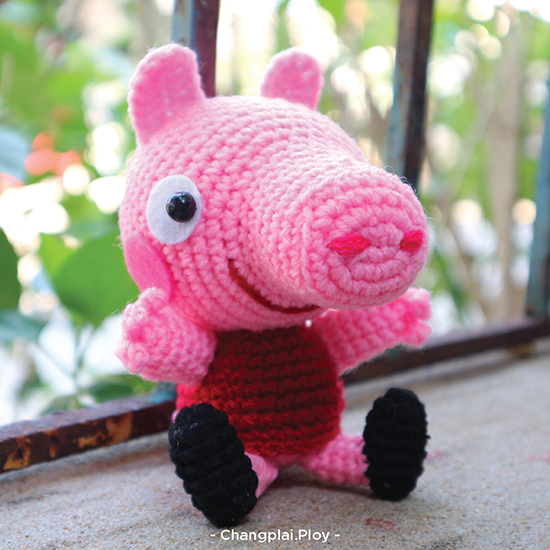
3. Sew arms, legs, to the body like in the picture.
4. Sew tail to body (not to dress, this's will help for sit)
5. Use magenta�yarn to sawing nostril, red yarn for mouth like in the picture or some face you want.�
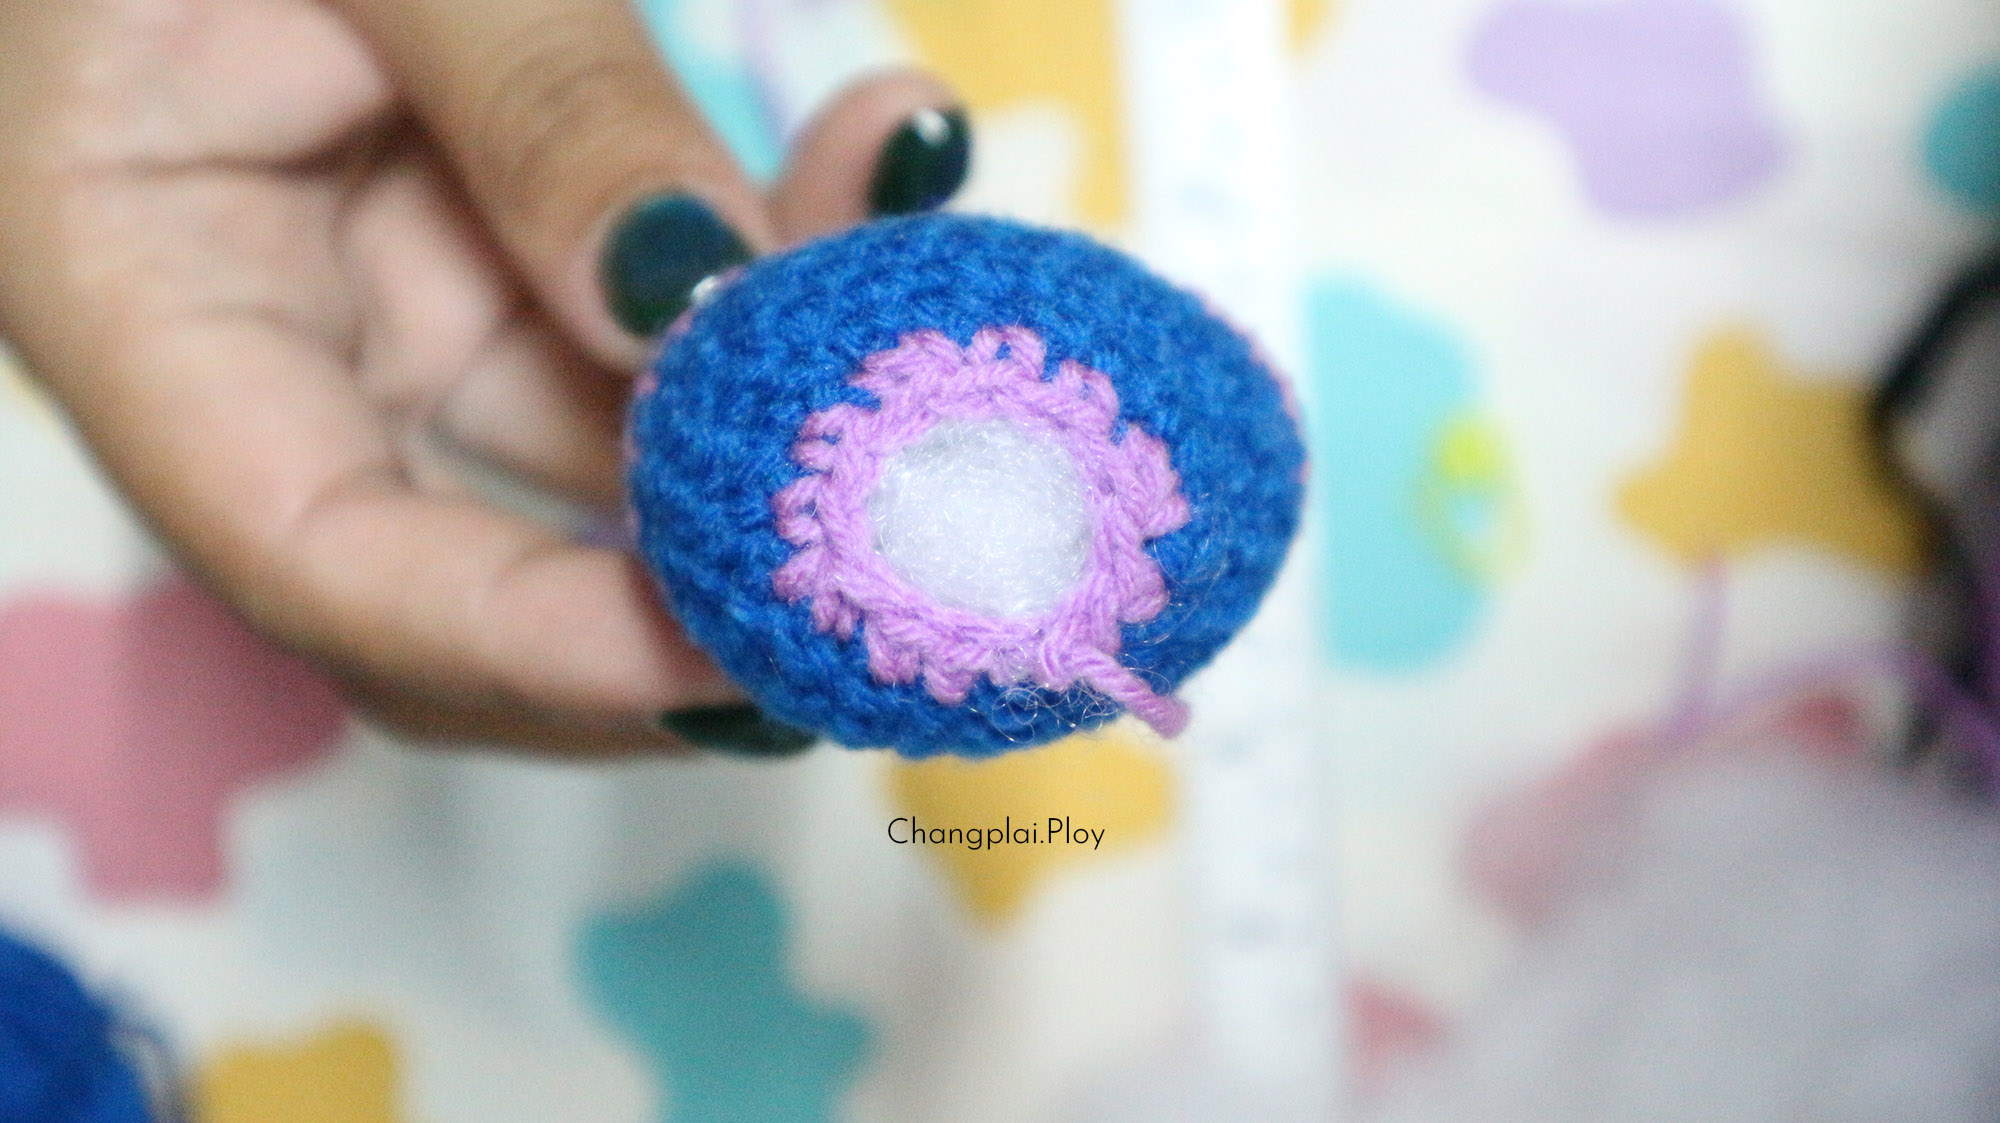
6. Cut white felt in circle and�perforate just a little for ad eyes (half round black beads)�
� � The sewing beads and white felt together before attach to head.�
7. Cut pink felt in circle (as big as white felt) and attach to head.

![Little Green Man [pattern by Changplai.Ploy]](https://www.bloggang.com/data/c/changplaiploy/picture/1629014021.jpg)


 �ҡ��ͤ�����ѧ����
 ���Դ������͡ : 13 �� [