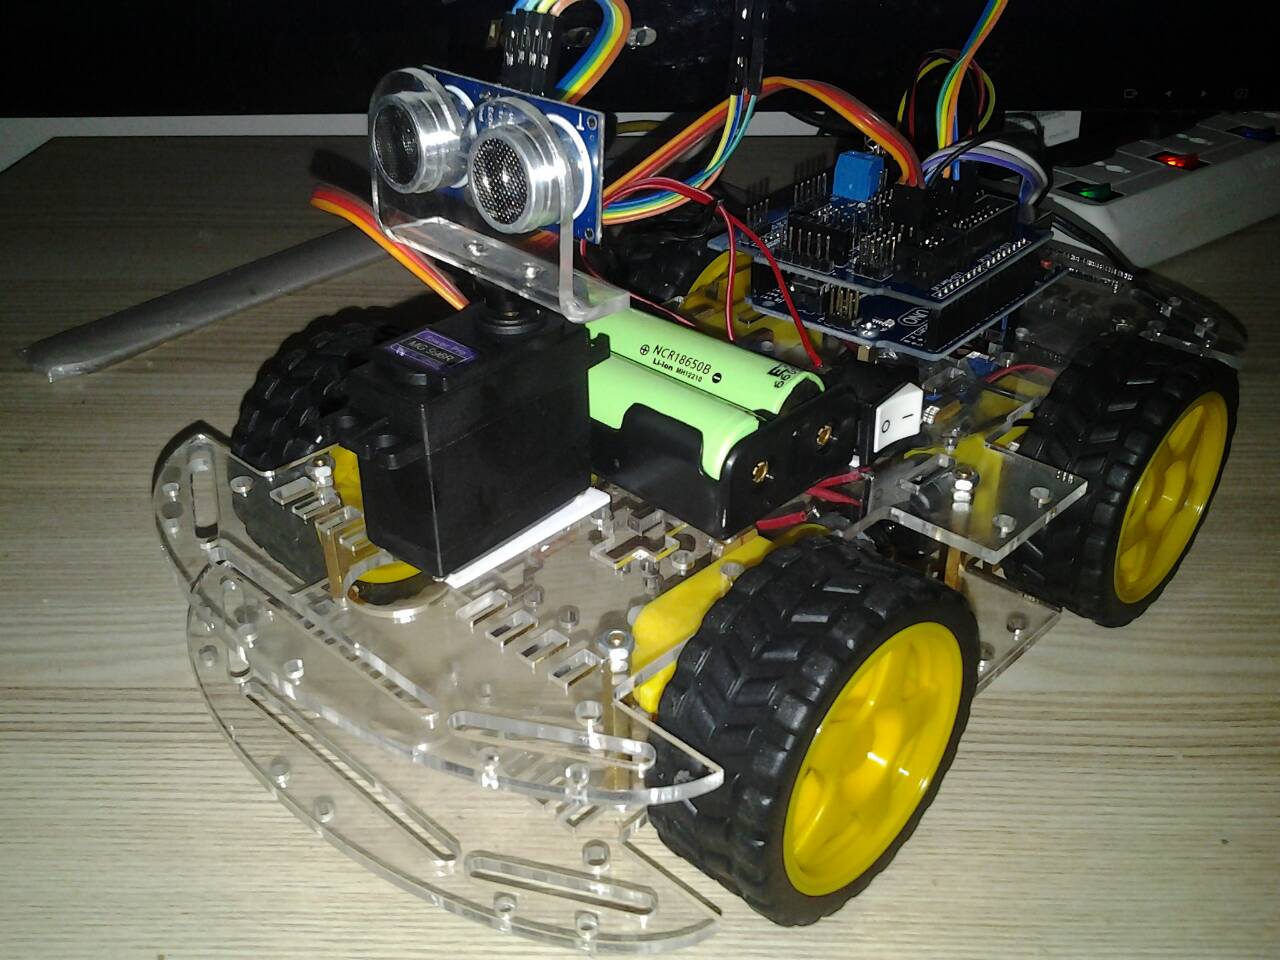
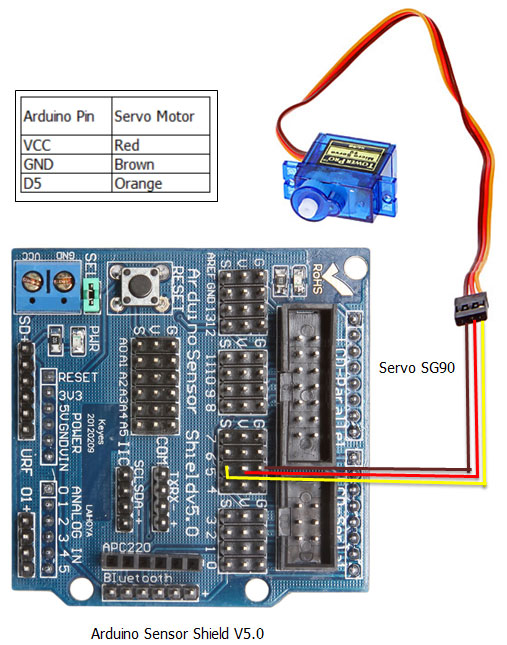
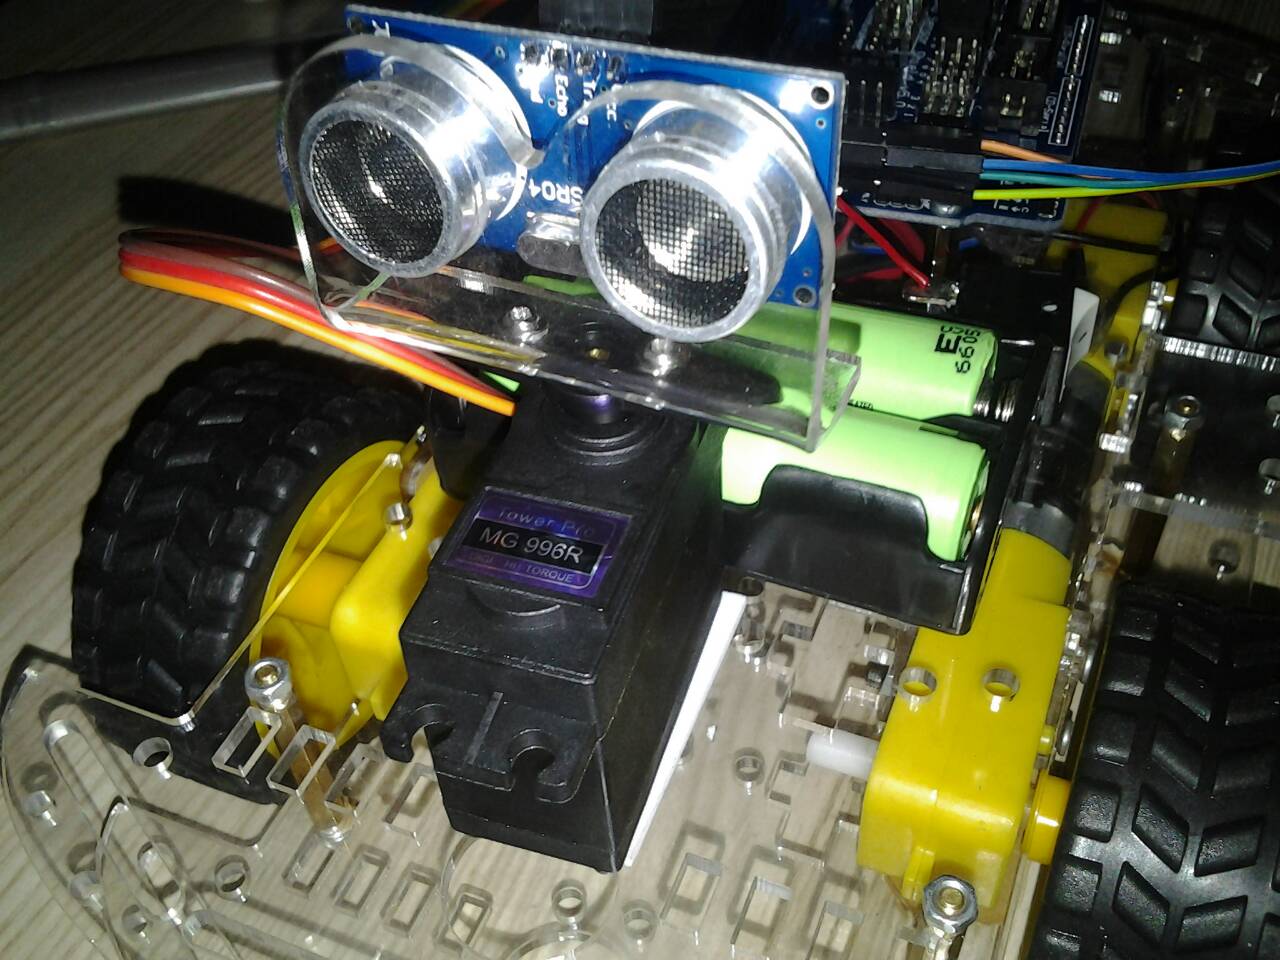
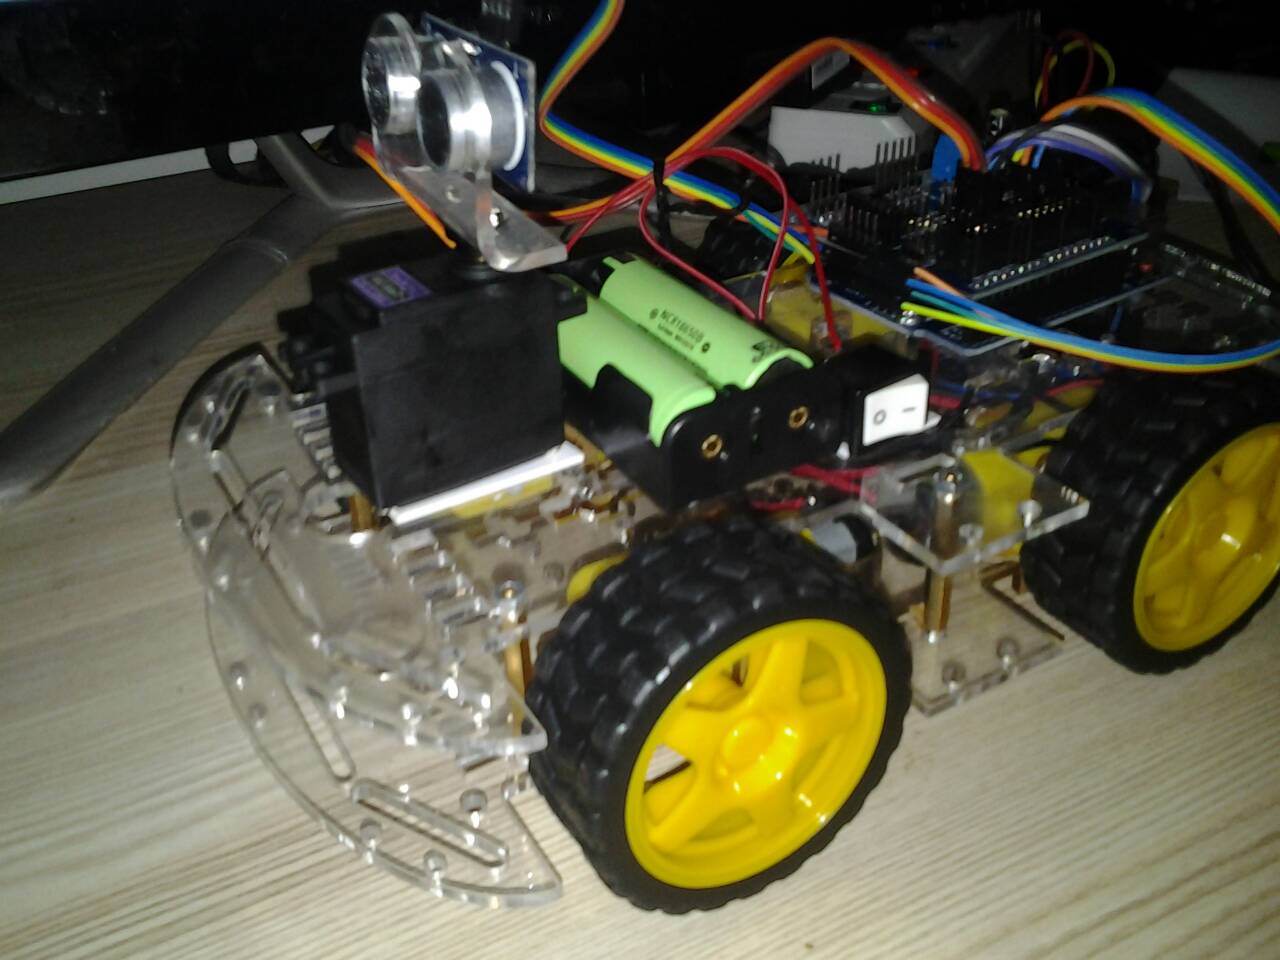
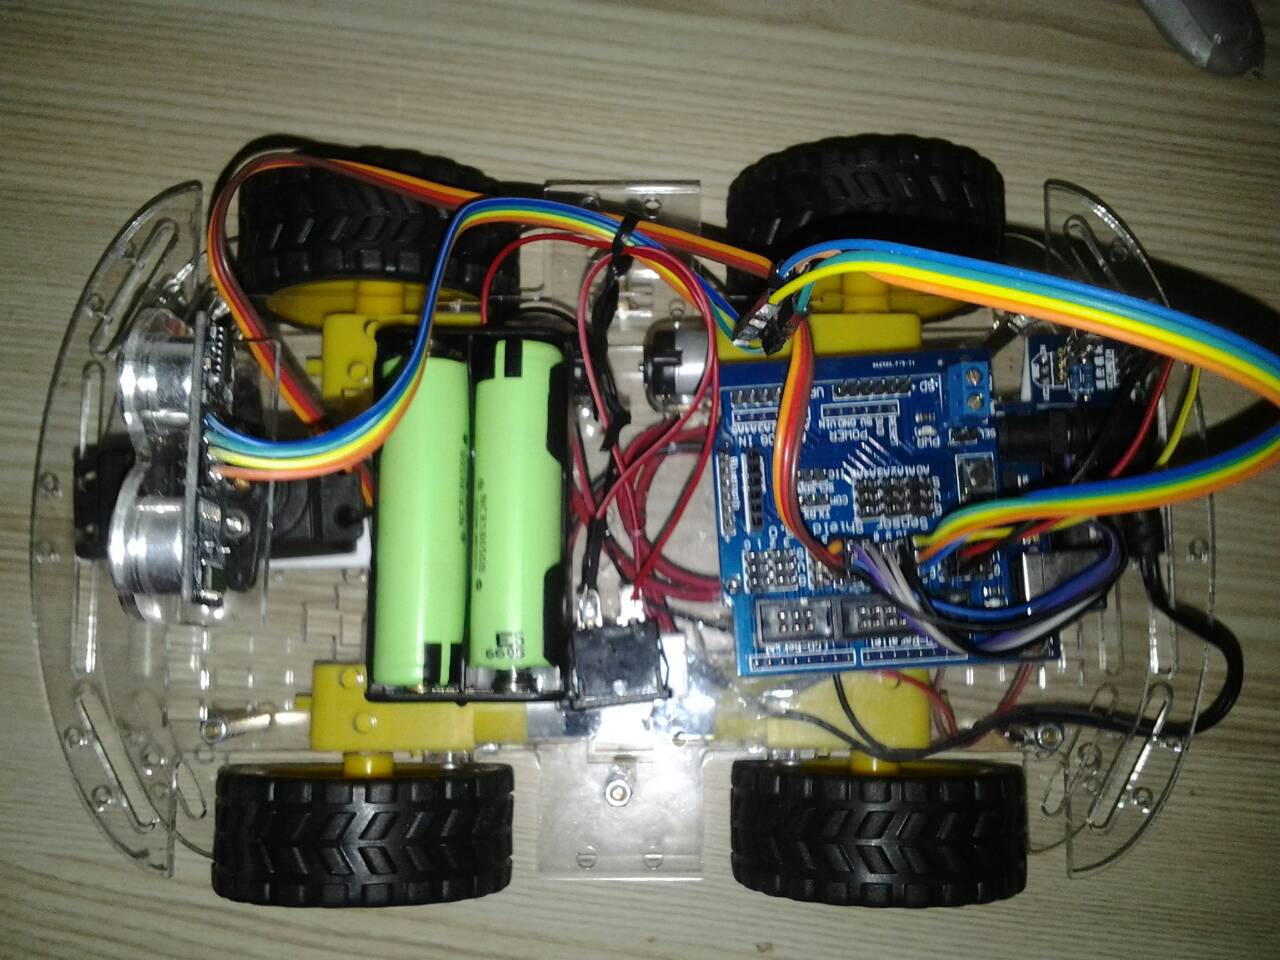
void watchsurrounding(){ //Meassures distances to the right, left, front, left diagonal, right diagonal and asign them in cm to the variables rightscanval,�
� � � � � � � � � � � � �//leftscanval, centerscanval, ldiagonalscanval and rdiagonalscanval (there are 5 points for distance testing)
� centerscanval = watch();
� if(centerscanval
� head.write(120);
� delay(100);
� ldiagonalscanval = watch();
� if(ldiagonalscanval
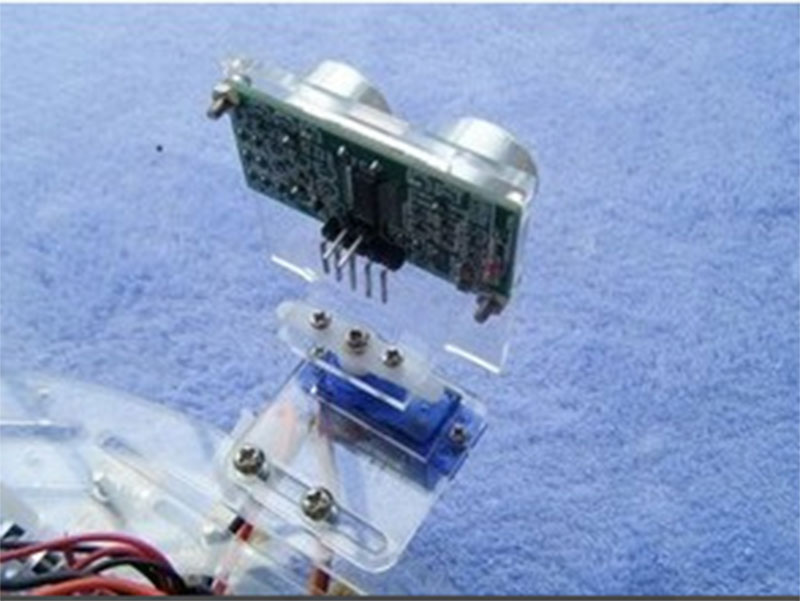
� head.write(160); //Didn't use 180 degrees because my servo is not able to take this angle
� delay(300);
� leftscanval = watch();
� if(leftscanval
� head.write(120);
� delay(100);
� ldiagonalscanval = watch();
� if(ldiagonalscanval
� head.write(80); //I used 80 degrees because its the central angle of my 160 degrees span (use 90 degrees if you are moving your servo through the whole 180 degrees)
� delay(100);
� centerscanval = watch();
� if(centerscanval
� head.write(40);
� delay(100);
� rdiagonalscanval = watch();
� if(rdiagonalscanval
� head.write(0);
� delay(100);
� rightscanval = watch();
� if(rightscanval
� head.write(80); //Finish looking around (look forward again)
� delay(300);
}
char decide(){
� watchsurrounding();
� if (leftscanval>rightscanval && leftscanval>centerscanval){
� � choice = 'l';
� }
� else if (rightscanval>leftscanval && rightscanval>centerscanval){
� � choice = 'r';
� }
� else{
� � choice = 'f';
� }
� return choice;
}
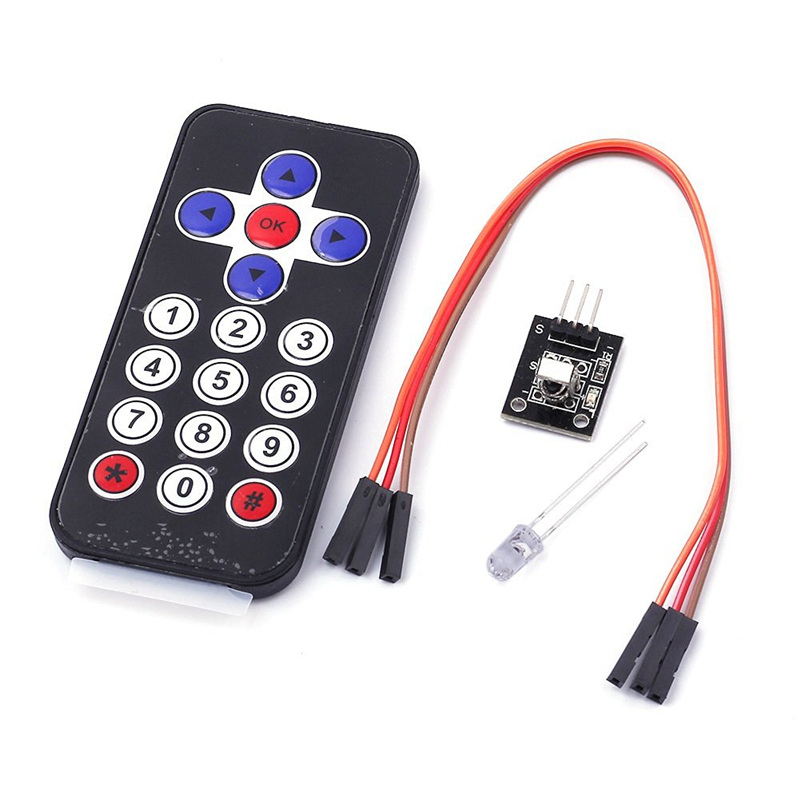
void translateIR() { //Used when robot is switched to operate in remote control mode
� switch(results.value)
� {
� case 0xFF629D: //Case 'FORWARD'
� � go();
� � break;
� case 0xFF22DD: //Case 'LEFT'
� � turnleft(turntime);�
� � stopmove(); �
� � break;
� case 0xFF02FD: //Case 'OK'
� � stopmove(); ��
� � break;
� case 0xFFC23D: //Case 'RIGHT'
� � turnright(turntime);
� � stopmove();�
� � break;
� case 0xFFA857: //Case 'REVERSE'
� � backwards();
� � break;
� case 0xFF42BD: �//Case '*'
� � modecontrol=0; stopmove(); // If an '*' is received, switch to automatic robot operating mode
� � break;
� default:�
� � ;
� }// End Case
� delay(500); // Do not get immediate repeat
}�
void loop(){
� if (irrecv.decode(&results)){ //Check if the remote control is sending a signal
� � if(results.value==0xFF6897){ //If an '1' is received, turn on robot
� � � power=1; }
� � if(results.value==0xFF4AB5){ //If a '0' is received, turn off robot
� � � stopmove();
� � � power=0; }
� � if(results.value==0xFF42BD){ //If an '*' is received, switch operating mode from automatic robot to remote control (press also "*" to return to automatic robot mode)
� � � modecontrol=1; // �Activate remote control operating mode
� � � stopmove(); //The robot stops and starts responding to the user's directions
� � }
� � irrecv.resume(); // receive the next value
� }
� while(modecontrol==1){ //The system gets into this loop during the remote control mode until modecontrol=0 (with '*')
� � if (irrecv.decode(&results)){ //If something is being received
� � � translateIR();//Do something depending on the signal received
� � � irrecv.resume(); // receive the next value
� � �}
� }
� if(power==1){
� go(); �// if nothing is wrong go forward using go() function above.
� ++numcycles;
� if(numcycles>130){ //Watch if something is around every 130 loops while moving forward�
� � watchsurrounding();
� � if(leftscanval
� � � turnright(turntime);
� � }
� � if(rightscanval
� � � turnleft(turntime);
� � }
� � numcycles=0; //Restart count of cycles
� }
� distance = watch(); // use the watch() function to see if anything is ahead (when the robot is just moving forward and not looking around it will test the distance in front)
� if (distance
� � � ++thereis;}
� if (distance>distancelimit){
� � � thereis=0;} //Count is restarted
� if (thereis > 25){
� � stopmove(); // Since something is ahead, stop moving.
� � turndirection = decide(); //Decide which direction to turn.
� � switch (turndirection){
� � � case 'l':
� � � � turnleft(turntime);
� � � � break;
� � � case 'r':
� � � � turnright(turntime);
� � � � break;
� � � case 'f':
� � � � ; //Do not turn if there was actually nothing ahead