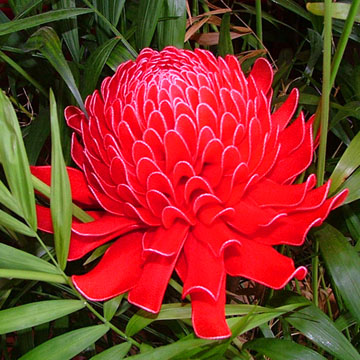
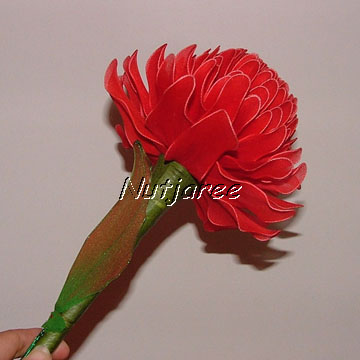
Red Torch Ginger : ดาหลา
วัสดุที่ต้องเตรียม : "Materials"
1) ลวดพันก้านสีขาวเบอร์ 28, 26 ,24 ทำกลีบดอก : "12" Plain wire; white No.28, 26 and 24"
2) ลวดเมทัลลิกสีเขียวเบอร์ 22 ทำกลีบเลี้ยง : "Metallic wire; green No.22 for making leaf"
3) ผ้าใยบัวสีแดง และสีแดงมัดย้อม (ดอกนี้ใช้เปลืองมาก ประมาณ 10 ชิ้นได้) : "Red stocking about 10 pieces"
4) ผ้าใยบัวสีเขียว 2 ชิ้น : "Green Stocking 2 pieces"
5) ก้านสำเร็จแข็งแบบอ้วน สั้นยาวตามใจปรารถนา : "10 Stems"
6) ฟลอร่าเทปสีเขียวเข้ม สีแดง "Floral Tape; green and red"
7) ด้ายเขียว ด้ายแดง : "Thread; green and red"
8) กาว ทิชชู่ : "Glue and Tissue paper"
9) คีมปากจิ้งจก กรรไกร : "Cutting tools"
10) ท่อพลาสติก : "Plastic ring"
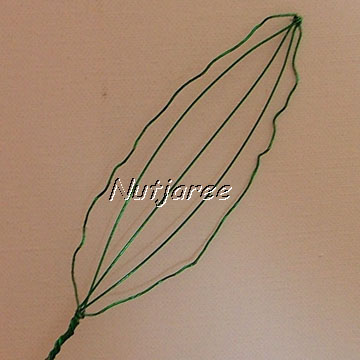
มาเตรียมกลีบเลี้ยงกัน : "Preparing leaf"
นำลวดเมทัลลลิกสีเขียวพันรอบท่อพลาสติกขนาด 6.5 ซม.
บีบปลายให้เรียว ดามกลางให้ได้ 3 เส้นดังรูป
"Take the green metallic wire to work with plsatic ring size 6.5 cm."
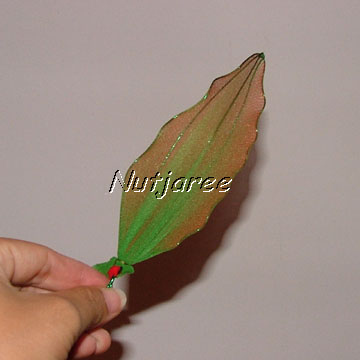
หุ้มด้วยผ้าสีแดง และหุ้มทุบด้วยสีเขียว เตรียมไว้ 4 กลีบต่อ 1 ดอก
"First cover the shaped wire with red stocking and then with green stocking; make 4 leaf for 1 one flower"
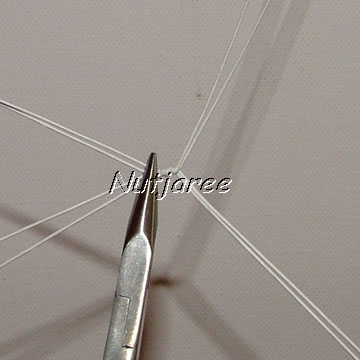
เตรียมแกนกลางดอก : "Preparing a middle of flower"
นำลวด 4 เส้น มาไขว้กัน แล้วบิดกึ่งกลางประมาณ 3 รอบ
"work with wire No.28, 4 wires, make a cross at the middle then turn them 3 times "
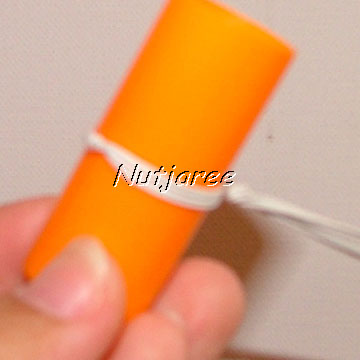
รวบปลายลวดที่บิดแล้ว พันรอบท่อพลาสติกขนาด 1.5 ซม. พยายามให้บริเวณที่บิดอยู่กึ่งกลาง
"Take it to curve around plastic ring 1.5 cm. size"
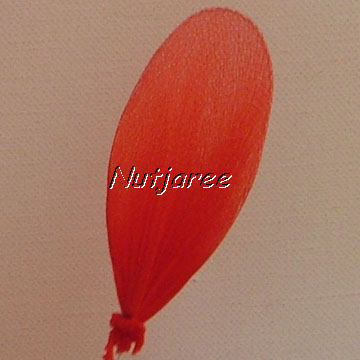
ถอดออกจากท่อพลาสติก แล้วบีบให้เป็นรูปดอกบัว
"Make it as Lotus shape "
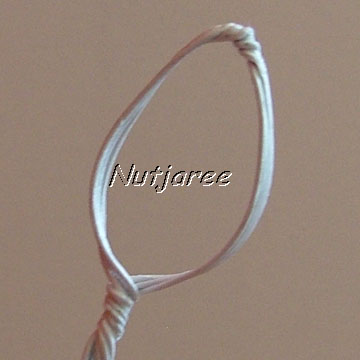
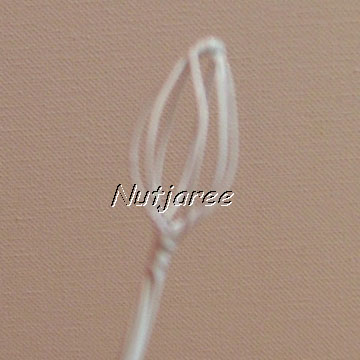
คลี่เส้นลวดที่บิดออกจากกัน จะได้ลวดมีลักษณะตูมเล็กๆ
"Make space of Lotus shape"
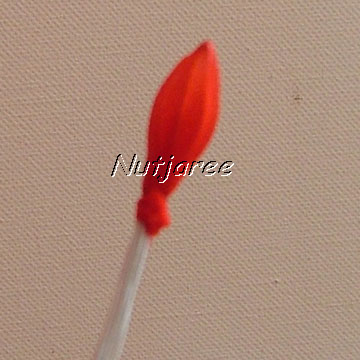
หุ้มด้วยผ้าสีแดง 2 ชั้น
"Cover 2 times with red stocking"
เตรียมกลีบดอก : "Preparing petals"
ชุดที่ 1 นำลวดเบอร์ 28 พันรอบท่อ พลาสติกขนาด 1.8 ซม. จำนวน 50 กลีบ
"Set 1 Work with wire No.28 and plastic ring 1.8 cm. size; make 50 pieces"
ชุดที่ 2 นำลวดเบอร์ 28 พันรอบท่อ พลาสติกขนาด 2.8 ซม. จำนวน 50 กลีบ
"Set 2 Work with wire No.28 and plastic ring 2.8 cm. size; make 50 pieces"
ชุดที่ 3 นำลวดเบอร์ 26 พันรอบท่อ พลาสติกขนาด 3.3 ซม. จำนวน 50 กลีบ
"Set 3 Work with wire No.26 and plastic ring 3.3 cm. size; make 50 pieces; for smaller flower you don't need this set of petals"
ชุดที่ 4 นำลวดเบอร์ 24 พันรอบท่อ พลาสติกขนาด 4.3 ซม. จำนวน 14 กลีบ
"Set 4 Work with wire No.24 and plastic ring 4.3 cm. size; make 14 pieces"
ชุดที่ 5 นำลวดเบอร์ 24 พันรอบท่อ พลาสติกขนาด 5 ซม. จำนวน 14 กลีบ
"Set 5 Work with wire No.24 and plastic ring 5 cm. size; make 14 pieces"
ชุดที่ 6 นำลวดเบอร์ 24 พันรอบท่อ พลาสติกขนาด 6 ซม. จำนวน 10 กลีบ
"Set 6 Work with wire No.24 and plastic ring 6 cm. size; make 10 pieces"
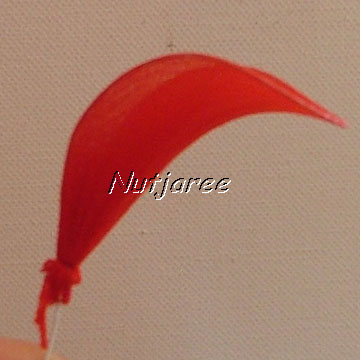
บีบกลีบให้เรียว(เรียวกว่าในรูปนะคะ อันนี้ถ่ายก่อนที่จะเข้าดอก กะขนาดไม่ถูก)กลีบชุดที่ 4 - 6 ก็ไม่ต้องบีบให้เรียวนะคะ
แล้วหุ้มด้วยผ้าสีแดง หุ้มทับด้วยสีแดงมัดย้อม สลับกันเพื่อให้ได้ดอกที่มีมิติ
"Shape the petals set 1 - 3; see on the picture"
ดัดกลีบชุดที่ 1 - 3 ให้โค้งๆ (ไม่ต้องโค้งขนาดนี้ค่ะ)
ส่วนกลีบชุดที่ 4 - 6 ไม่ต้องไปดูดำดูดีกะมันค่ะ ปล่อยมันไว้อย่างนั้นแหละ...
"Shape the petals set 1 - 3; see on the picture again"
มาเริ่มเข้าดอก (รูปไม่ค่อยชัด) : "Start to make a flower"
มัดกลีบชุดที่ 1 รอบๆแกนกลางทีละกลีบ มัดติดให้ชิดๆกันเลยค่ะ
"Work with petal set 1; tie around the middle of the flower that we prepared"
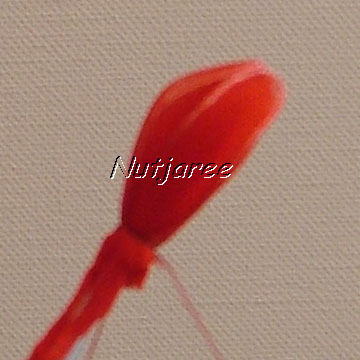
เมื่อครบรอบ แล้วก็เริ่ม มัดรอบใหม่ โดยให้ปลายกลีบซ้อนกัน ให้เห็นปลายกลีบรอบที่แล้วโผล่นิดเดียว
ติดให้ครบทุกกลีบ โดยไม่ต้องสับหว่าง คือมัดติดแบบไม่มีช่องว่างเลยค่ะ
"Start the next round again and again till finish (petals set 1)"
ติดกลีบชุดต่อไป ให้ครบ พยายามอย่าเพิ่งให้กลีบดอกมีลักษณะต่ำลงมาก
"Work with petals set 2, do the same as above"
และก่อนจะติดกลีบชั้นต่อไป หากสังเกตว่า กลีบทำท่าจะมัดไม่อยู่ ก็ให้ใช้ทิชชู่พันเสริมก้าน
แล้วพันด้วยฟลอร่าเทปสีแดง ก่อนจะมัดกลีบชั้นต่อไป
"For stateble, please glue tissue paper around stem, let it dried and tie with red floral tape before start the next round, "
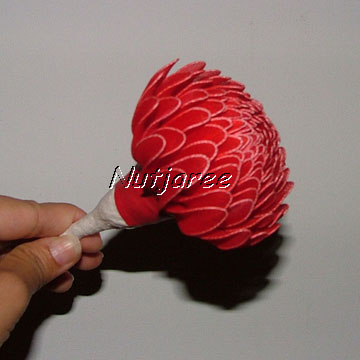
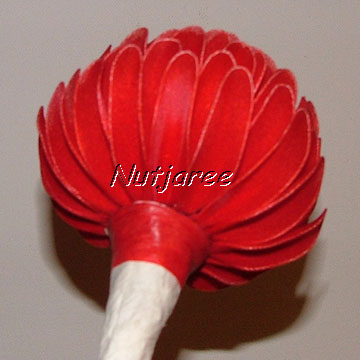
มัดกลีบชุดที่ 3 โดยเริ่มมัดกลีบให้ต่ำลง ให้มีลักษณะกลมๆ
"Work with petal set 3 and try to shape it like a circle"
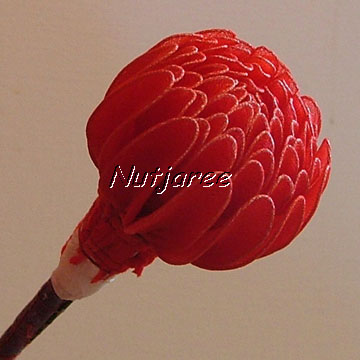
ติดกลีบชุดที่ 4 - 6 โดยติดสับหว่างกัน เมื่อติดครบแล้ว ดึงกลีบลง ดังรูป หลังจากนั้นดัดกลีบให้พลิ้วทีละกลีบ
"Work with petals set 4 - 6, but the petal in the next round at the middle; between two petal in the last round"
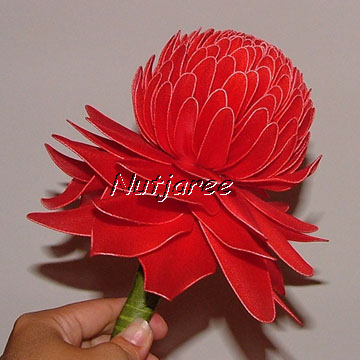
พันก้านด้วยฟลอร่าเทปสีเขียวเข้มประมาณ 15 ซม.
"Tie stem with green floral tape 15 cm, length"
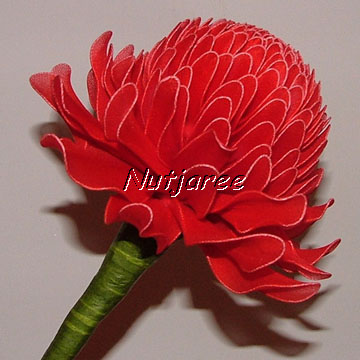
ติดกลีบเลี้ยง
"Tie the leaf"
ติดกลีบเลี้ยงให้ครบ โดยติดกลีบคู่ ทั้งหมด 2 คู่ เสร็จแล้วพันก้านให้เรียบร้อย..
"Make 2 pairs of leaf"
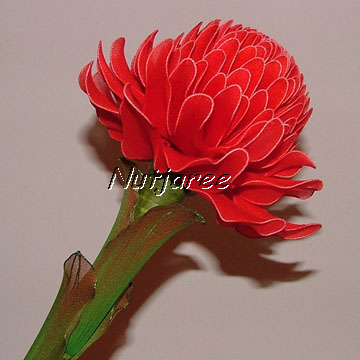
แค่นี้เราก็จะได้ดาหลาดอกโต ไว้ปักแจกันประดับบ้านแล้วค่ะ
ขนาดดอกสำเร็จนี้มีขนาดประมาณ 5 * 7 นิ้วค่ะ
หากใครต้องการให้ดอกเล็กกว่านี้ ก็ลดจำนวนกลีบลองก็ได้ค่ะ
กลีบชุดที่ 3 ไม่ต้องใช้ ก็จะได้ดอกกำลังพอเหมาะ
ส่วนก้าน ก็เสริมก้านให้ใหญ่ขึ้น ให้สมดุลกับขนาดของดอก
ท้ายนี้ก็ขอให้ทุกท่านทำดอกไม้อย่างมีความสุขนะคะ
"Ready, well done!!! You will have Red Torch Ginger in 5 x 7 inch size
For making Red Torch Ginger, you can make it smaller or less than leaf as you like.
Enjoy with creating your own flower"

| Create Date : 20 ธันวาคม 2551 |
| Last Update : 15 มกราคม 2552 22:22:51 น. |
|
0 comments
|
| Counter : 1442 Pageviews. |
 |
|


 ฝากข้อความหลังไมค์
 ผู้ติดตามบล็อก : 11 คน [
