1 2 3 4 5 6 7 8 9 10 11 12 13 14 15 16 17 18 19 20 21 22 23 24 25 26 27 28 29 30
������ҧ ���¹���ź��觡մ��ҧ Arduino ������� 1
���¹���ź��觡մ��ҧ ������� 1 ��觷ӧҹ�¡���������仴�ҹ˹�� �����ૹ���� Ultrasonic ����觡մ��ҧ ���ա�������������ѧ�����������ź价ҧ�������¹���ź��觡մ��ҧ� �ػ�ó����ͧ�����4WD Smart Robot Car Chassis Kits Arduino UNO R3 - Made in italy Arduino Sensor Shield V5.0 ૹ���� Ultrasonic Module HC-SR04 Mounting Bracket for HC-SR04 Ultrasonic Module Ẻ��� Motor Drive Module L298N ��� Jumper�Female to Male ��� 20cm. ��� Jumper�Female to Female ��� 20cm. �ҧ��ҹẺ 18650 ����ҹ 2 �� ẵ����������� 18650 �ӹǹ 2 �� ����ͧ�蹾իպ�����Ẻ������� 6 mm 12 ��� ʡ����ǡ����͵������� ��Ҵ 3�� ���12��. 10 ��� ���������Ե������Ѻ�Դ�Դ (ON / OFF Rocker Switch)
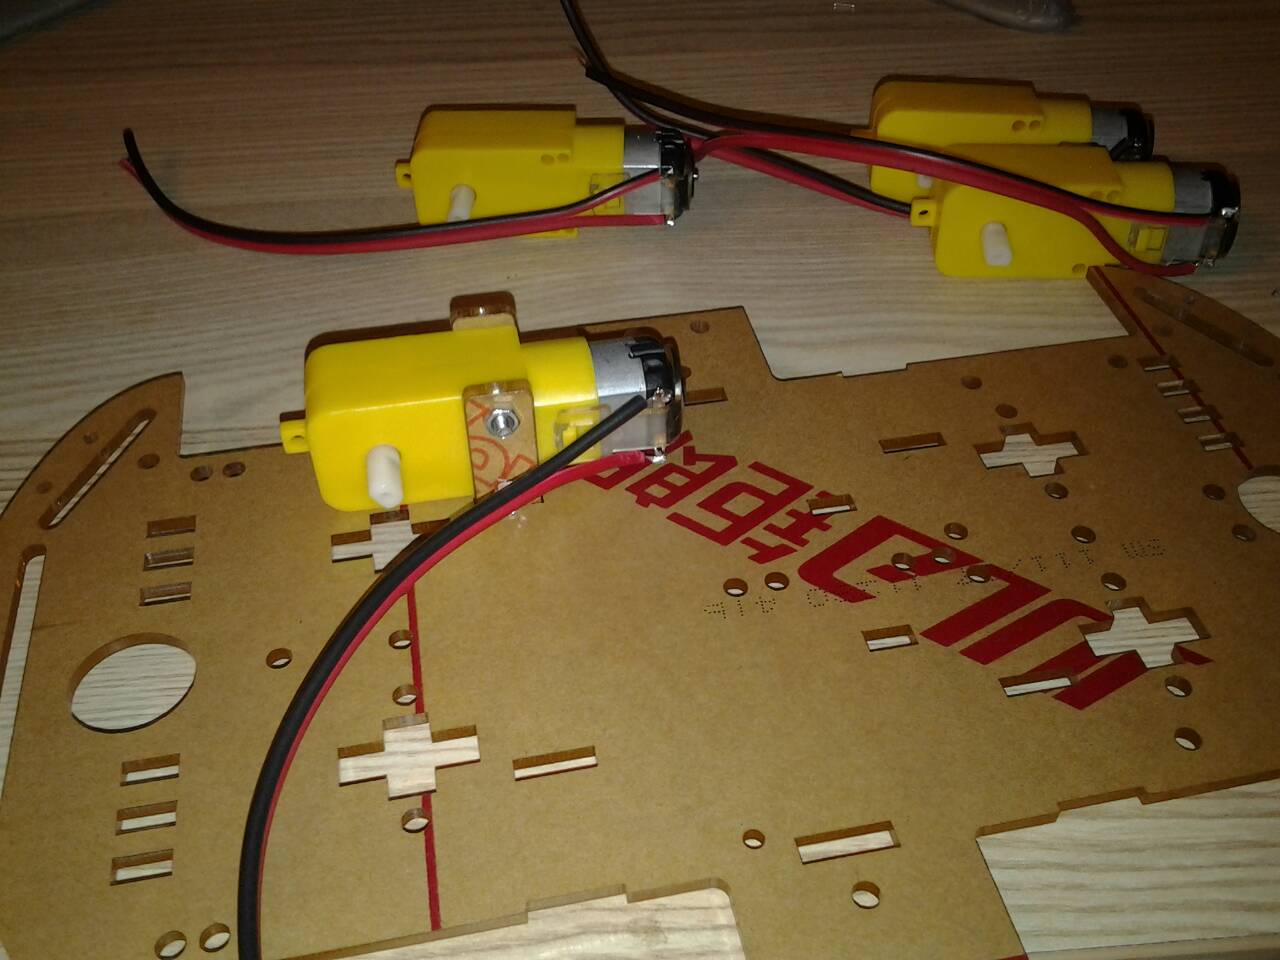
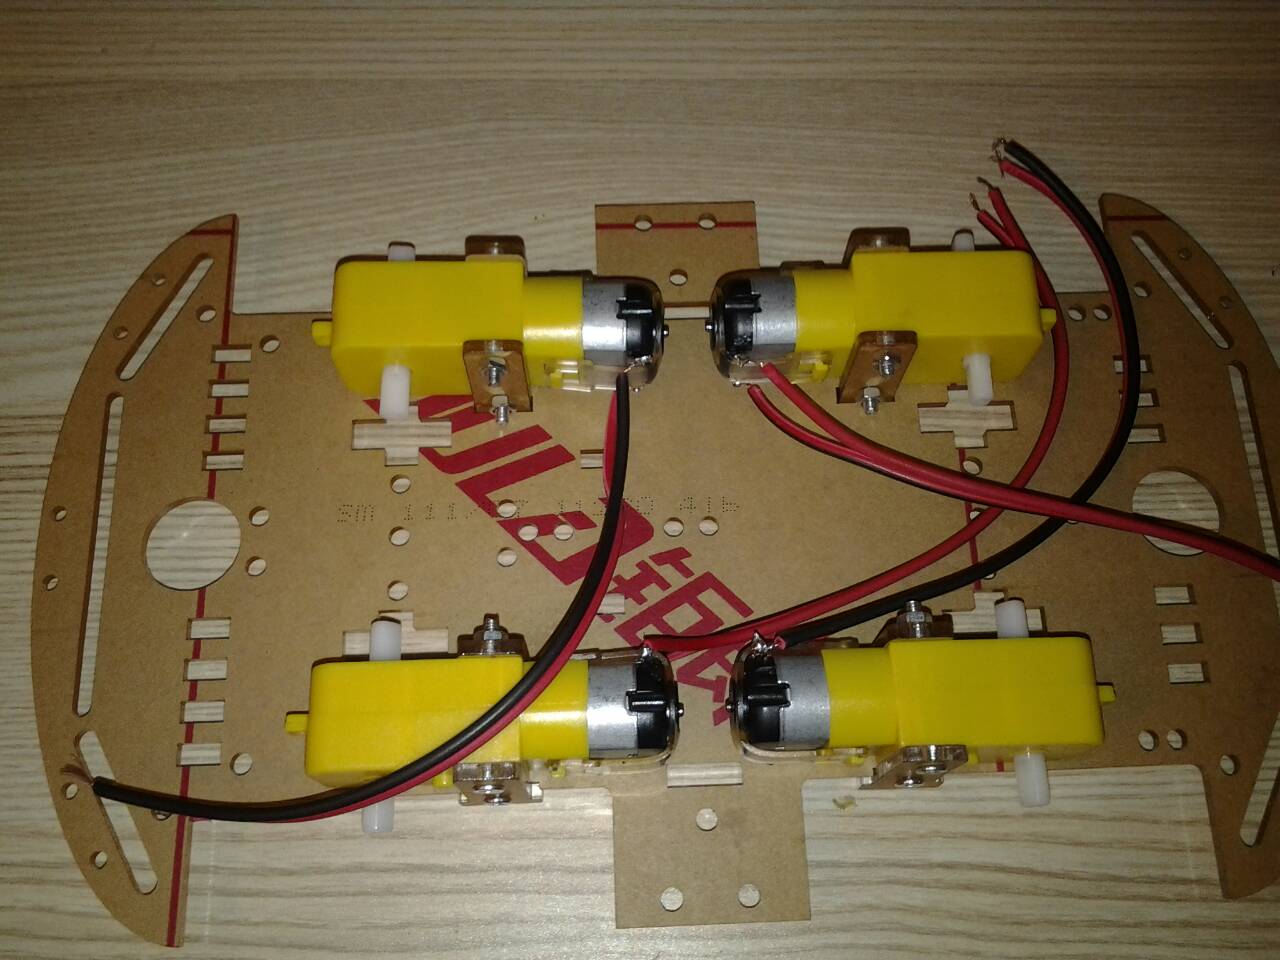
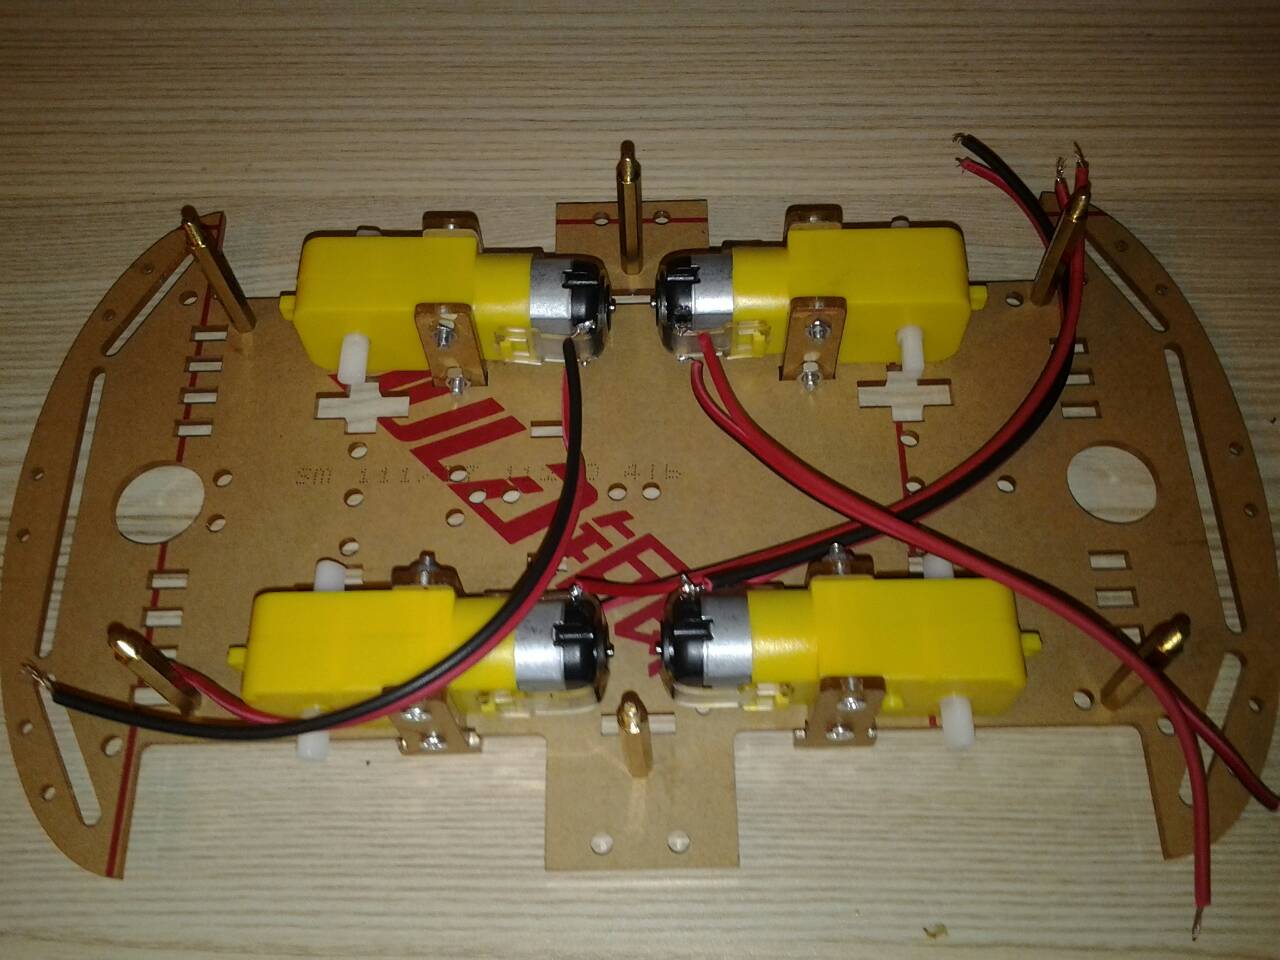
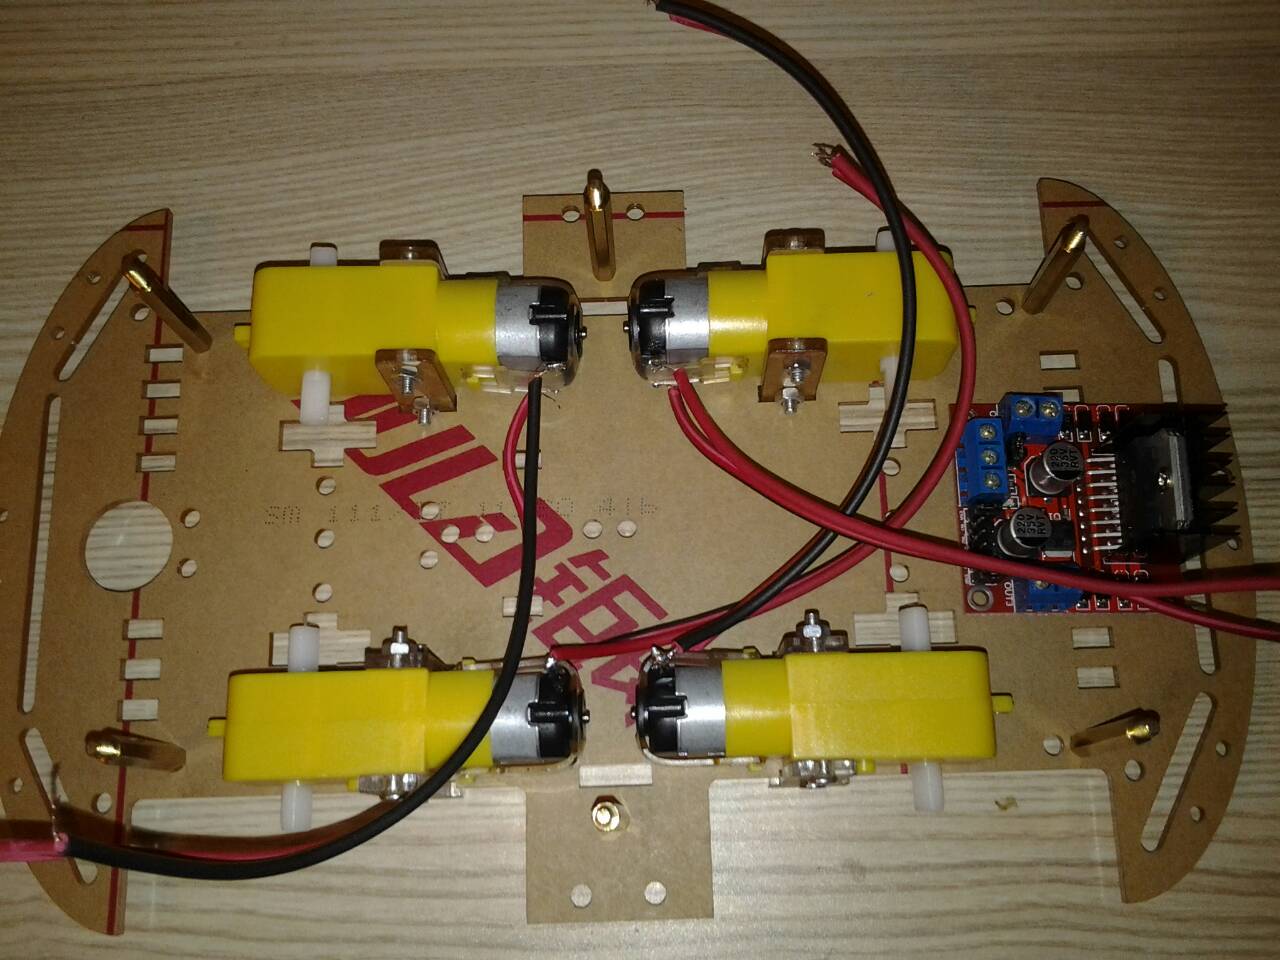
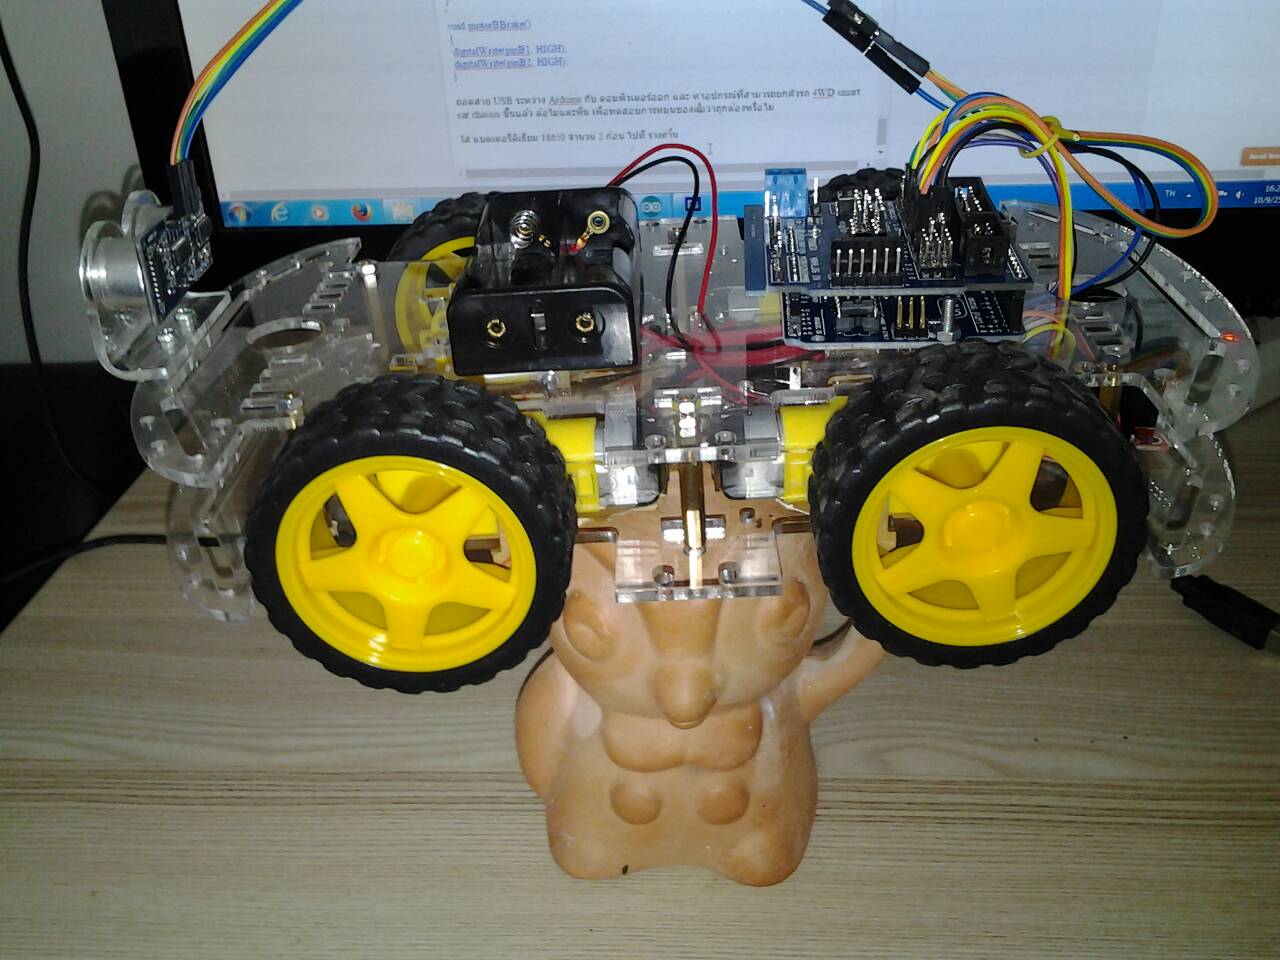
��Сͺ��ҡѺ �ç ��鹷�� 1 �ͧ 4WD smart car chassis �ѧ�ٻ
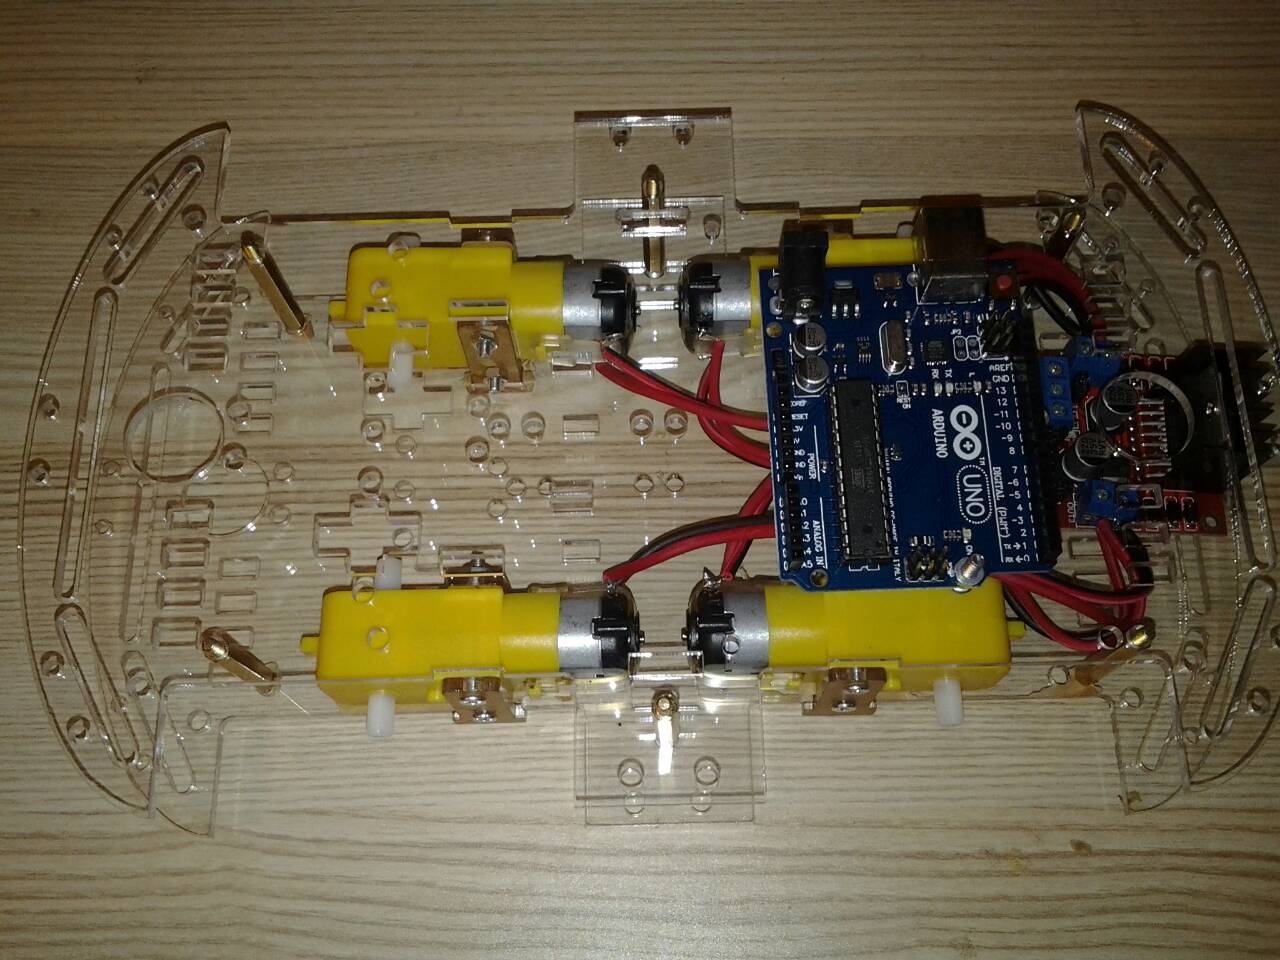
��Сͺ ���� Arduino Sensor Shield V5.0 ŧ��� ���� Arduino UNO R3
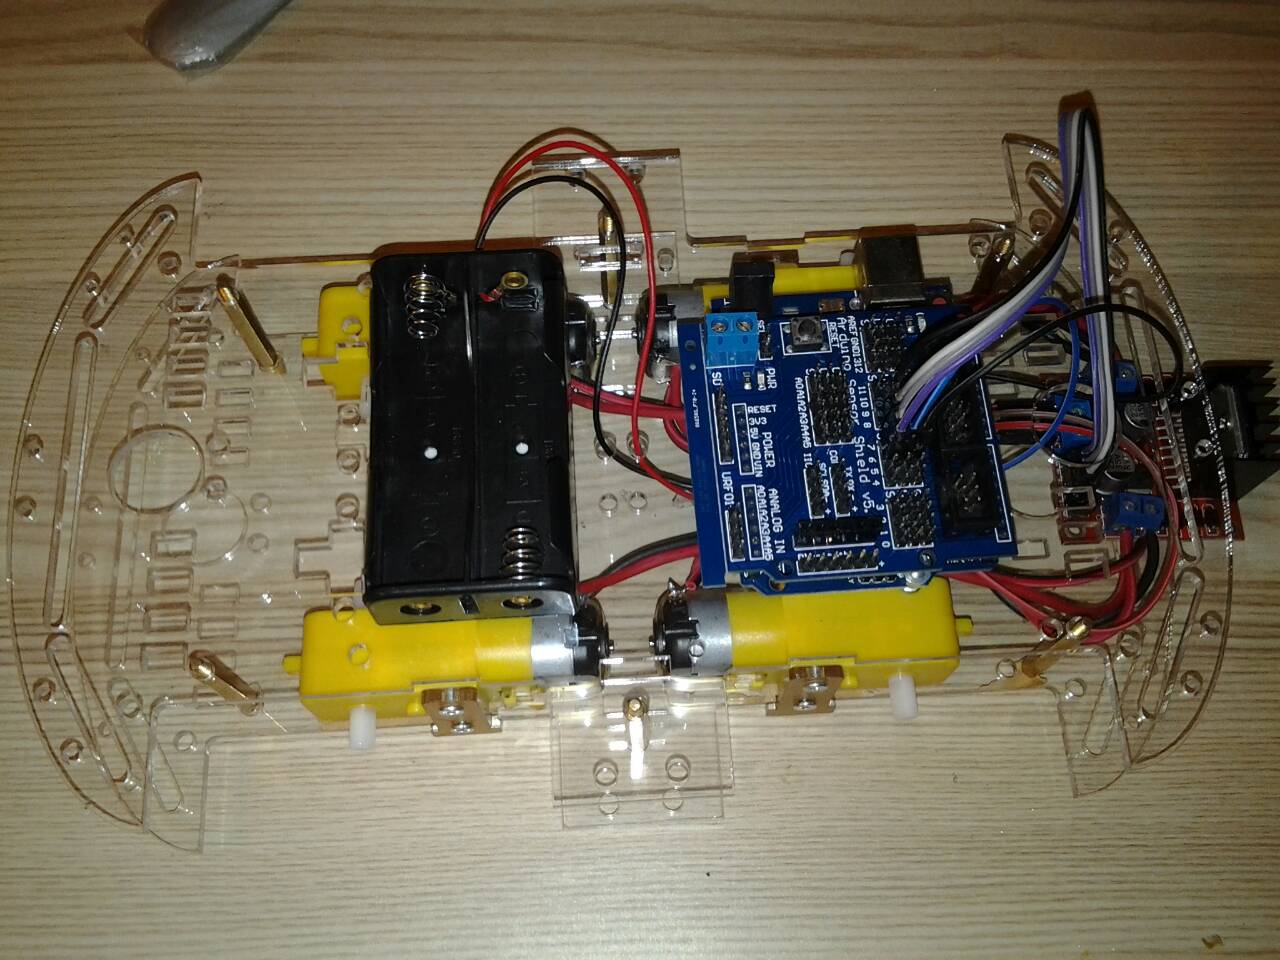
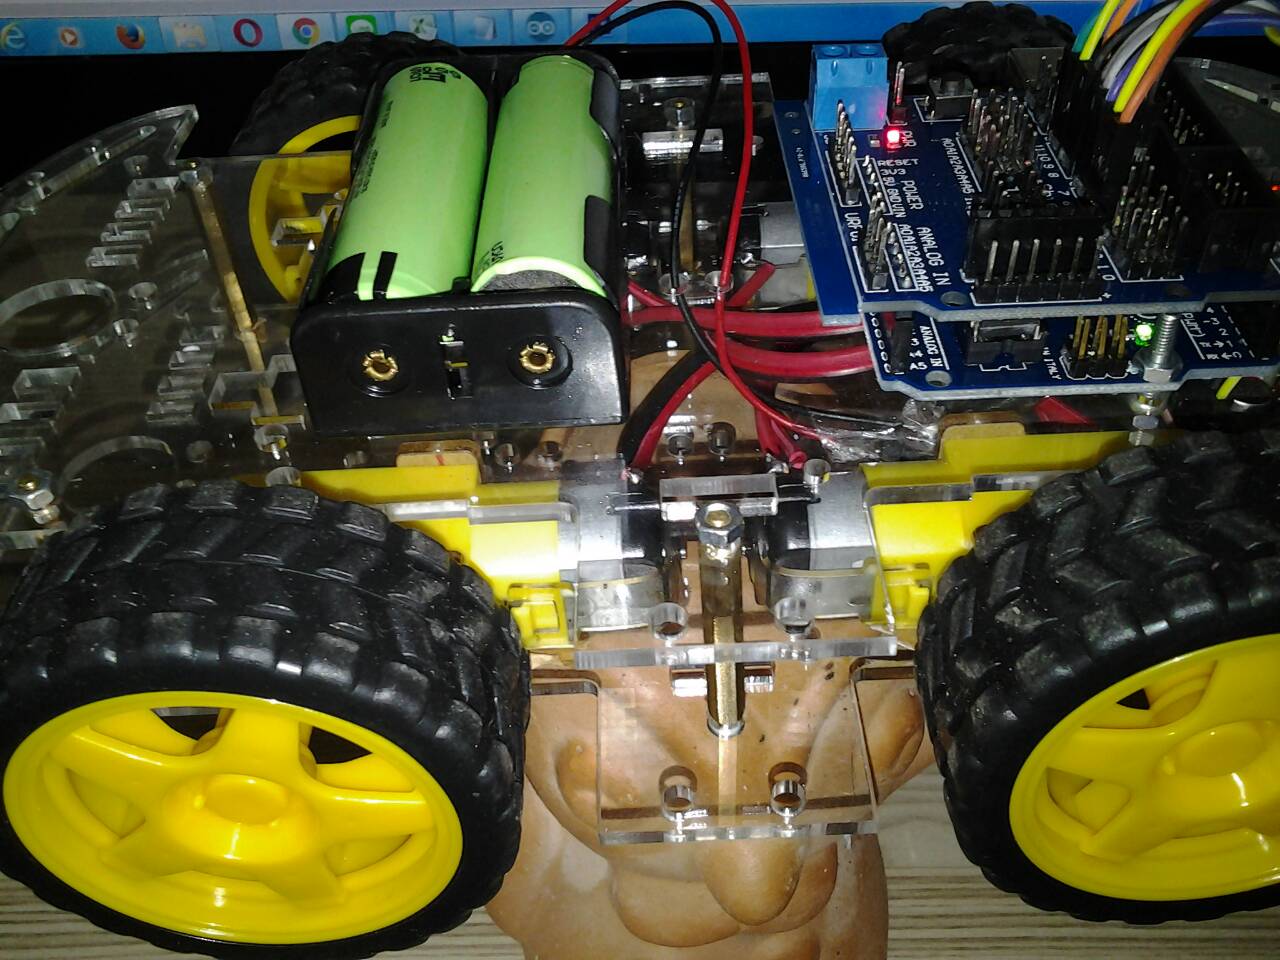
��Сͺ �ҧ��ҹẺ 18650 ��� �������� ǧ�õ���ٻ
�����˵� : ����� Jumper ������� ENA ��� ENB �ͧ ���� L298N ����ʹ�͡
����������������ҧ ���� Arduino Sensor Shield V5.0 �Ѻ����� L298N��
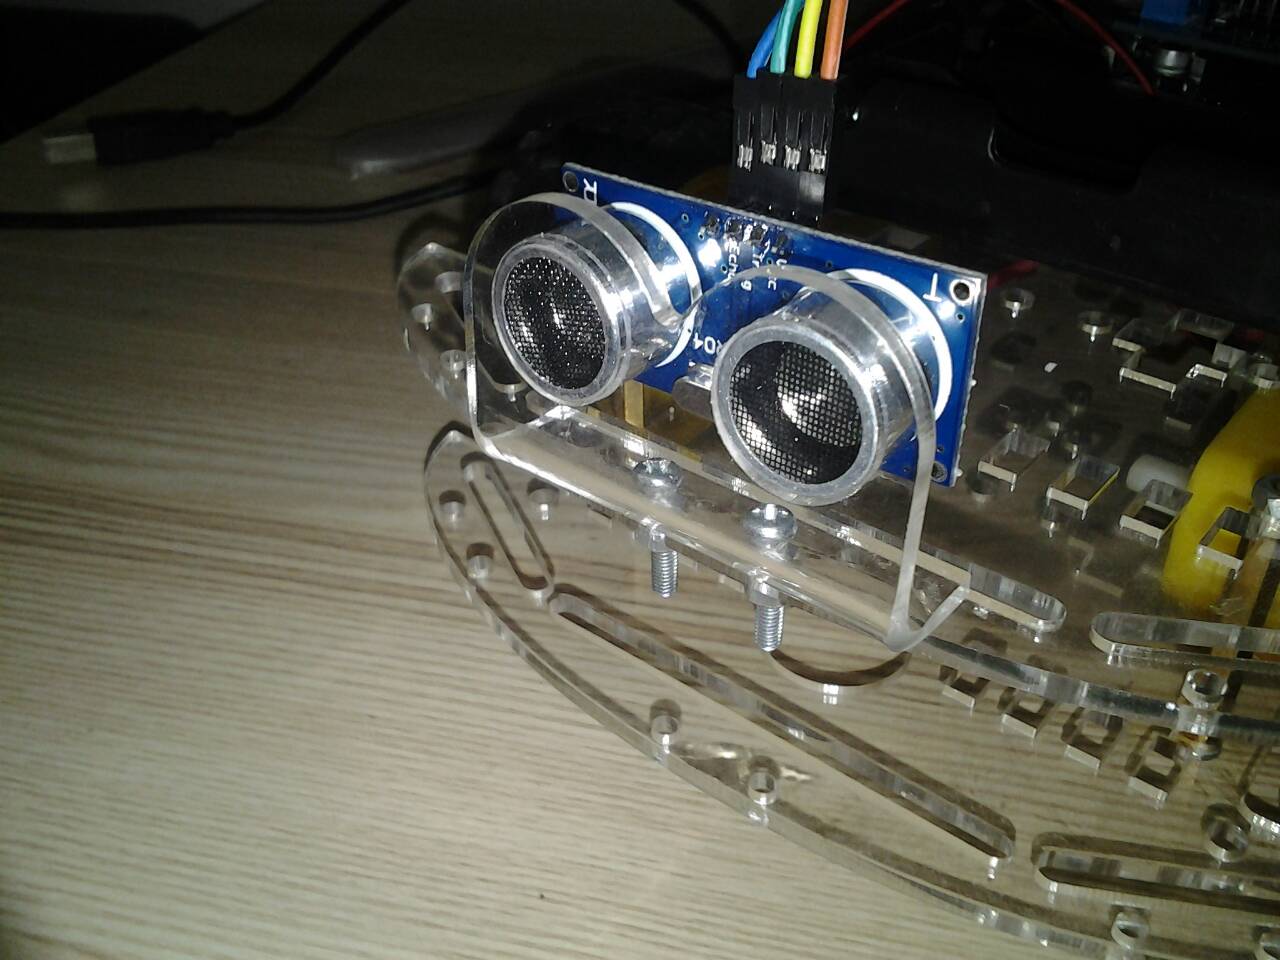
.�������� ������ HC-SR04 �Ѻ Sensor Shield V5.0 �ѧ�ٻ
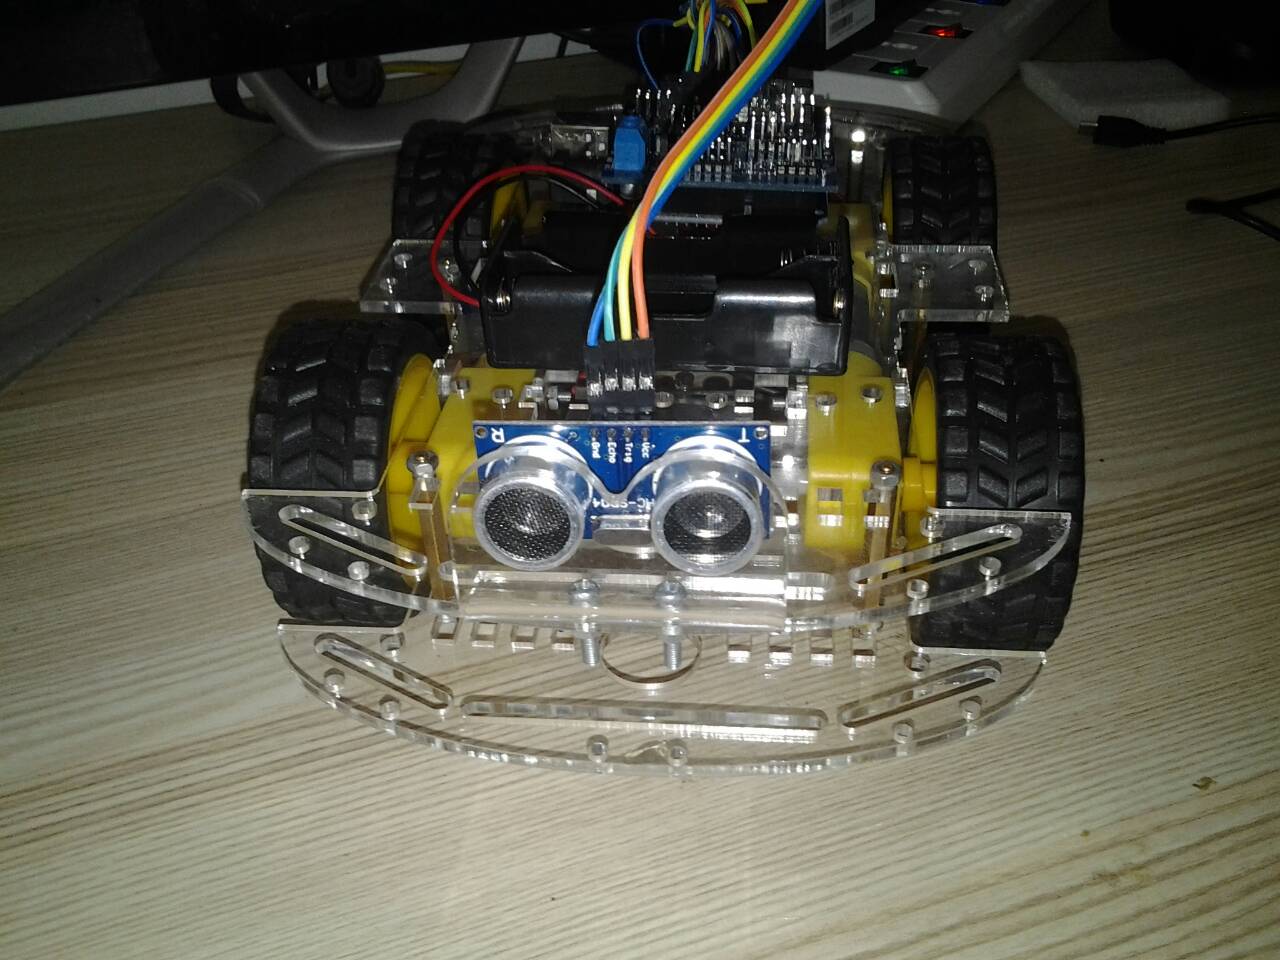
��Сͺ�HC-SR04� ��ҡѺ�Mounting Bracket for HC-SR04 Ultrasonic Module Ẻ��� ��� ��Сͺ�Bracket ���ҡ�Ѻ �çö2 ����ٻ
��з��ͺ�������������Ҷ١��ͧ������� �ػ�ó���ҹ��������� ���������ҧ �ԧ���ҹ��ҧ
//robotsiam.blogspot.com/2016/09/hc-sr04-sensor-shield-v50.html ��ѧ�ҡ�����鷴�ͺ���ͧ�� ��ҡ����ع�ͧ��Ͷ١��ͧ������� ��
�Դ����� Arduino (IDE) ��� Upload �鴹�� ��ѧ ���� Arduino UNO R3
// Motor A pins (enableA = enable motor, pinA1 = forward, pinA2 = backward) int enableA = 3; int pinA1 = 6; int pinA2 = 7; //Motor B pins (enabledB = enable motor, pinB2 = forward, pinB2 = backward) int enableB = 5; int pinB1 = 8; int pinB2 = 9; //This lets you run the loop a single time for testing boolean run = true; void setup() { �pinMode(enableA, OUTPUT); �pinMode(pinA1, OUTPUT); �pinMode(pinA2, OUTPUT); �pinMode(enableB, OUTPUT); �pinMode(pinB1, OUTPUT); �pinMode(pinB2, OUTPUT); } void loop() { � if (run) { � � delay(2000); � � enableMotors(); � � //Go forward � � forward(200); � � //Go backward � � backward(200); � � //Turn left � � turnLeft(400); � � coast(200); � � //Turn right � � turnRight(400); � � coast(200); � � //This stops the loop � � run = false;� � } } //Define high-level H-bridge commands void enableMotors() { �motorAOn(); �motorBOn(); } void disableMotors() { �motorAOff(); �motorBOff(); } void forward(int time) { �motorAForward(); �motorBForward(); �delay(time); } void backward(int time) { �motorABackward(); �motorBBackward(); �delay(time); } void turnLeft(int time) { �motorABackward(); �motorBForward(); �delay(time); } void turnRight(int time) { �motorAForward(); �motorBBackward(); �delay(time); } void coast(int time) { �motorACoast(); �motorBCoast(); �delay(time); } void brake(int time) { �motorABrake(); �motorBBrake(); �delay(time); } //Define low-level H-bridge commands //enable motors void motorAOn() { �digitalWrite(enableA, HIGH); } void motorBOn() { �digitalWrite(enableB, HIGH); } �//disable motors void motorAOff() { �digitalWrite(enableB, LOW); } void motorBOff() { �digitalWrite(enableA, LOW); } �//motor A controls void motorAForward() { �digitalWrite(pinA1, HIGH); �digitalWrite(pinA2, LOW); } void motorABackward() { �digitalWrite(pinA1, LOW); �digitalWrite(pinA2, HIGH); } //motor B controls void motorBForward() { �digitalWrite(pinB1, HIGH); �digitalWrite(pinB2, LOW); } void motorBBackward() { �digitalWrite(pinB1, LOW); �digitalWrite(pinB2, HIGH); } //coasting and braking void motorACoast() { �digitalWrite(pinA1, LOW); �digitalWrite(pinA2, LOW); } void motorABrake() { �digitalWrite(pinA1, HIGH); �digitalWrite(pinA2, HIGH); } void motorBCoast() { �digitalWrite(pinB1, LOW); �digitalWrite(pinB2, LOW); } void motorBBrake() { �digitalWrite(pinB1, HIGH); �digitalWrite(pinB2, HIGH); } �ʹ��� USB �����ҧ Arduino �Ѻ �����������͡ ��� ���ػ�ó�������ö¡���ö�4WD smart car chassis ������� �������о�� ��ͷ��ͺ�����ع�ͧ�����Ҷ١��ͧ�������
��� ẵ����������� 18650 �ӹǹ 2 �� 价�� �ҧ��ҹ ��� ��Ǩ�ͺ���Ǣͧẵ����� ���ء��ͧ�������
��������зӧҹ��§ 1 ���� ��ҵ�ͧ��÷��ͧ�������ʹ ẵ������͡ (���� �Դ�Դ ��Է�������) ��������������� ����������ع ��Ǩ�ͺ�����ع ����͵�ҧ�١��ͧ������� ��ҵ��ǧ�ö١��ͧ ��� ����ͧ��ҧ����ع仢�ҧ˹�� 1���� ��Ѻ��ѧ 1 ���� ��� �Թ˹���ա˹�觤������Ǩ֧��ش ������١��ͧ������ �蹡�õ�͢��Ǣͧ������Դ �繵�
��ҷء���ҧ�١��ͧ ���ͧ ¡ŧ�ҧ��������Ƿ��ͺ �ա���� �ʹ ẵ������͡ (���� �Դ�Դ ��Է�������) ��������������� ��ҷء���ҧ�١��ͧ ö������仢�ҧ˹��-�����ѧ ���� �����ǫ��� ���� �֧��Ѻ�����˹����
�ҡ��鹷��ͺ
���¹���ź��觡մ��ҧ ��� �Upload �鴹�� ��ѧ ���� Arduino UNO R3
#include //Tell the Arduino where the sensor is hooked up NewPing sonar(10, 11); int enableA = 3; int pinA1 = 6; int pinA2 = 7; int enableB = 5; int pinB1 = 8; int pinB2 = 9; long inches; void setup() { pinMode(enableA, OUTPUT); pinMode(pinA1, OUTPUT); pinMode(pinA2, OUTPUT); pinMode(enableB, OUTPUT); pinMode(pinB1, OUTPUT); pinMode(pinB2, OUTPUT); } void loop() { //Run the motors at slightly less than full power analogWrite(enableA, 200); analogWrite(enableB, 200); //Ping the sensor and determine the distance in inches inches = sonar.ping_in(); //If the robot detects an obstacle less than four inches away, it will back up, then turn left; if no obstacle is detected, it will go forward if (inches < 4) { analogWrite(enableA, 255); analogWrite(enableB, 255); backward(600); coast(200); turnLeft(600); coast(200);} else { forward(1); } } //Define high-level H-bridge commands void enableMotors() { motorAOn(); motorBOn(); } void disableMotors() { motorAOff(); motorBOff(); } void forward(int time) { motorAForward(); motorBForward(); delay(time); } void backward(int time) { motorABackward(); motorBBackward(); delay(time); } void turnLeft(int time) { motorABackward(); motorBForward(); delay(time); } void turnRight(int time) { motorAForward(); motorBBackward(); delay(time); } void coast(int time) { motorACoast(); motorBCoast(); delay(time); } void brake(int time) { motorABrake(); motorBBrake(); delay(time); } //Define low-level H-bridge commands //enable motors void motorAOn() { digitalWrite(enableA, HIGH); } void motorBOn() { digitalWrite(enableB, HIGH); } //disable motors void motorAOff() { digitalWrite(enableB, LOW); } void motorBOff() { digitalWrite(enableA, LOW); } //motor A controls void motorAForward() { digitalWrite(pinA1, HIGH); digitalWrite(pinA2, LOW); } void motorABackward() { digitalWrite(pinA1, LOW); digitalWrite(pinA2, HIGH); } //motor B controls void motorBForward() { digitalWrite(pinB1, HIGH); digitalWrite(pinB2, LOW); } void motorBBackward() { digitalWrite(pinB1, LOW); digitalWrite(pinB2, HIGH); } //coasting and braking void motorACoast() { digitalWrite(pinA1, LOW); digitalWrite(pinA2, LOW); } void motorABrake() { digitalWrite(pinA1, HIGH); digitalWrite(pinA2, HIGH); } void motorBCoast() { digitalWrite(pinB1, LOW); digitalWrite(pinB2, LOW); } void motorBBrake() { digitalWrite(pinB1, HIGH); digitalWrite(pinB2, HIGH); }
���ͧ ¡ŧ�ҧ��������� ����觡մ��ҧ����ͺ �ա���� �ҡö�С����� "���¹���ź��觡մ��ҧ" �ӧҹ��վ�����ä�Ѻ
VIDEO
Create Date : 06 ��Ȩԡ�¹ 2559
Last Update : 6 ��Ȩԡ�¹ 2559 11:04:26 �.
0 comments
Counter : 1956 Pageviews.